This post may contain affiliate sales links. Please see our full disclosure policy for details.
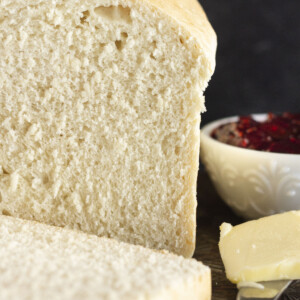
This homemade bread recipe is perfect for beginners because it eliminates the lengthy second rise without compromising on flavor or texture, just like my one rise cinnamon rolls. By using rapid-rise yeast and straightforward techniques, the dough comes together quickly. It also allowed my culinary students to create bakery-quality bread in one class period.

Table of Contents
At home, this recipe became a staple for my family of six. With a house full of hungry kids, having a reliable and quick bread recipe made all the difference. Whether I used it for school lunches, an impromptu snack, or as a side with dinner, this bread is versatile and made with love—just the way homemade bread should be.
Whether you are inexperienced or short on time, baking bread from scratch can feel intimidating. I wanted to change that, which is how this quick one-rise yeast bread recipe came to life. Now you have a simple, foolproof way to bake fresh bread in about an hour, from start to finish.
Recipe Ingredients
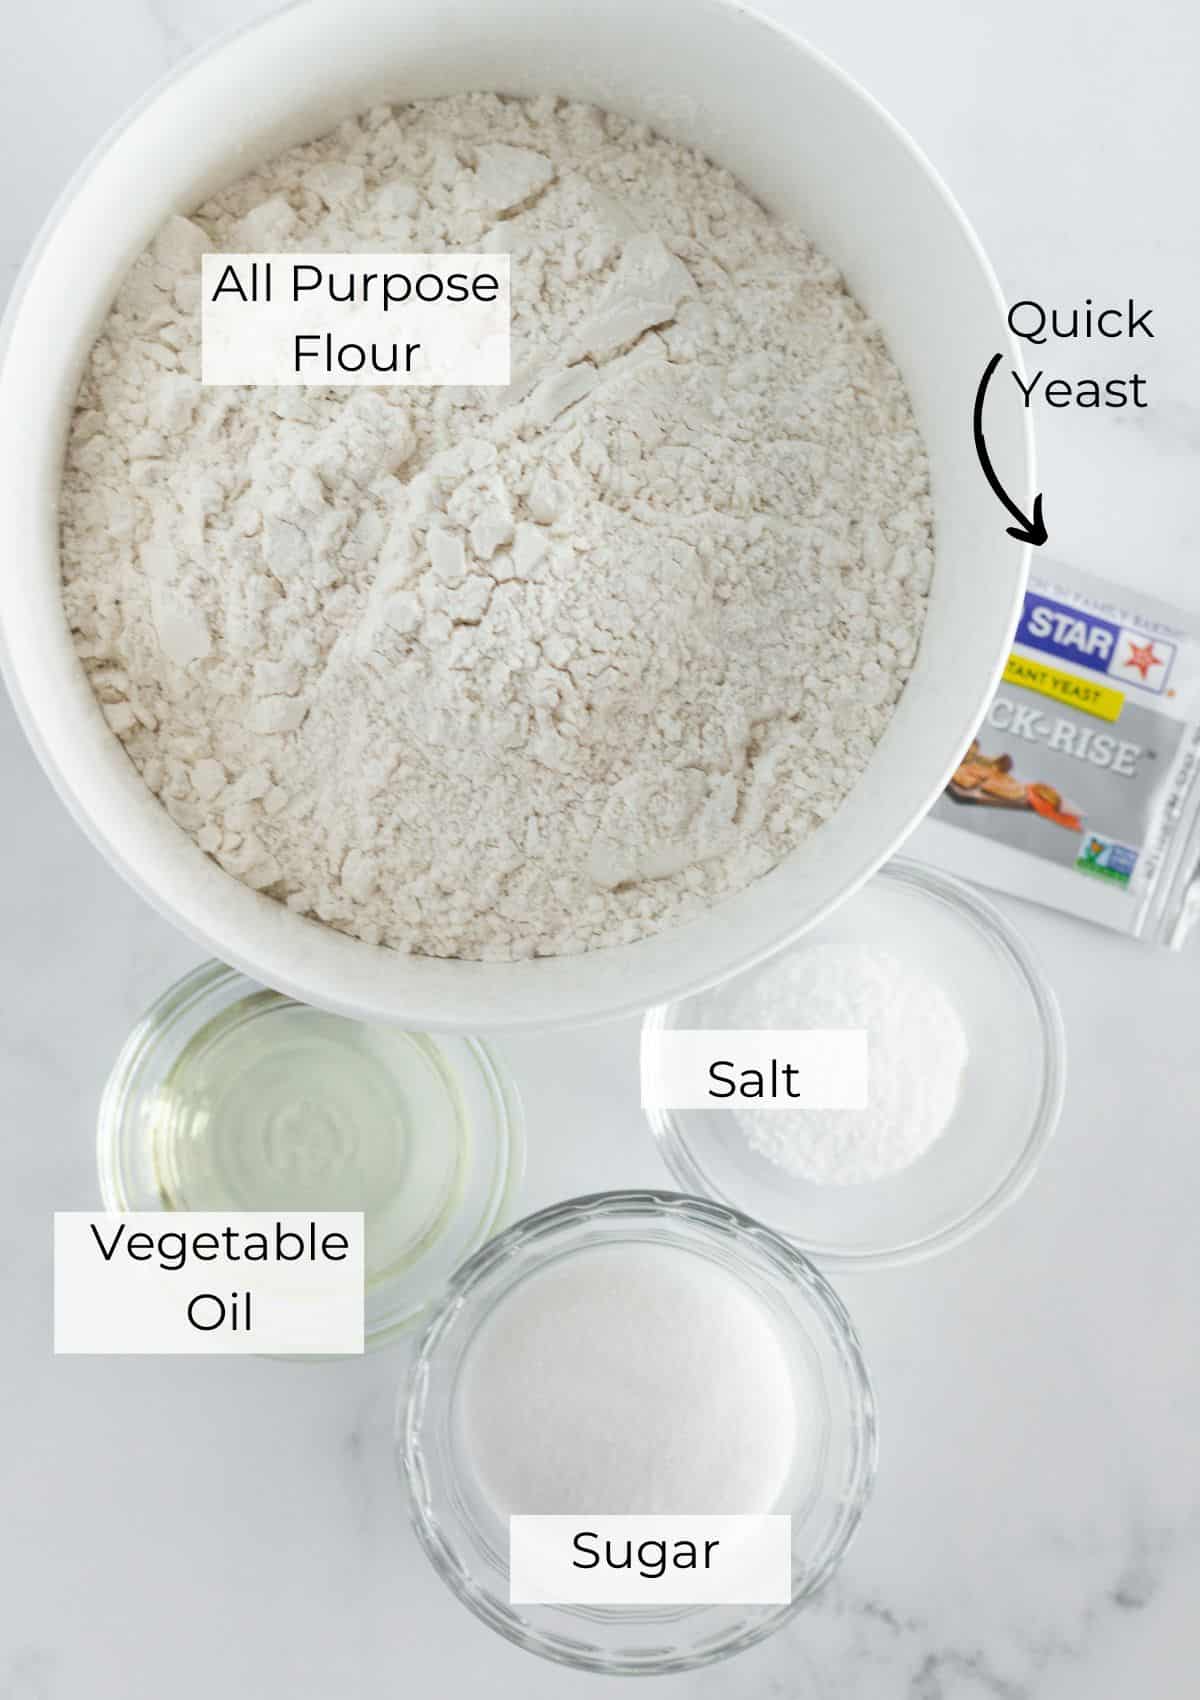
- Quick Rise Yeast: Using instant yeast is what allows you to make your bread rise to make fresh homemade bread in just one hour.
- Granulated Sugar: Helps to bloom the yeast in this bread recipe.
- All Purpose Flour: A good quality all purpose flour should be used in the recipe.
See recipe card for full information on ingredients and quantities.
Variations
To add some variety and change the flavors of this One Hour Bread, you can experiment with different ingredients.
Consider incorporating herbs, spices, or other mix-ins to give the bread a unique twist.
For a savory option, try adding chopped fresh herbs like rosemary, thyme, or parsley to the dough. You can also mix in grated cheese, garlic powder, or onion flakes for a flavorful garlic bread.
For a sweeter variation, consider folding in raisins, dried cranberries, or cinnamon into the dough.
Don’t hesitate to get creative with your favorite ingredients to personalize the bread to your taste preferences. Just ensure not to overload the dough, so the bread maintains its texture and rises properly.
How to Make This One Hour Homemade Bread Recipe
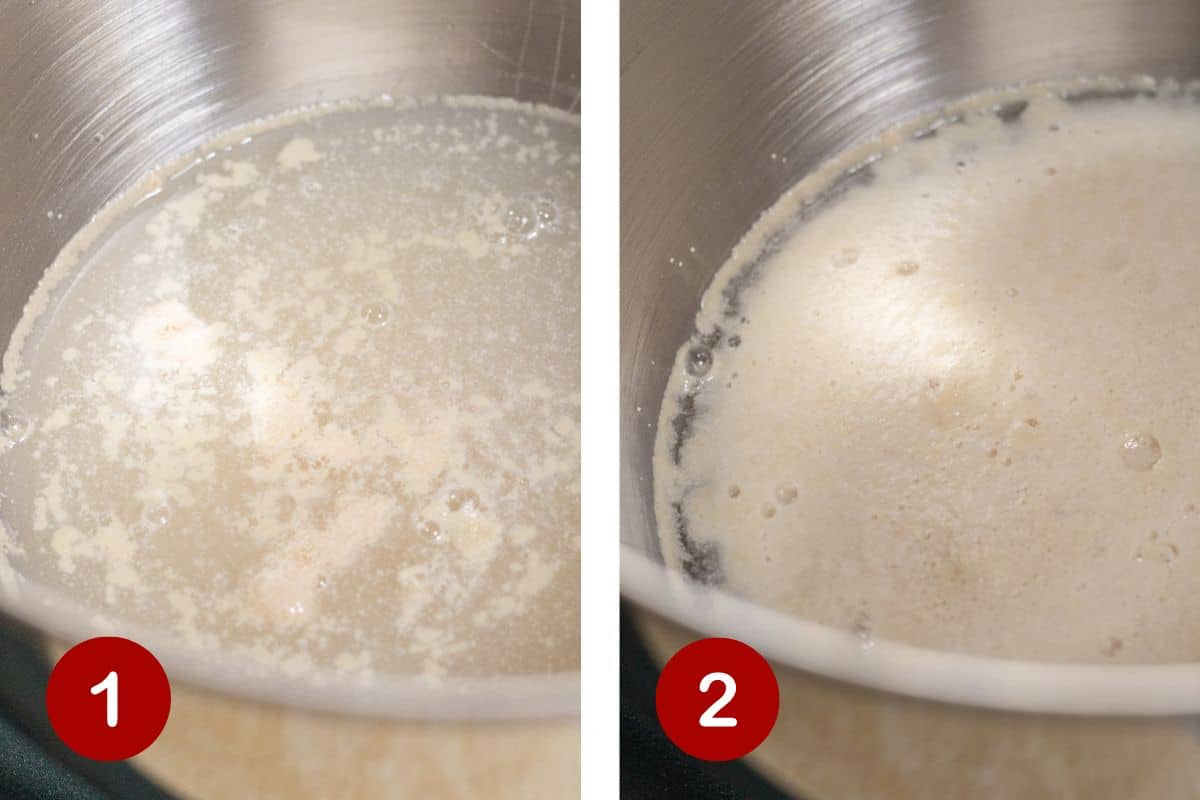
- Begin by putting your warm water in a large mixing bowl. Add your yeast.
- Next, add the sugar and stir. Let the mixture sit and proof for 5 minutes. After 5 minutes, the yeast mixture should start to form a creamy foam. This means that it has proofed and your yeast is good to go!
- Add the oil, half of the flour and salt to the yeast mixture in the bowl of a stand mixer fitted with the hook attachment. This can also be done by hand.
- This is what the dough will look like after you have added half of the flour the first time. It will be lumpy, soft and sticky.
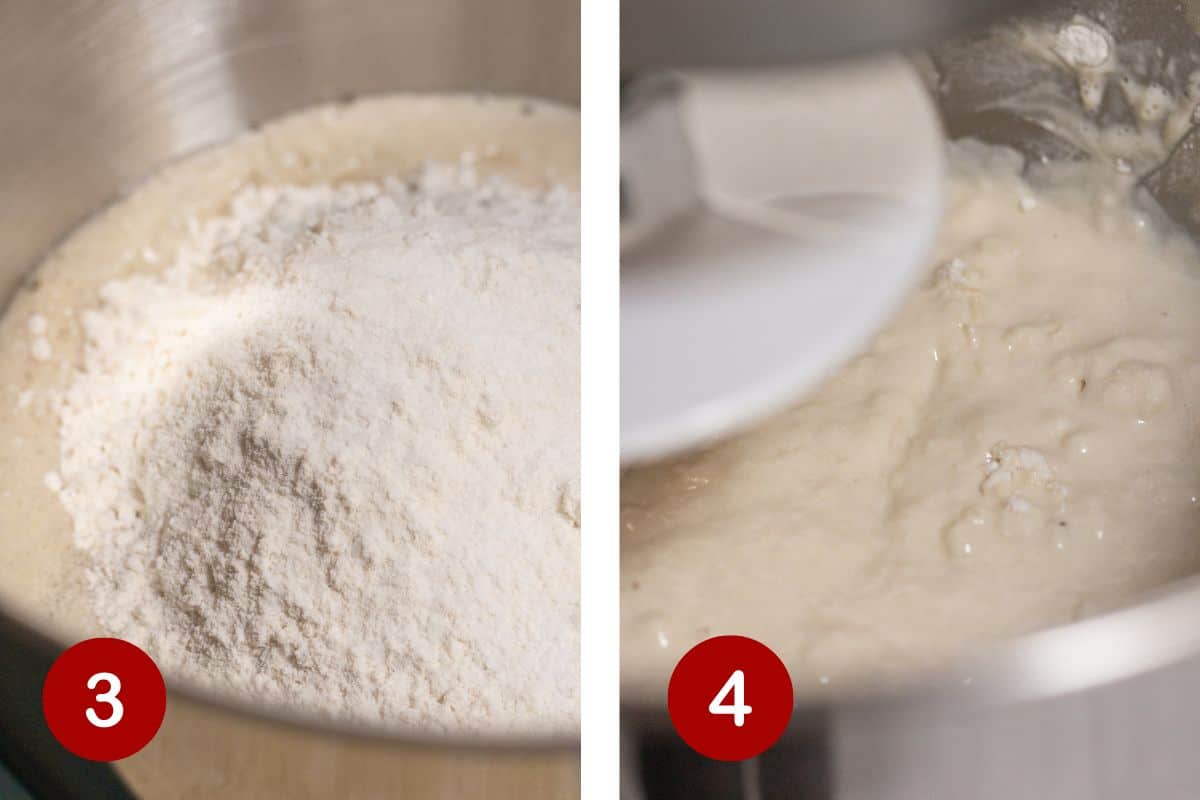
- Continue to add flour until the dough pulls away from the sides of the bowl. This is what the dough will look like when it has enough flour added to it. Most one hour bread recipes will give you a suggested amount that isn’t specific, 4 3/4 – 5 1/4 cups in this case. That means that it will take at least 4 3/4 cups of flour but because of elements like humidity and temperature it can take as much as 5 1/4 cups. It is important to pay more attention to the consistency of the dough.
- Once it is to this point you need to knead the dough for 4-5 minutes. If you are using a mixer, then just continue with the dough hook on low speed for that amount of time. If you are mixing by hand, you will want to turn the dough out onto a floured surface and knead by hand.
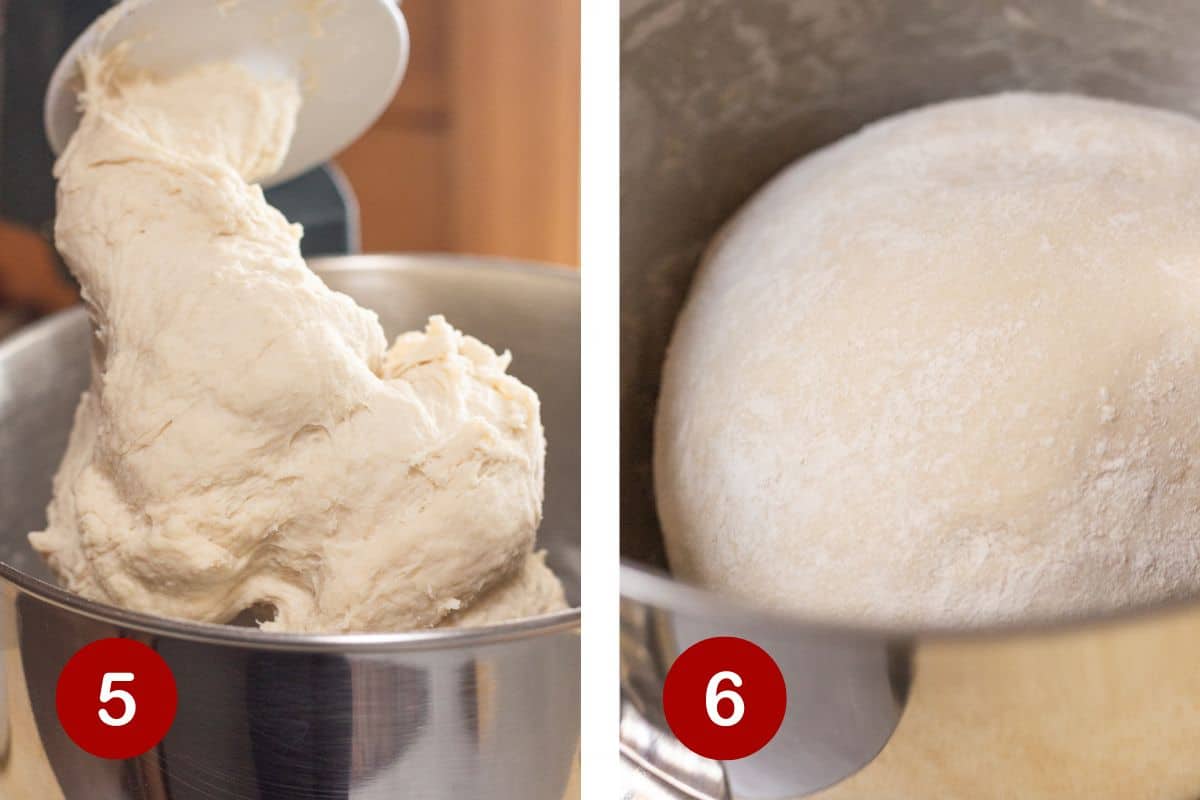
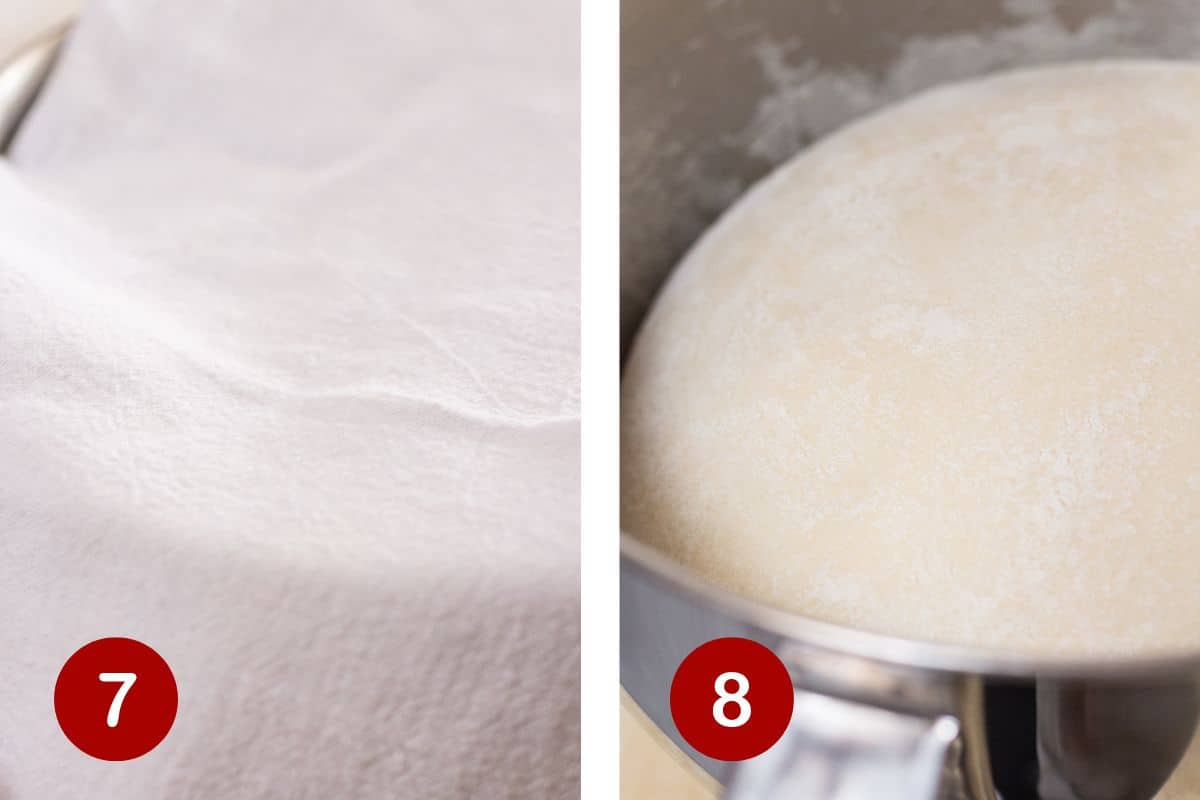
- Once you have kneaded the dough, it is time to let it rise. It is best to cover it with a towel and place it somewhere warm. I put my bread in front of our heater. You can see how to use your oven as a proofer in this post.
- It only takes about 20 minutes and your dough will have almost doubled in size. It will be light and airy.
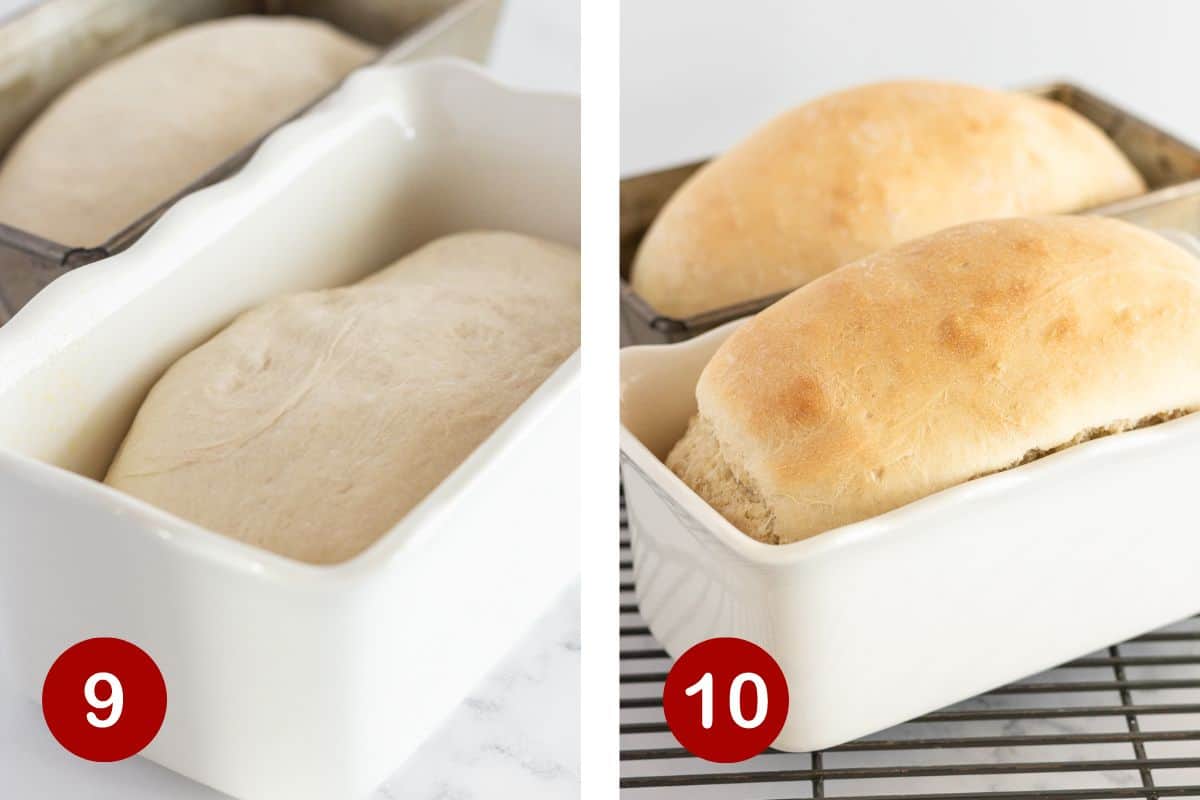
- You are going to get two loaves of bread from this one hour bread recipe, so divide dough in half. Place each half into each loaf pan that has been liberally sprayed with non-stick spray.
- Bake in a 350 degree oven for 25-30 minutes or until the top of the bread is golden brown. Let your one hour bread cool in the pans for 5-10 minutes and then turn them out onto a cooling rack.
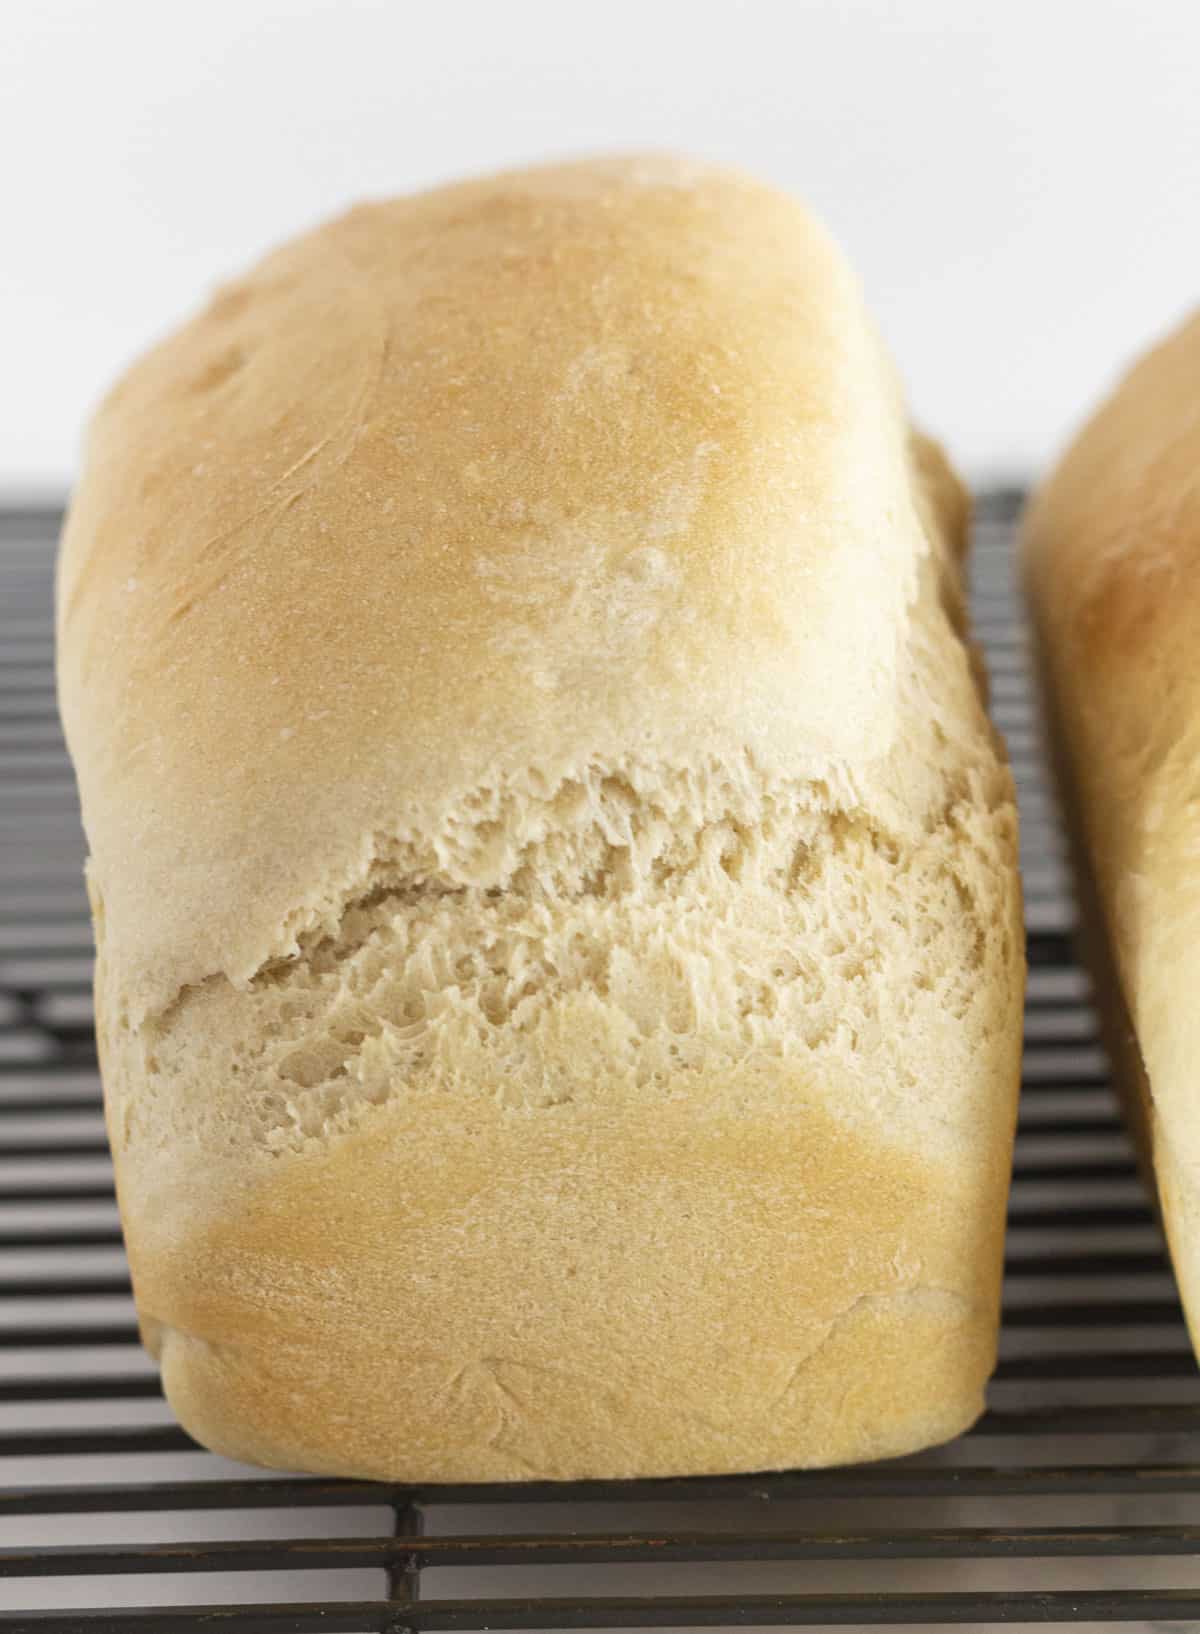
Now is a great time to cut a slice while those beautiful loaves of bread are still warm, add some butter and enjoy. But if you have better self control then I do then wait until they have cooled completely to slice and eat.
I always suggest slicing it about 1/2 inch thick and whether you make a sandwich or toast {like we did this morning} you and your family will be sure to enjoy every bite.
Expert Tips
- Allow the yeast to bloom before adding other ingredients. If you try to use it too soon it will not rise well.
- Be sure to check the expiration date on your yeast. There are many things that are good after the expiration date but this ingredient is not it. It needs to be fresh for best results.
- Find a warm place to allow the dough to rise. The warmth will allow the bread dough to rise quickly.
- Use your own bread for all of your daily needs. It is wonderful as toast, for a sandwich, french toast, served with a bowl of soup for dinner tonight, or anything else you use a great bread for.
Storage and Freezing
Store: Store the easy bread recipe in a nice airtight container or zipper bag at room temperature for up to 5 days.
Freeze: This bread freezes wonderfully for up to 3 months. Be sure it is wrapped tightly in plastic wrap before storing.
Recipe FAQs
To get bread so quickly you need to use Rapid Rise Yeast but if you don’t have any on hand you could always use regular active dry yeast yeast.
The regular yeast will require a longer rise time but will still result in a fabulous end product.
We proof yeast to check and see that it is still workable or able to rise. By adding the yeast to warm water {and sugar, most of the time} and letting it sit for 5-10 minutes you will know by how the yeast reacts if it is still good.
Besides the top of the bread being golden brown, you can tap the top of the bread and when it sounds hollow you will know it is done.
do you love easy bread recipes? try these…


Did you try this recipe?Leave a ⭐️ review below and tag @practicallyhomemade on Pinterest!
Bread Recipe With Instant Yeast
Ingredients
- 2 cups very warm water , {I used tap}
- 1 packet rapid rise yeast, {or 2 1/4 teaspoons}
- ¼ cup granulated sugar
- 2 Tablespoons vegetable oil
- 4¾-5¼ cups all purpose flour
- 1½ teaspoons salt
Instructions
- Place warm water, yeast and sugar in a large bowl. Stir and let the mixture stand for 5 minutes to proof. You will know it is ready when it starts to form a cream foam.
- Add oil, half of the flour {2 1/4 cups} and salt. Start to mix using a dough hook {or by hand}. Add remaining flour until the dough pulls away from the sides of the bowl. Then using the dough hook {or on a floured surface, if mixing by hand} knead the dough for 4-5 minutes.
- Cover the dough in the bowl with a dish towel and let rise in a warm place for 20 minutes or until almost doubled in size.
- Divide the dough in half and place each half into a loaf pan that has been generously sprayed with non-stick spray.
- Bake in a 350° oven for 25-30 minutes or until the top is golden brown {you can also tap on the top of the loaf and if it sounds hollow then it is done}.
- Remove from the oven and let cool in the pans for 5-10 minutes. Turn loaves of bread out onto a cooling rack to cool completely.
- Cut bread into 1/2 inch slices. Use for sandwiches or toast. Keep in an airtight container for up to 3 days or freeze for up to 3 months.
Video
Notes
Nutrition
Nutrition information is automatically calculated, so should only be used as an approximation.


Amazing bread and so easy!
Can you substitute Olive Oil for Veg Oil? I rarely use any oil other than Olive Oil.
Thank you.
Yes, it should work great.
We have been making this recipe often, and we love it! The recipe is quick, easy, and the result, soft and delicious.