This post may contain affiliate sales links. Please see our full disclosure policy for details.
With over 30 years of baking experience, I’ve learned that some of the best memories come from simple, hands-on recipes that bring the family together in the kitchen. This Easy Rice Krispie Easter Nest recipe is just that—easy to make, adorably festive, and perfect for little hands to help.

Table of Contents
These no-bake nests have been a staple in my kitchen for years and they never fail to bring a smile to everyone’s face. Whether you’re making them with your own kids, grandkids or just for a festive Easter dessert, they add a touch of charm to the holiday.
Why we love rice krispie nests with mini cadbury eggs
- They are so much fun! The pastel color and sweet nest shape make them perfect for an Easter celebration
- The simplicity of the recipe. They are made with only a handful of simple ingredients that are easily found at the grocery store. There is also no need for an oven when making this classic treat.
- The flavor and texture combination. From the chewy texture of the classic Rice Krispie treat to the candy coated chocolate eggs, they are irresistible.
- The cute Easter nests are versatile. They work well for a classroom snack, brunch or spring time party.
Ingredients Needed

- Rice Krispie Cereal: I love that they hold their shape and keep their crunch. It can be molded easily to make the little nests. I also love using it to make these Rice Krispie Cookies.
- Marshmallows: Once melted the marshmallows add just enough sweetness and hold the rice cereal together.
- Butter: The addition of butter creates the perfect marshmallow mixture. I prefer to use salted butter but unsalted butter can also be used.
- Mini Cadbury Eggs: These adorable-edible milk chocolate eggs are my family’s favorite. You can also find them in dark chocolate if you prefer. They are also added to the top of these Cadbury Egg Cookies that start with a cake mix.
See recipe card for full information on ingredients and quantities.
Variations & Substitutions
Eggs: If you don’t have Cadbury mini eggs, try using jelly beans, mini robin eggs, M&M’s or other candy eggs.
Cereal: The chocolate rice cereal would be so much fun in this recipe. Use it in place of the plain Rice Krispies or half of each cereal to get a great color and flavor. See this Chocolate Krispie Treats recipe for more tips.
Grass: Sometimes finding the grass sprinkles can be hard but there are other options. Try using green colored coconut or even creamy frosting for a delicious grass effect.
How to make Rice Krispie Easter Nests
- Begin by melting the butter in a saucepan over a medium-low heat. Once melted, add the marshmallows to the pan.
- Continue on a low heat until the marshmallows have melted completely.

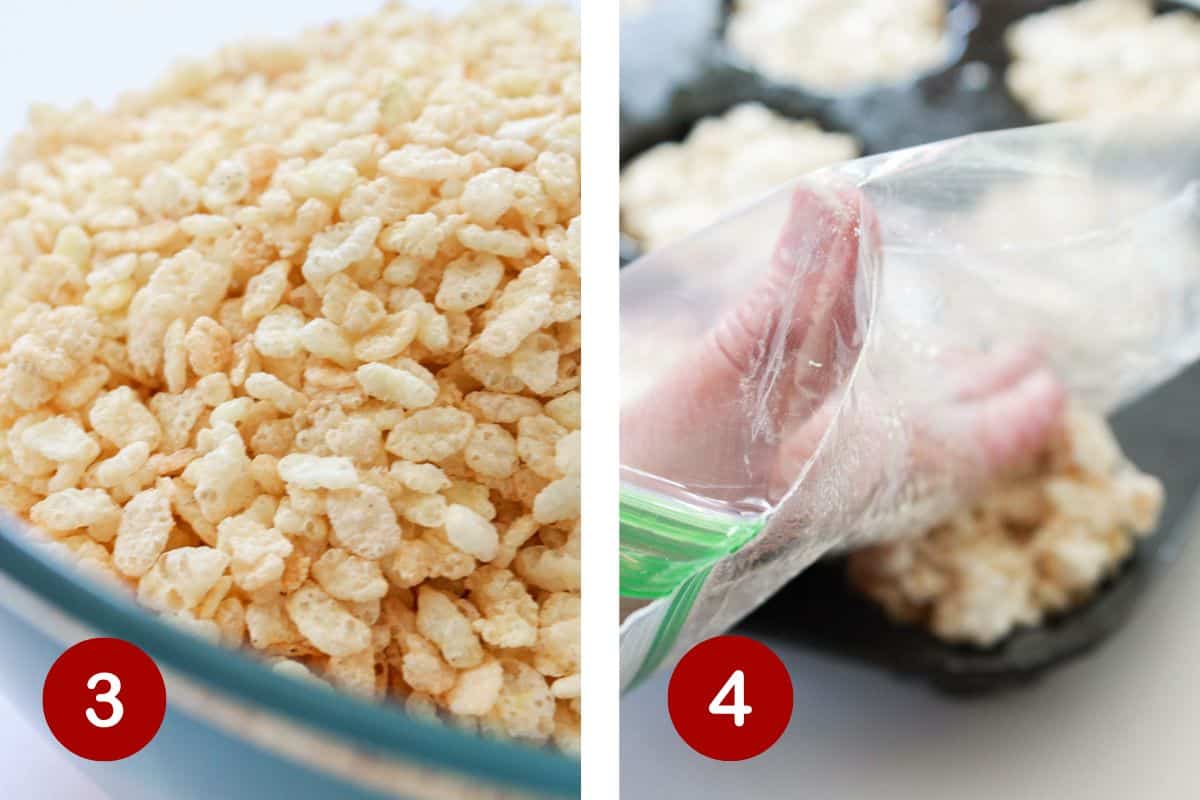
- Add the crunchy Rice Krispies to the marshmallow mixture and stir until they are evenly distributed.
- Divide the mixture between 12 mini bundt pan molds {or a cupcake pan} and press into the pan. Note: I like to spray a sandwich bag with cooking spray and use it like a glove, so that nothing sticks to my hands.
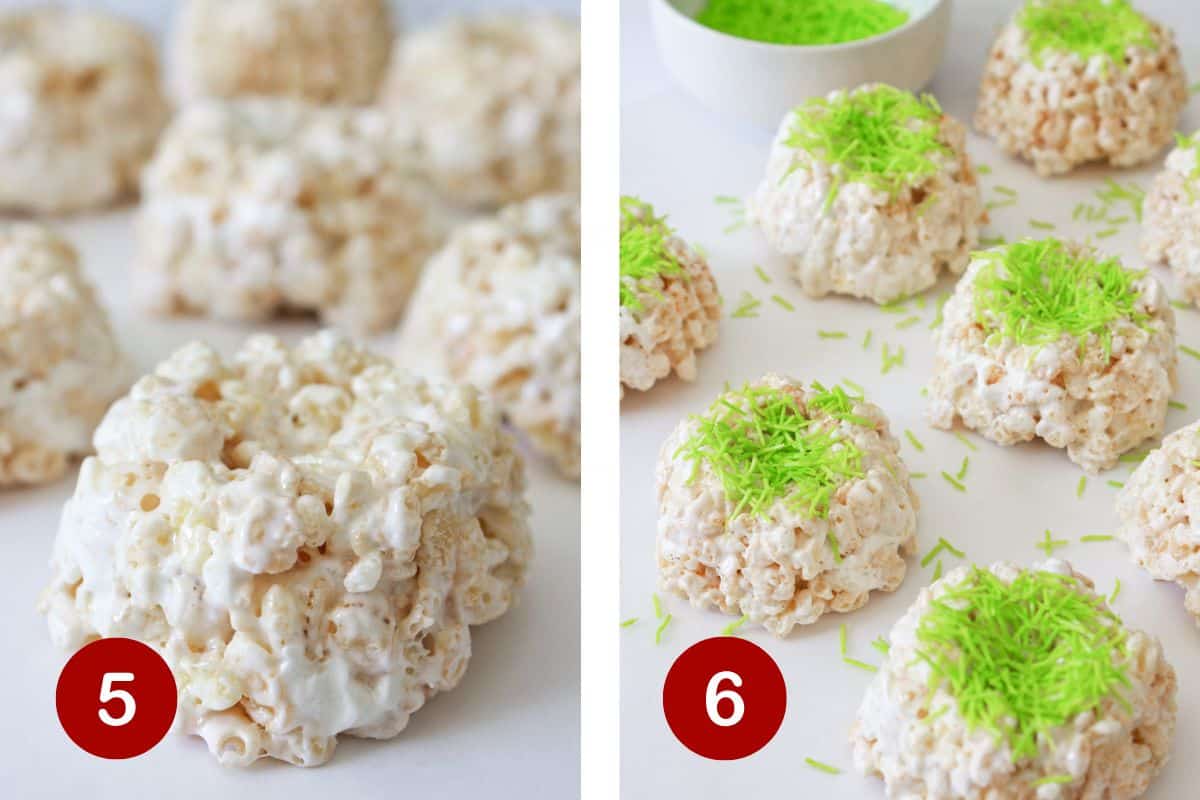
- Allow the treats to set up in the pan for about 15 minutes and then use a butter knife to pop them out.
- Top the center of each nest with green sprinkles and egg-shaped candy, pressing down so that everything sticks. NOTE: If the eggs aren’t staying in the nest you can use about a tablespoon of melted chocolate and use it as glue.
Expert Tips
- Be sure to melt butter and marshmallows over a low heat. Doing this step low and slow will ensure that nothing burns.
- Spray the pan you are using with nonstick spray. Doing so will allow the crispy treats to easily be removed even though the mixture is sticky.
- Press the rice krispies cereal mixture firmly into the prepared pan. This will help the mixture stick together and hold its shape.
- If you can’t find the green sprinkles, make your own edible “grass”. Add coconut to a plastic bag with a few drops of green food coloring and shake until the coconut is coated.
Storage
Store: Easter Rice Krispie Treats need to be stored in an airtight container at room temperature. They will stay fresh for about 3 days.
Freeze: This easy Easter dessert can be frozen for up to 3 months without toppings. I would put a layer of wax paper between layers if you are stacking them to be sure that they don’t stick together.
Recipe FAQs
Yes, it would work wonderfully. I have used a mini bundt pan but a regular sized or mini muffin pan would both work great. Small tart pans can also be used to make this fun Easter treat.
They are a candy coated milk chocolate egg that can be found during the holidays. These popular chocolate Easter eggs used to only be sold during Easter but now they are sold at Christmas and Thanksgiving with varying colors that correspond with the holiday.

Do you love fun Easter desserts? Try these recipes…


Did you try this recipe?Leave a ⭐️ review below and tag @practicallyhomemade on Pinterest!

Rice Krispie Easter Egg Nests
Ingredients
Rice Krispie Treats
- 3 Tablespoons butter
- 10 ounces mini marshmallows, {or 40 large marshmallows}
- 6 cups Rice Krispie Cereal
Toppings
- 36 Mini Cadbury Eggs
- Wilton Shredded Green Wafers
- 1 ounce white chocolate, {melted}-optional
Instructions
- In a saucepan, melt butter over medium-low heat. Once melted, ¾ of the marshmallows and stir until they are completely melted. Remove from heat, add Rice Krispie Cereal and remaining marshmallows. Stir until the Krispies are completely coated. NOTE: The marshmallows you add at the end won't completely melt.
- Spray each cavity of mini Bundt pan {or muffin pan} with non-stick spray. Prep a small Ziploc bag by spraying one side of it with non-stick spray, it will act like a glove to help keep the mixture from sticking to your hand. Divide Krispie mixture between the 12 cavities and press down. Let the Krispie treats set up for at least 15 minutes and then use a butter knife to pop them out of the pan.
- Add shredded green wafer sprinkles to the top of each bundt. You might have to press down slightly. Then add 2-3 mini Cadbury Eggs on top of each nest. If the eggs aren't sticking to the nest, melt one ounce of white chocolate in the microwave and use it as the glue by adding a bit of melted chocolate to the bottom of each egg. Store in an airtight container at room temperature for up to 3 days.
Notes
- A regular sized or mini muffin pan can also be used to make the Rice Krispie nests.
- Jelly beans and M&M candies are both great substitutes for the Mini Cadbury Eggs.
- To make edible grass: Add 1/2 cup of coconut to a zipper bag, along with a few drops of green food coloring. Shake until the coconut is coated.
Nutrition
Nutrition information is automatically calculated, so should only be used as an approximation.


Hi June, Yoir vegetable Casserole was a really big hit in our family. Just wa ted to thank you
For your wonderful receipes.
You are so very welcome. I am glad you enjoyed it.