This post may contain affiliate sales links. Please see our full disclosure policy for details.
If you are a peanut butter lover, this Easy No Bake Peanut Butter Pie is truly the best! From the chocolate crust, to the creamy peanut butter filling, whipped topping and tons of toppings…this pie is one for the record books!
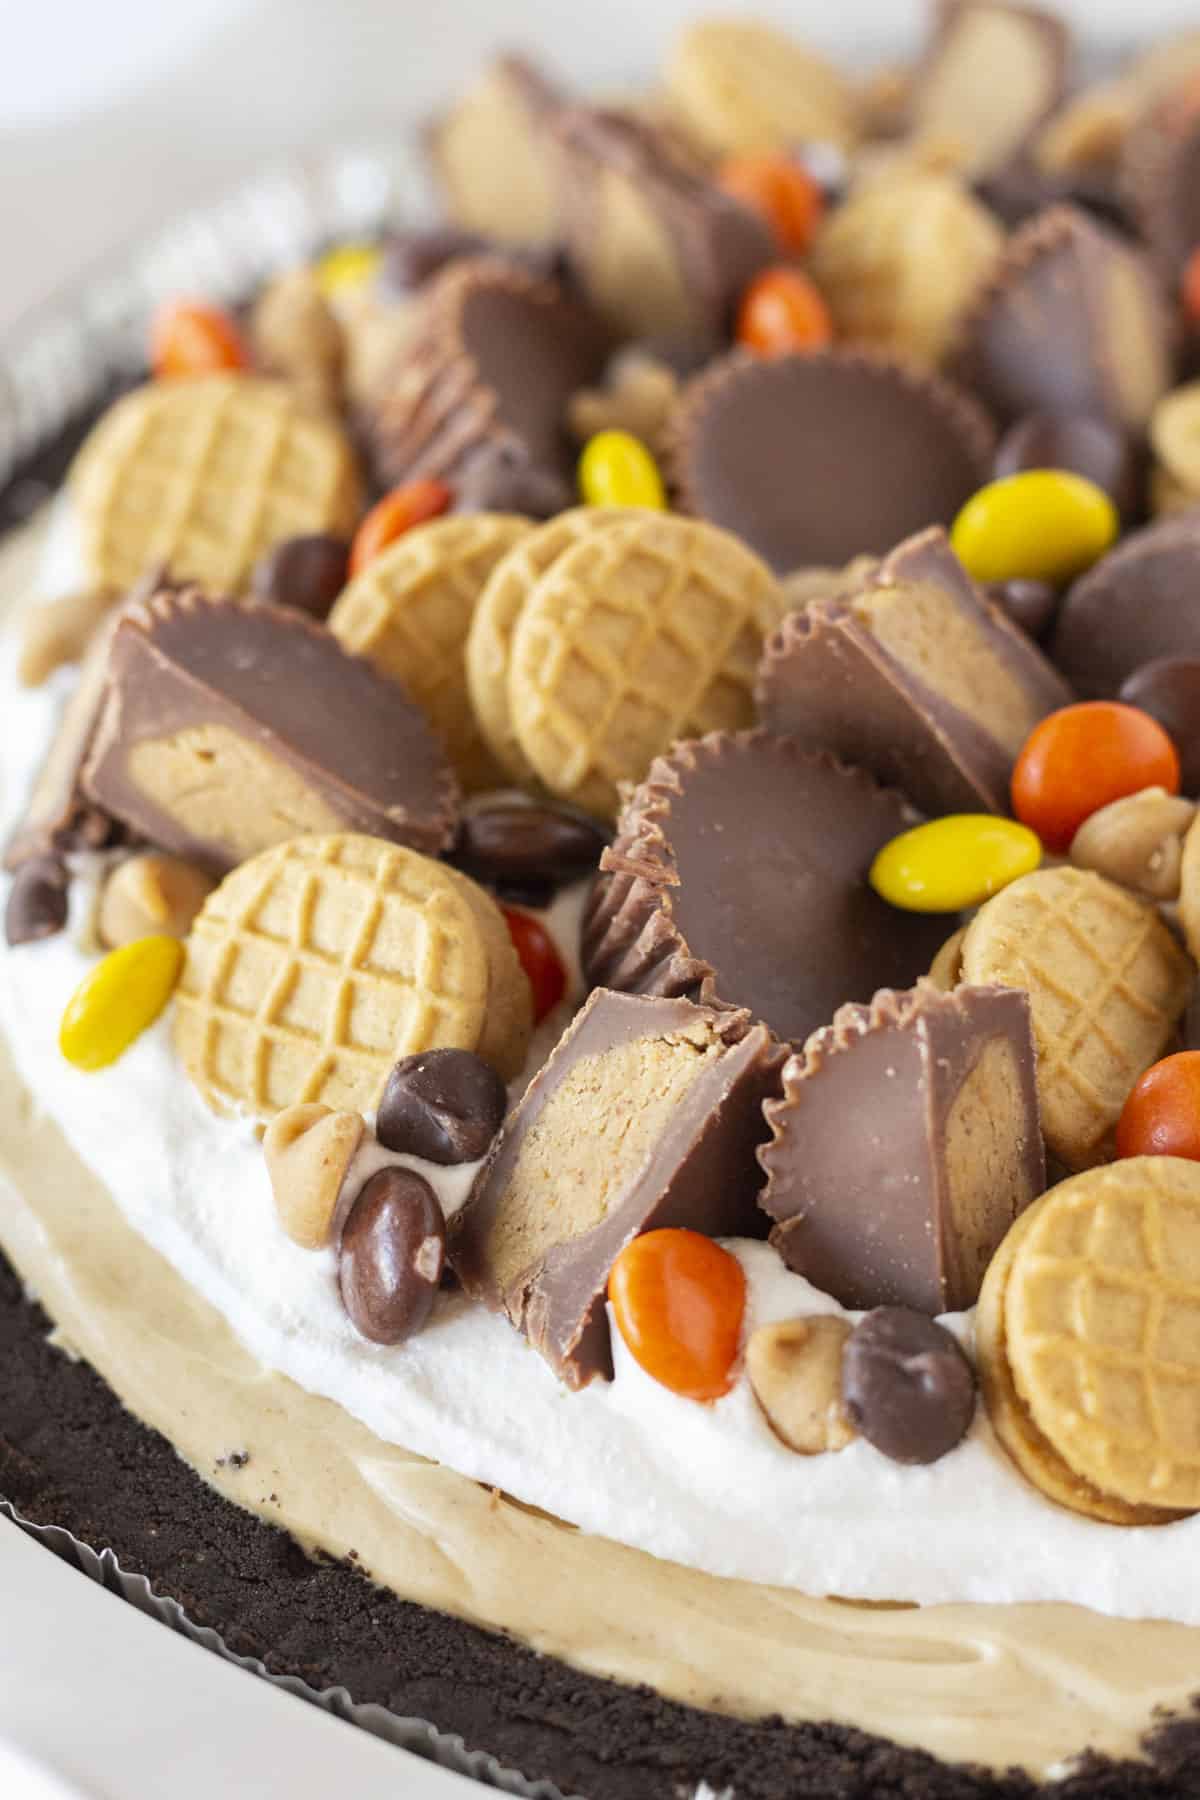
Table of Contents
Can we agree that the combination of chocolate and peanut butter is a match made in heaven?!
This chocolate peanut butter pie is the perfect rendition of this classic flavor combo and you don’t want to miss it! So are these Chocolate and Peanut Butter Texas Sheet Cake Cookies!
What goes into this Recipe
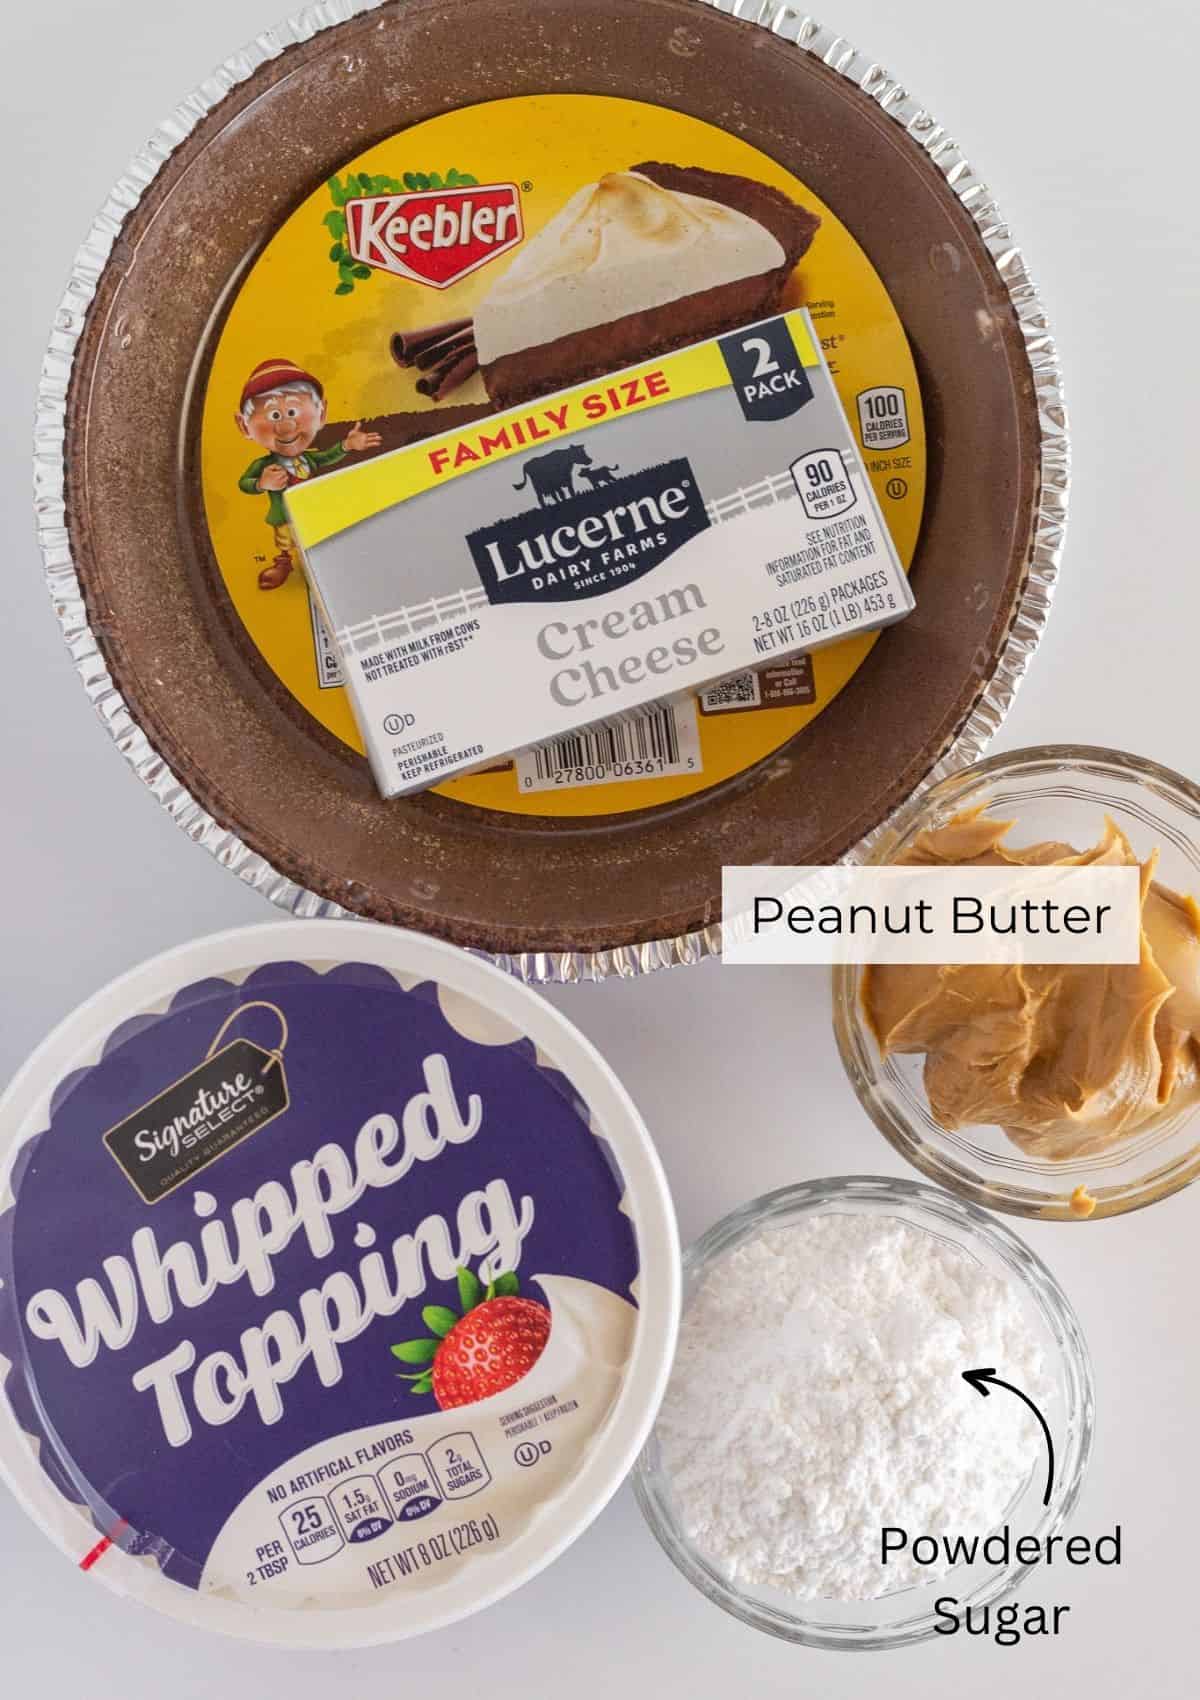
- Chocolate Pie Crust– Buy a store-bought chocolate cookie crust or make your own and press into a pie pan for the perfect foundation.
- Cream Cheese– Adds to the creamy and smooth texture you love.
- Peanut Butter– You have to have peanut butter and a good quality creamy version is perfect.
- Powdered Sugar– Adding just the right amount of sweetness.
- Whipped Topping– The Cool Whip is added to the filling for structure and a little added sweetness in the filling and on top.
See recipe card for full information on ingredients and quantities.
Topping Ideas
- Peanut Butter Chips
- Reese’s Pieces
- Mini Nutter Butter Cookies
- Reese’s Cups
- Chocolate Chips {mini chocolate chips are my favorite}
- Chocolate Curls or chocolate shavings
- Chocolate Sauce or chocolate ganache
How to make No Bake Peanut Butter Pie
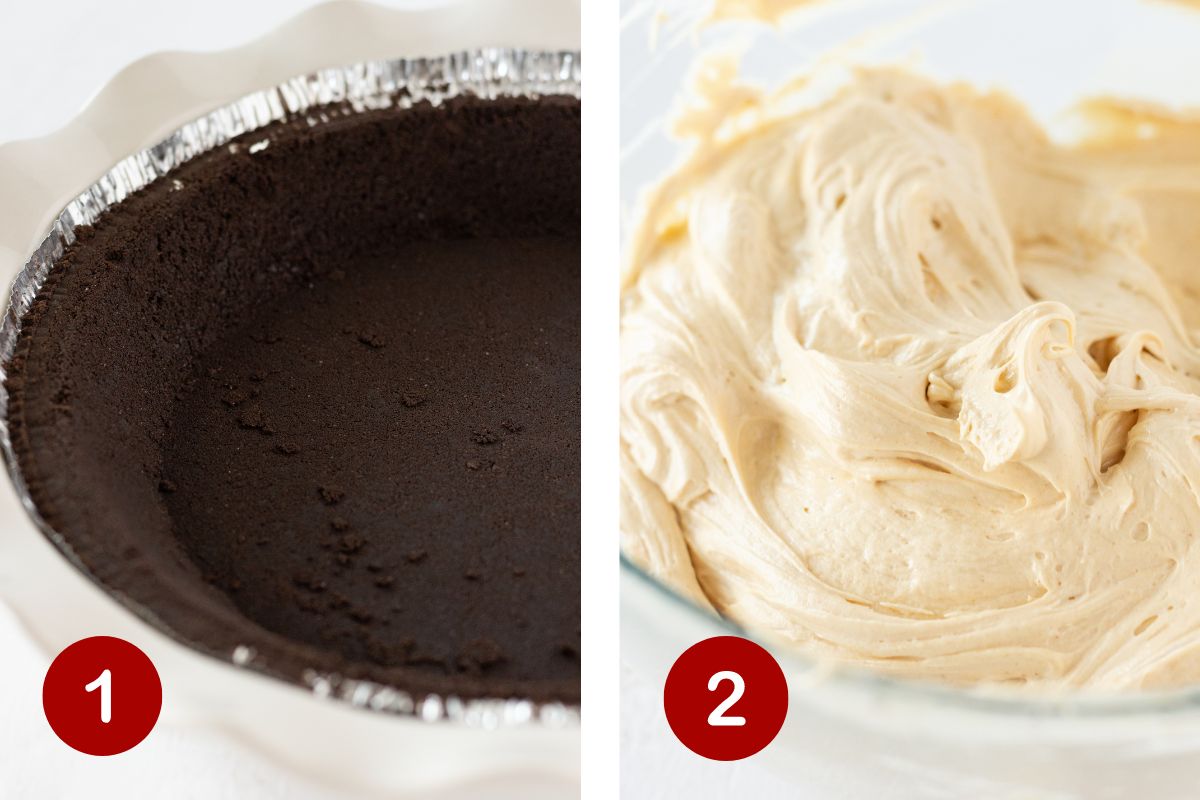
1. To make this no bake recipe, begin with a store-bought chocolate crust or homemade chocolate Oreo crust like I used in my Snickers No Bake Cheesecake.
2. Use an electric mixer to combine the softened cream cheese with the peanut butter in a large mixing bowl until smooth. Add powdered sugar and continue to mix until incorporated. Finally, add the whipped topping to the cream cheese and peanut butter mixture. Continue using the hand-held mixer to combine until super smooth and velvety.
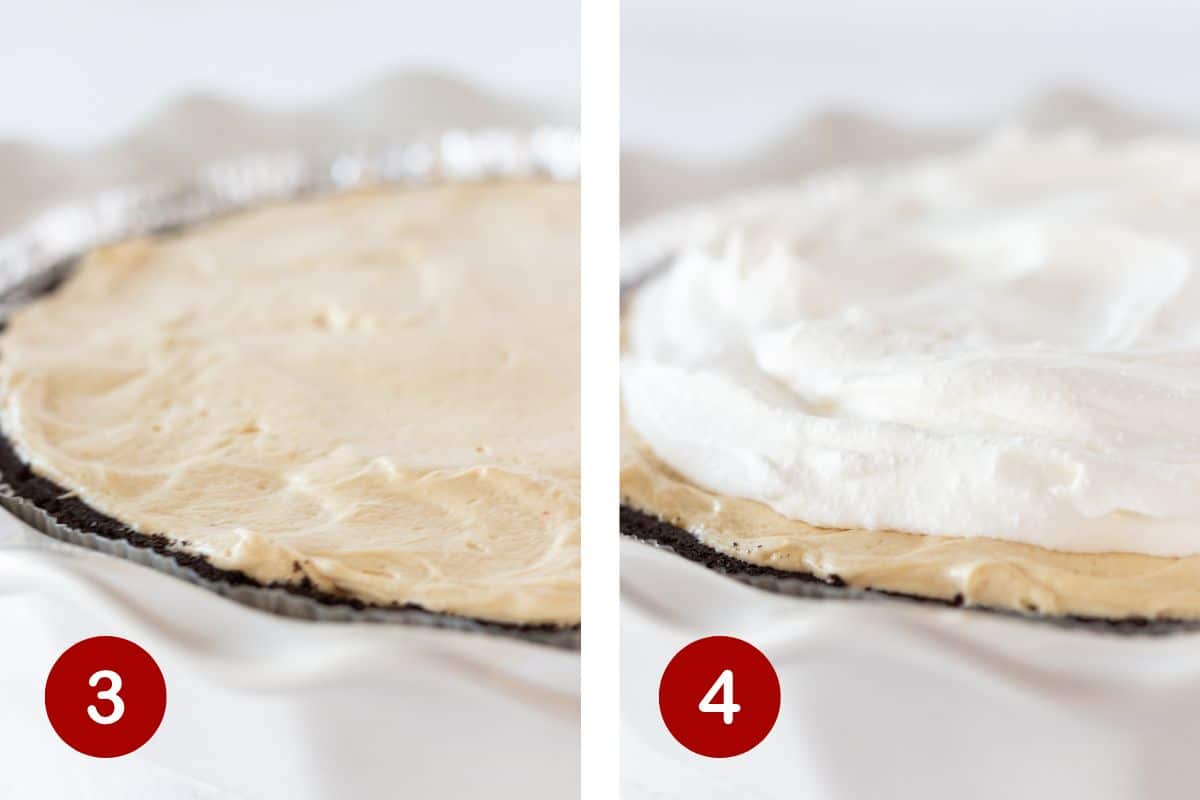
3. Add the peanut butter filling to the prepared pie crust.
4. Top the peanut butter filling with additional whipped topping and spread out into an even layer, leaving a bit of filling showing around the edge.
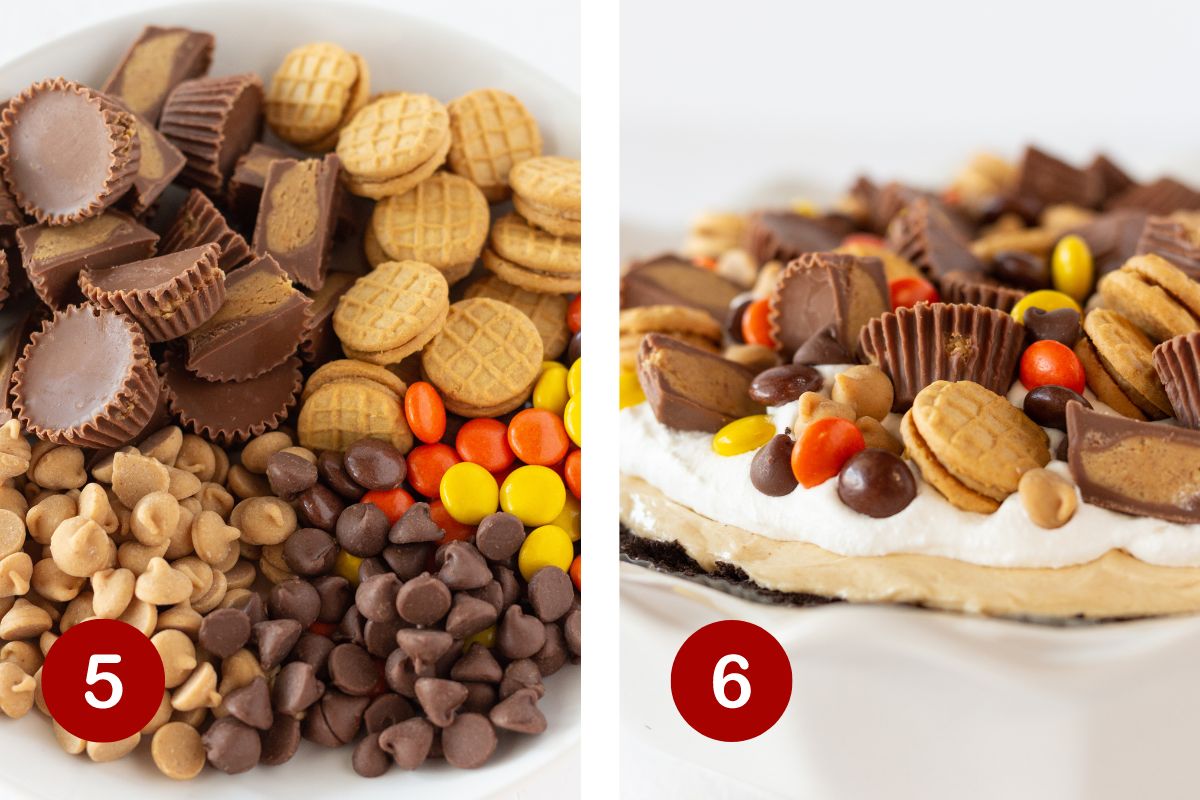
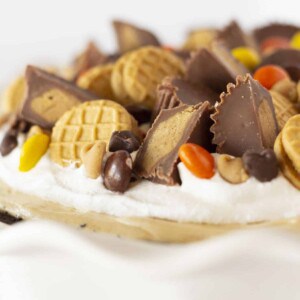
5. Gather your combination of topping ingredients. I have used peanut butter cups, Reese’s pieces, mini Nutter Butter cookies, peanut butter chips and chocolate chips.
6. Use the topping ingredients to cover the top of your pie. Refrigerate for at least 2 hours for a chilled pie or freeze for 4 hours for a frozen pie.
Expert Tips
- Make sure that the filling ingredients are at room temperature. This easy step will ensure that the filling is smooth.
- Grab a pre-made crust from the grocery store. It will save you the step of having to make your own and it still tastes fabulous. A crust made from graham cracker crumbs would also work wonderfully. I also like to use them for this No Bake Lemon Cheesecake.
- Spread the filling into an even layer. This will ensure that you get a uniform and professional looking easy peanut butter pie recipe..
- Pile the top of the pie with whipped cream and toppings. There are so many fun items that you can add to the top and give it a finished look.
- Be sure to chill for at least 2 hours or even the next day. It is important that the pie is set up nicely so that it will cut into nice pieces.
Storing and Freezing
Store- This Peanut Butter Pie needs to be refrigerated to set up nicely and to keep all of the ingredients from spoiling. If you use a ready-made pie crust the clear liner makes a great covering. Otherwise, a good airtight container works great to keep it fresh for up to 4 days.
Freeze- To freeze, wrap the pie tightly with plastic wrap. It freezes well for up to 2 months. Serve a frozen peanut butter pie or thaw in the refrigerator and serve.
Recipe FAQs
For good peanut butter flavor, use a high-quality creamy peanut butter to keep the filling smooth. Jif and Skippy are both great brands.
You could also choose a natural peanut butter of your favorite brand.
Absolutely! I normally use a store-bought crust to save time{but I still set it in a pie plate}, I have an awesome Oreo crust recipe that I used for my No Bake Snickers Cheesecake.
You can also make it in a springform pan or in a pie plate.
I prefer to use the whipped topping you find in the freezer section of your grocery store. Defrost and refrigerate it until you are ready to use it.
If you prefer to use homemade whipped cream, combine 1 cup of heavy cream with 3 tablespoons of powdered sugar in a medium bowl. Use a mixer to beat the ingredients until you have stiff peaks, add 1 teaspoon of vanilla, stir and use.
If you can’t eat peanuts, use almond butter. It will still give you a wonderful pie and you can top with your favorite almond candies.

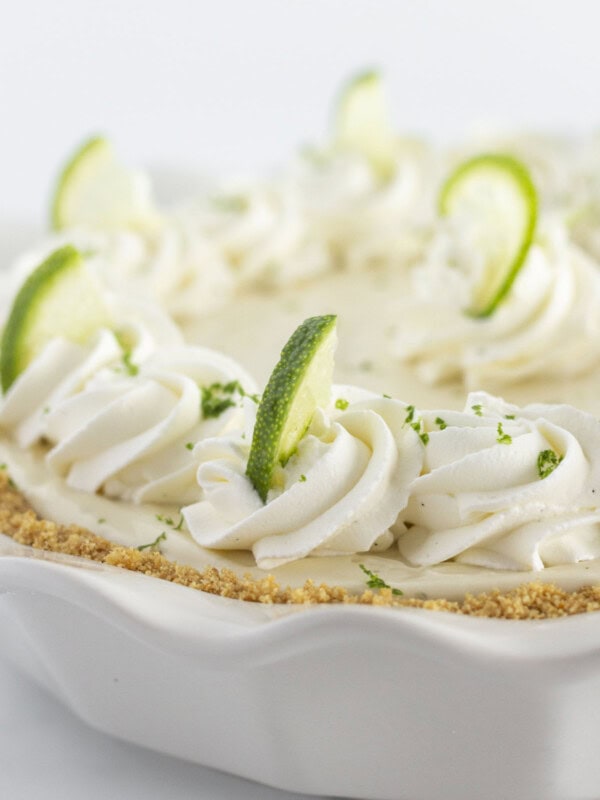
Do you love no bake desserts? Try these other recipes…


Did you try this recipe?Leave a ⭐️ review below and tag @practicallyhomemade on Pinterest!
The Best Easy No Bake Peanut Butter Pie
Ingredients
- 1 chocolate pie crust
- 8 ounces cream cheese , {softened}
- ¾ cup creamy peanut butter
- ¾ cup powdered sugar
- 8 ounces whipped topping
Toppings
- 4 ounces whipped topping
- 3 Tablespoons Reese's pieces candies
- 3 Tablespoons peanut butter chips
- 3 Tablespoons chocolate chips
- 20 mini Reese's Peanut Butter Cups {some cut in half}
- 20-24 mini Nutter Butter Cookies
Instructions
- In a medium bowl combine cream cheese and peanut butter with an electric mixer until thick and smooth. Add powdered sugar and mix until combined. Lastly, add whipped topping and mix until everything is incorporated.
- Remove the plastic liner from the chocolate crust and pour the peanut butter filling into the prepared crust. Spread out evenly. Top with the 4 oz. of whipped topping and the assorted toppings.
- Refrigerate your No Bake Peanut Butter Pie for at least 2 hours before cutting. Refrigerate leftovers for up to 4 days.
Video
Notes
- Make sure that the filling ingredients are at room temperature. This easy step will ensure that the filling is smooth.
- Be sure to chill for at least 2 hours or even the next day. It is important that the pie is set up nicely so that it will cut into nice pieces.
- To freeze, wrap the pie tightly with plastic wrap. It freezes well for up to 2 months. Serve a frozen peanut butter pie or thaw in the refrigerator and serve.
- If you don’t like a chocolate crust, use a store bought graham cracker crust.
- Peanut Butter Chips
- Reese’s Pieces
- Mini Nutter Butter Cookies
- Reese’s Cups
- Chocolate Chips {mini chocolate chips are my favorite}
- Chocolate Curls or chocolate shavings
- Chocolate Sauce or chocolate ganache
Nutrition
Nutrition information is automatically calculated, so should only be used as an approximation.