No Bake Chocolate Peppermint Cheesecake Recipe
Updated Dec 02, 2025, Published Dec 10, 2020
This post may contain affiliate sales links. Please see our full disclosure policy for details.
I always feel like Christmas isn’t complete without a delicious peppermint dessert. So bringing the flavor of candy canes to a cheesecake seemed like a super logical thing to do. Of course, I always think that making over the top and decadent desserts is the best plan. You are going to love every bite of this No Bake Chocolate Peppermint Cheesecake!

There is something so magical about a No Bake Cheesecake! Taking a handful of ingredients and turning them into a velvety smooth dessert without an oven is SO AWESOME.
If you hadn’t noticed already…simple desserts are totally my jam. Whether it is a No Bake Peppermint Chocolate Cheesecake or Cream Cheese Cake Mix Cookie, I just can’t get enough.
Especially this time of year when things are especially busy. I realize that Christmas might look a little different but that doesn’t exactly mean it is any less hectic.
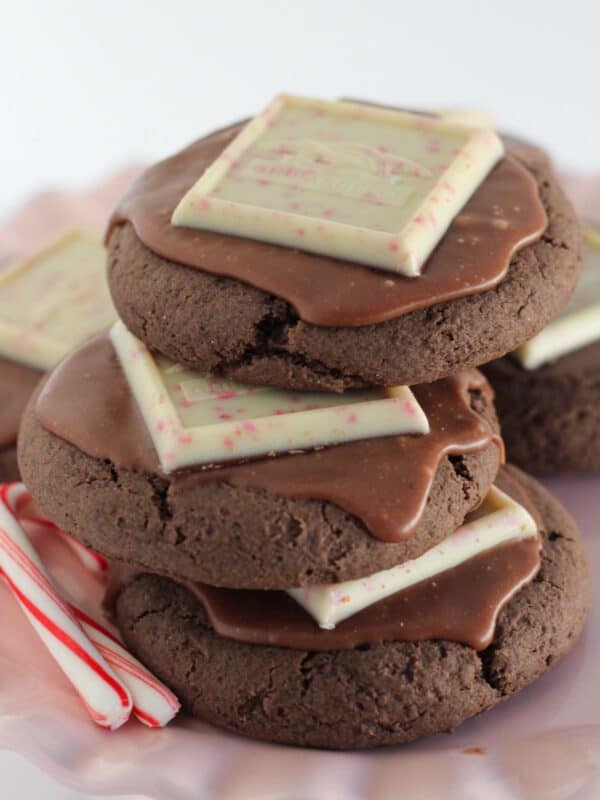
That is why it is super important to me that I provide you with out of this world recipes, while still giving you extra time with your family and friends. So start with this No Bake Chocolate Peppermint Cheesecake and then try these Peppermint Chocolate Cookies and get the holidays going.
How to Make a Chocolate Peppermint Cheesecake
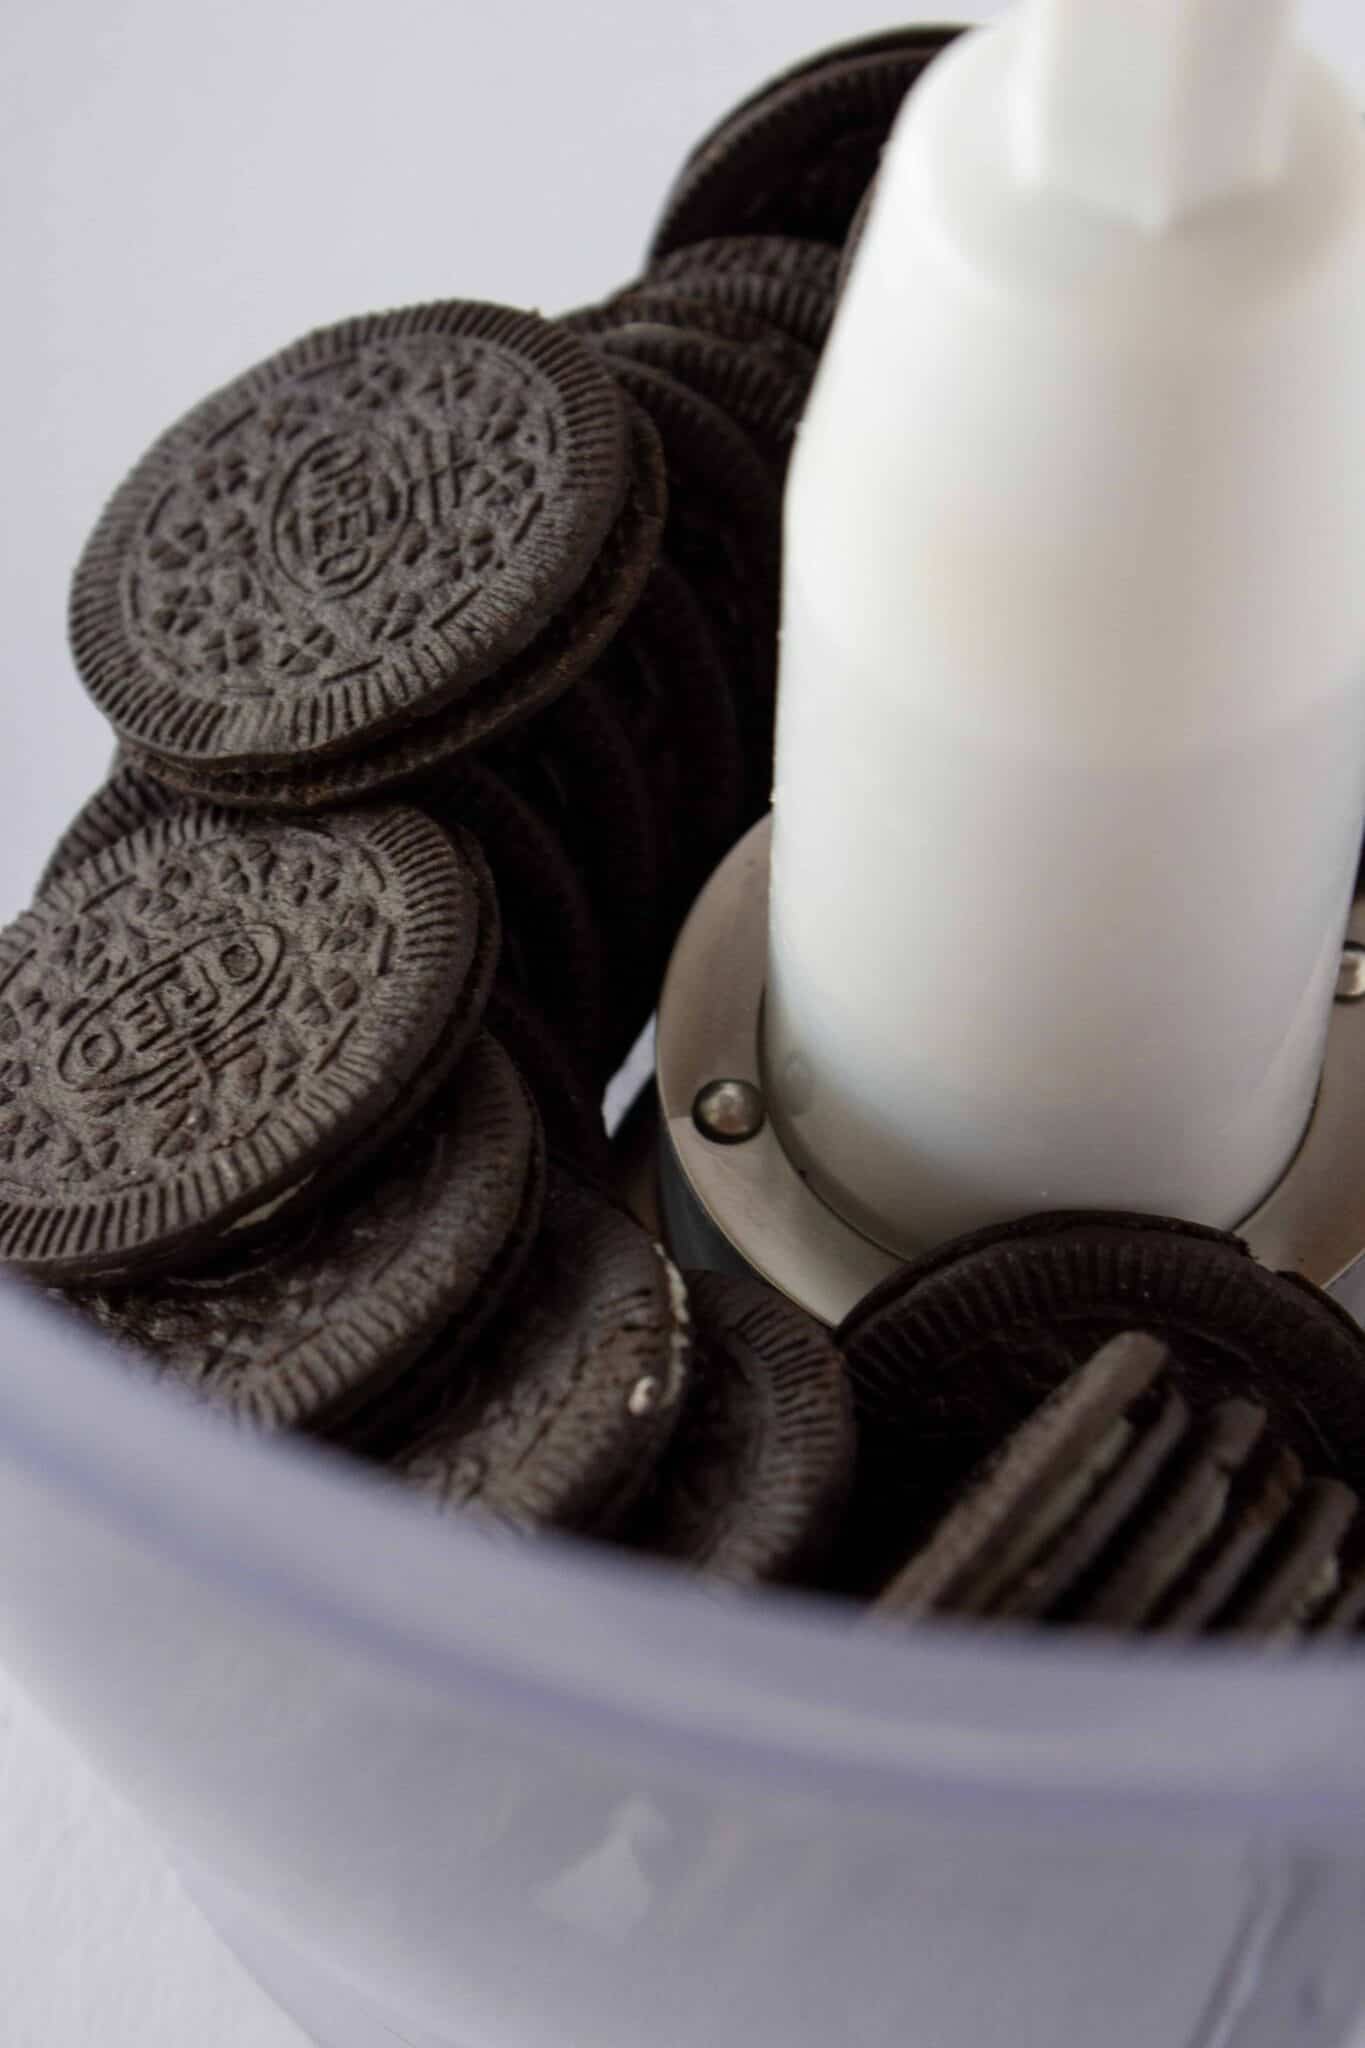
- To make the crust I started with Oreo Thins {but regular Oreos totally work too}. I like the ratio of chocolate cookie to cream filling. Add them to the food processor and pulse until you have fine crumbs.
- You can transfer the cookie crumbs to a bowl or leave them in the food processor and add the melted butter.
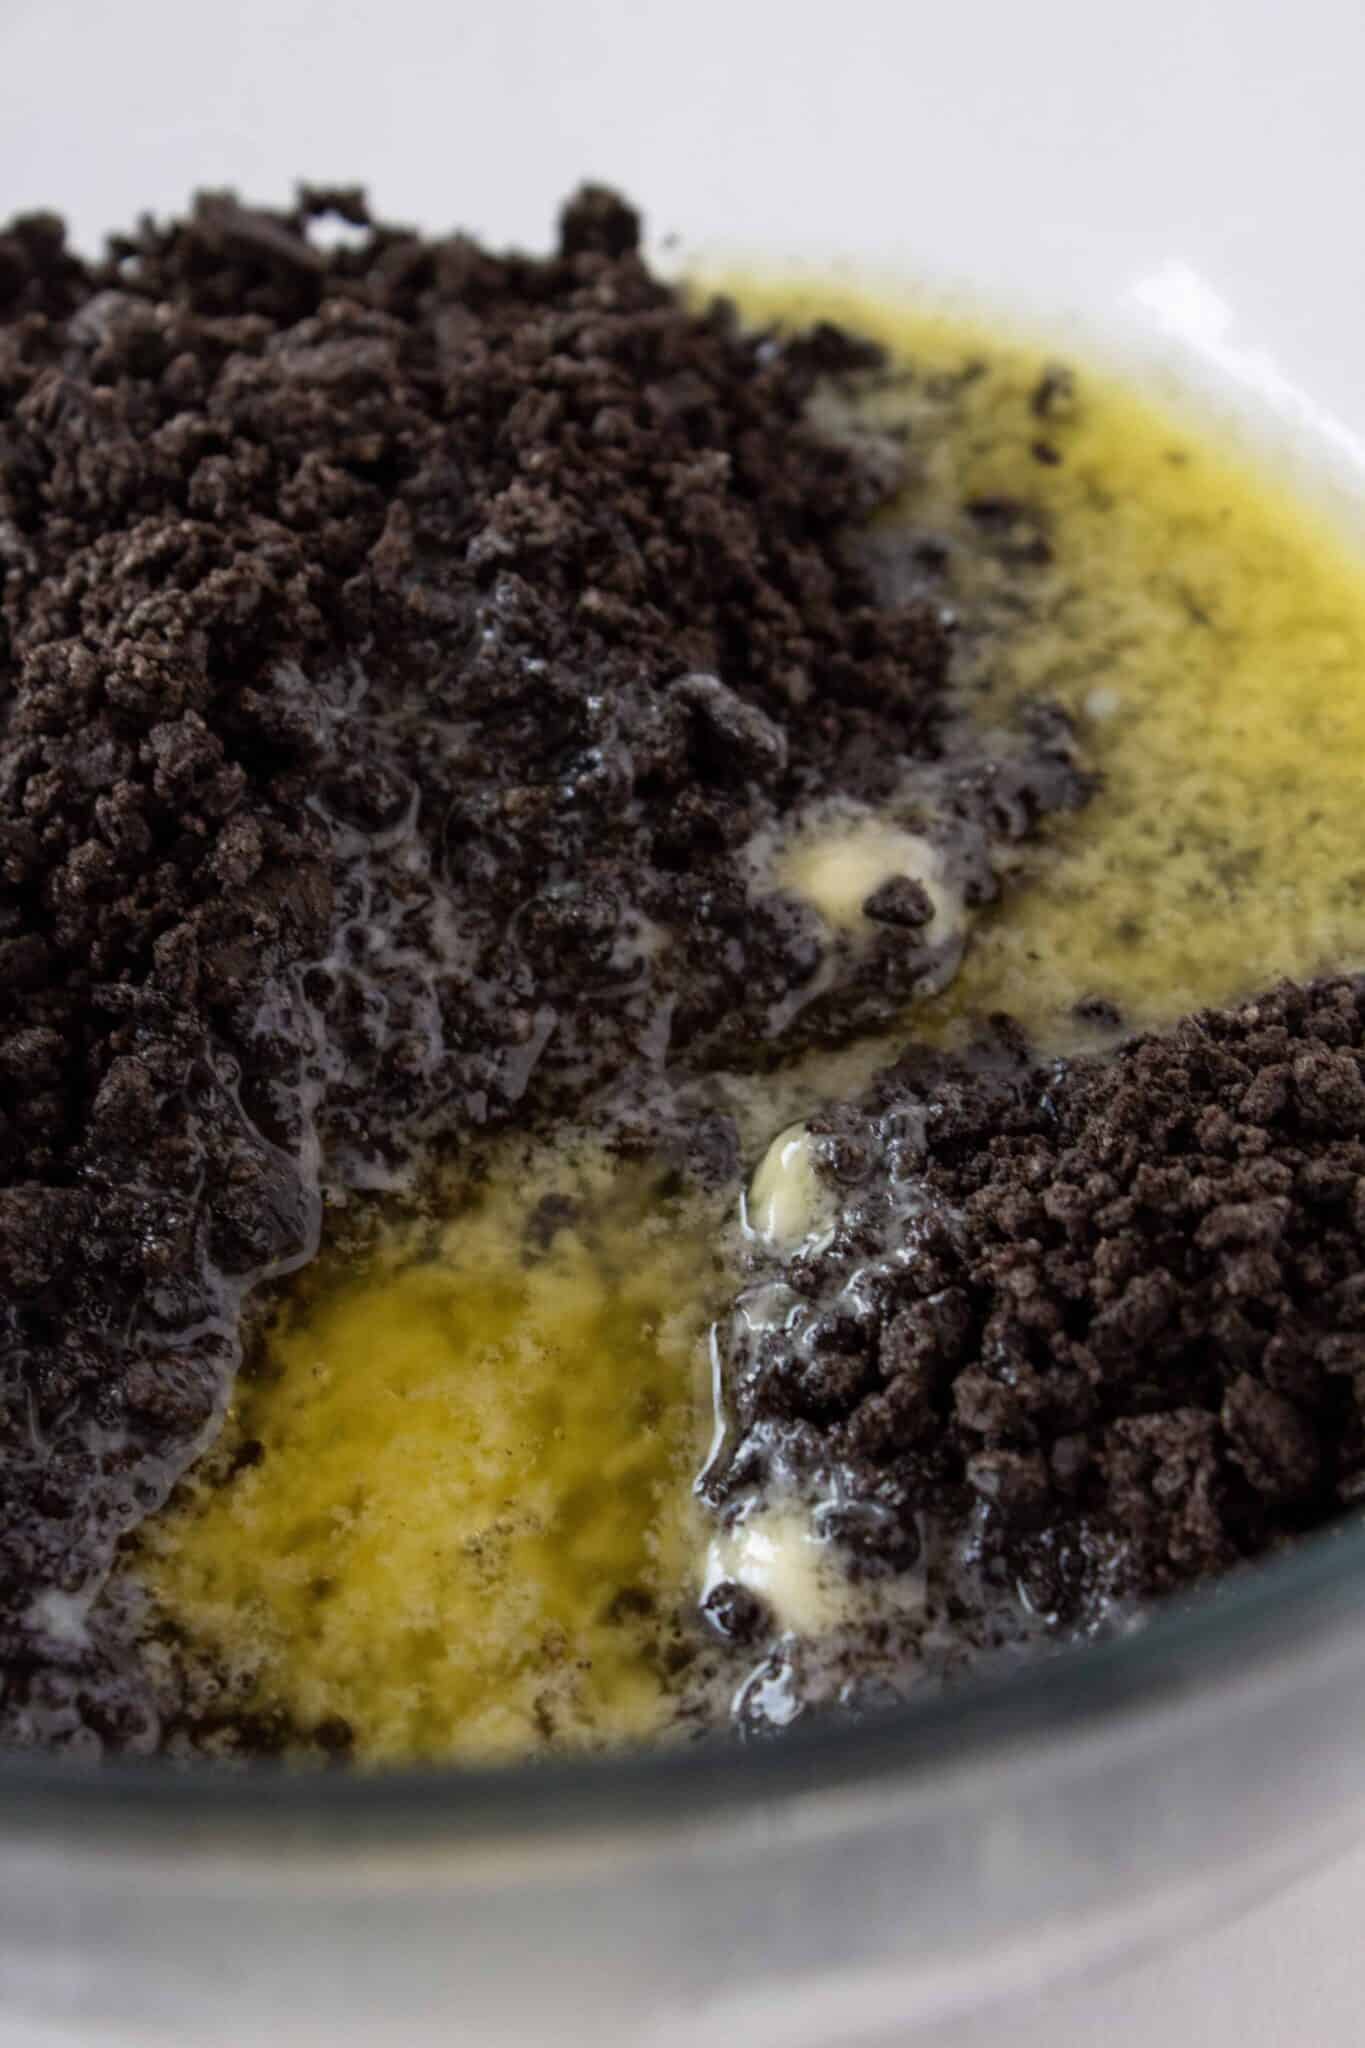
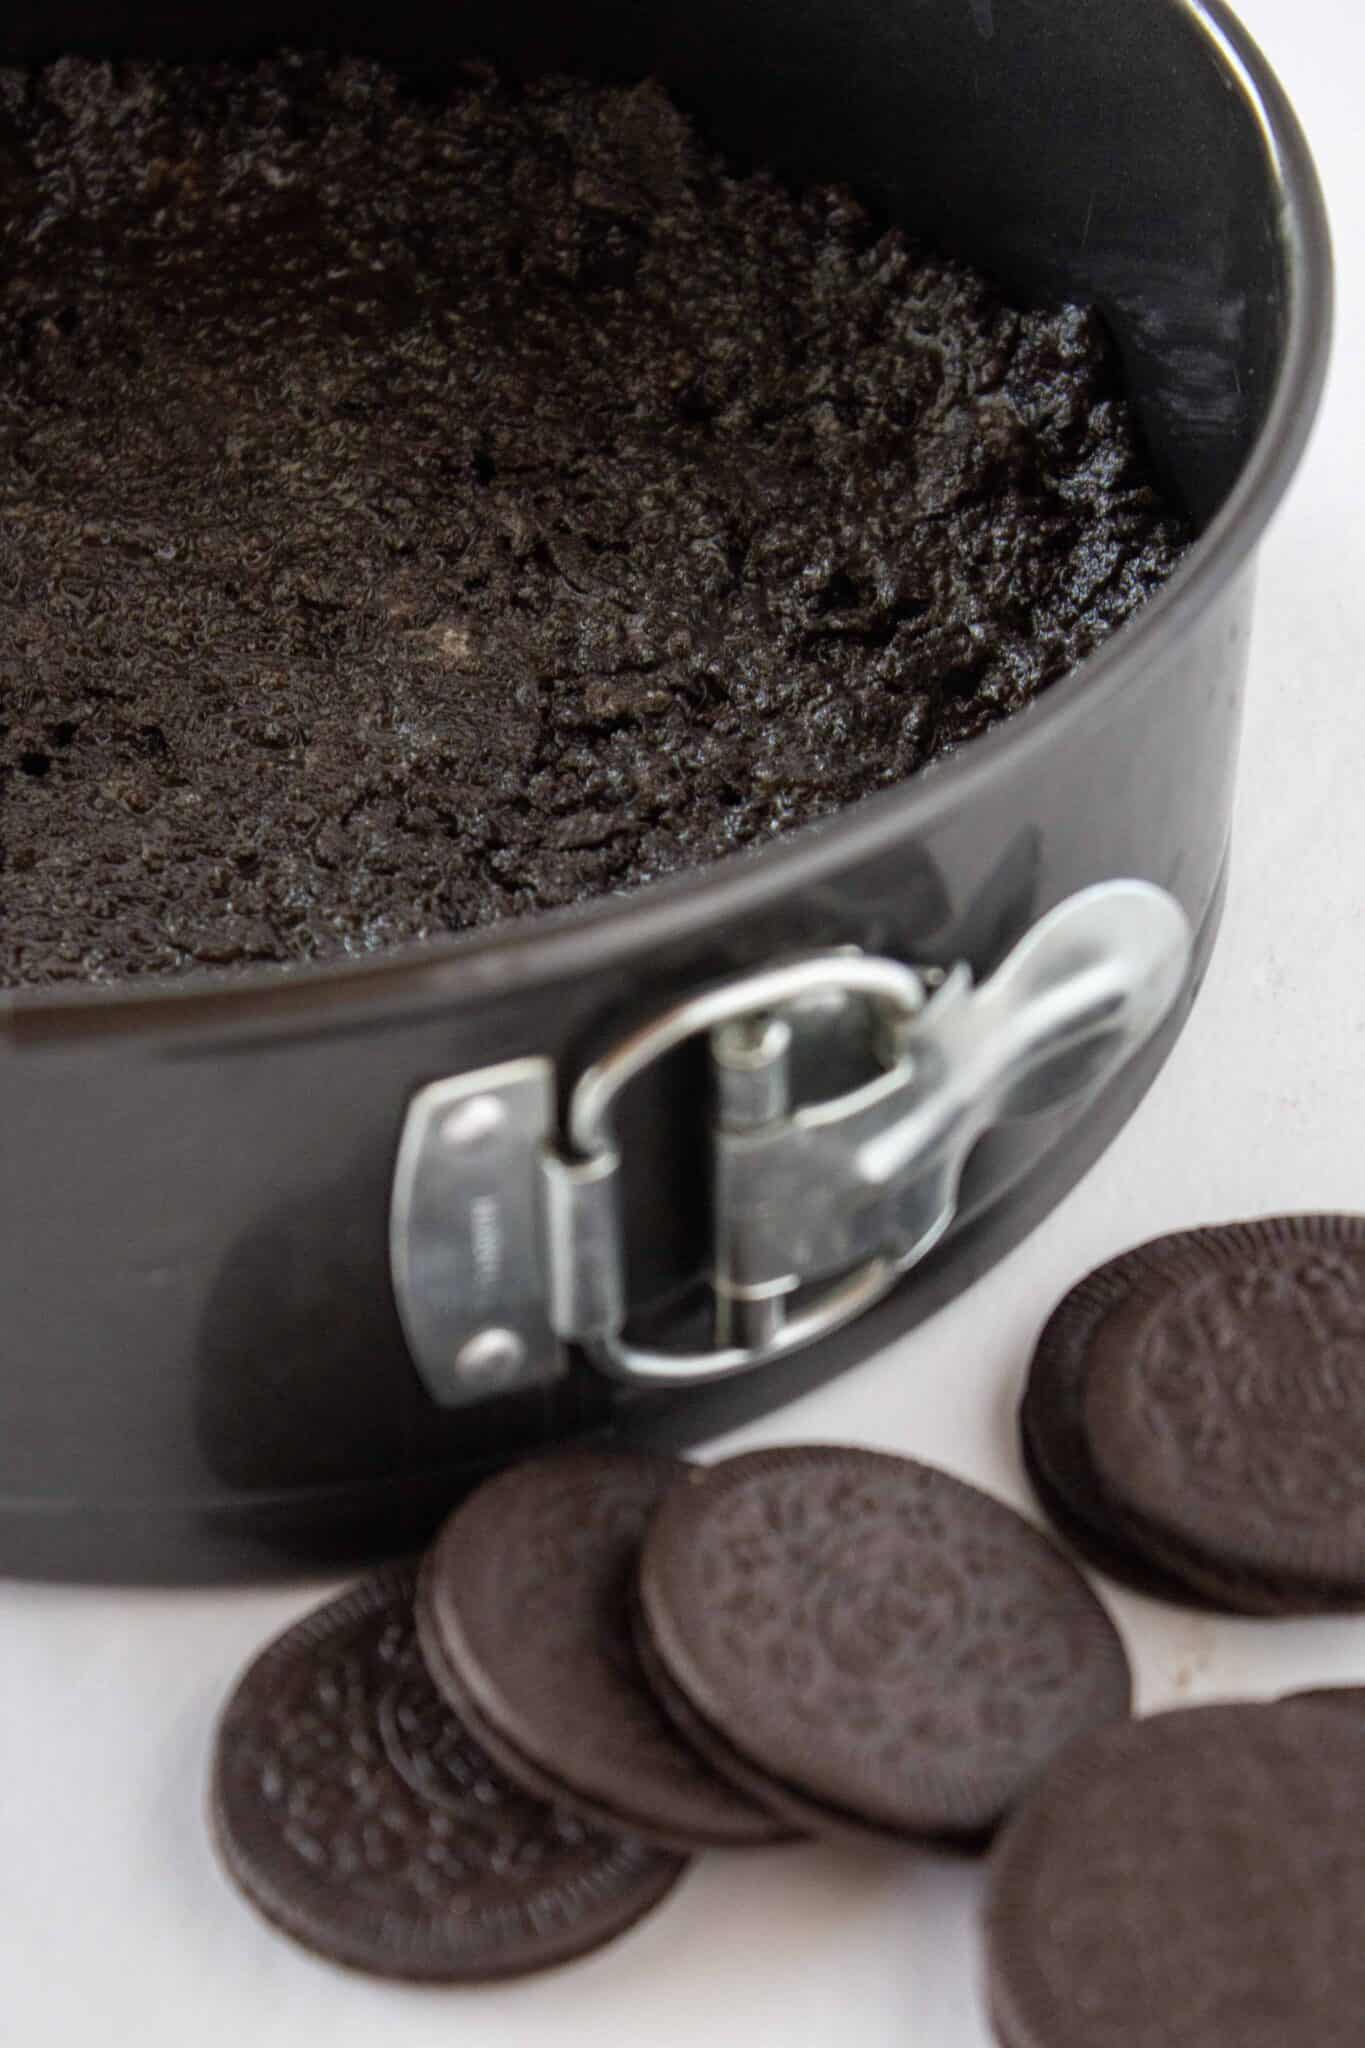
- Dump the buttery Oreo crumbs into your ungreased spring form pan and press it down firmly. Refrigerate the crust while you are working on the filling.
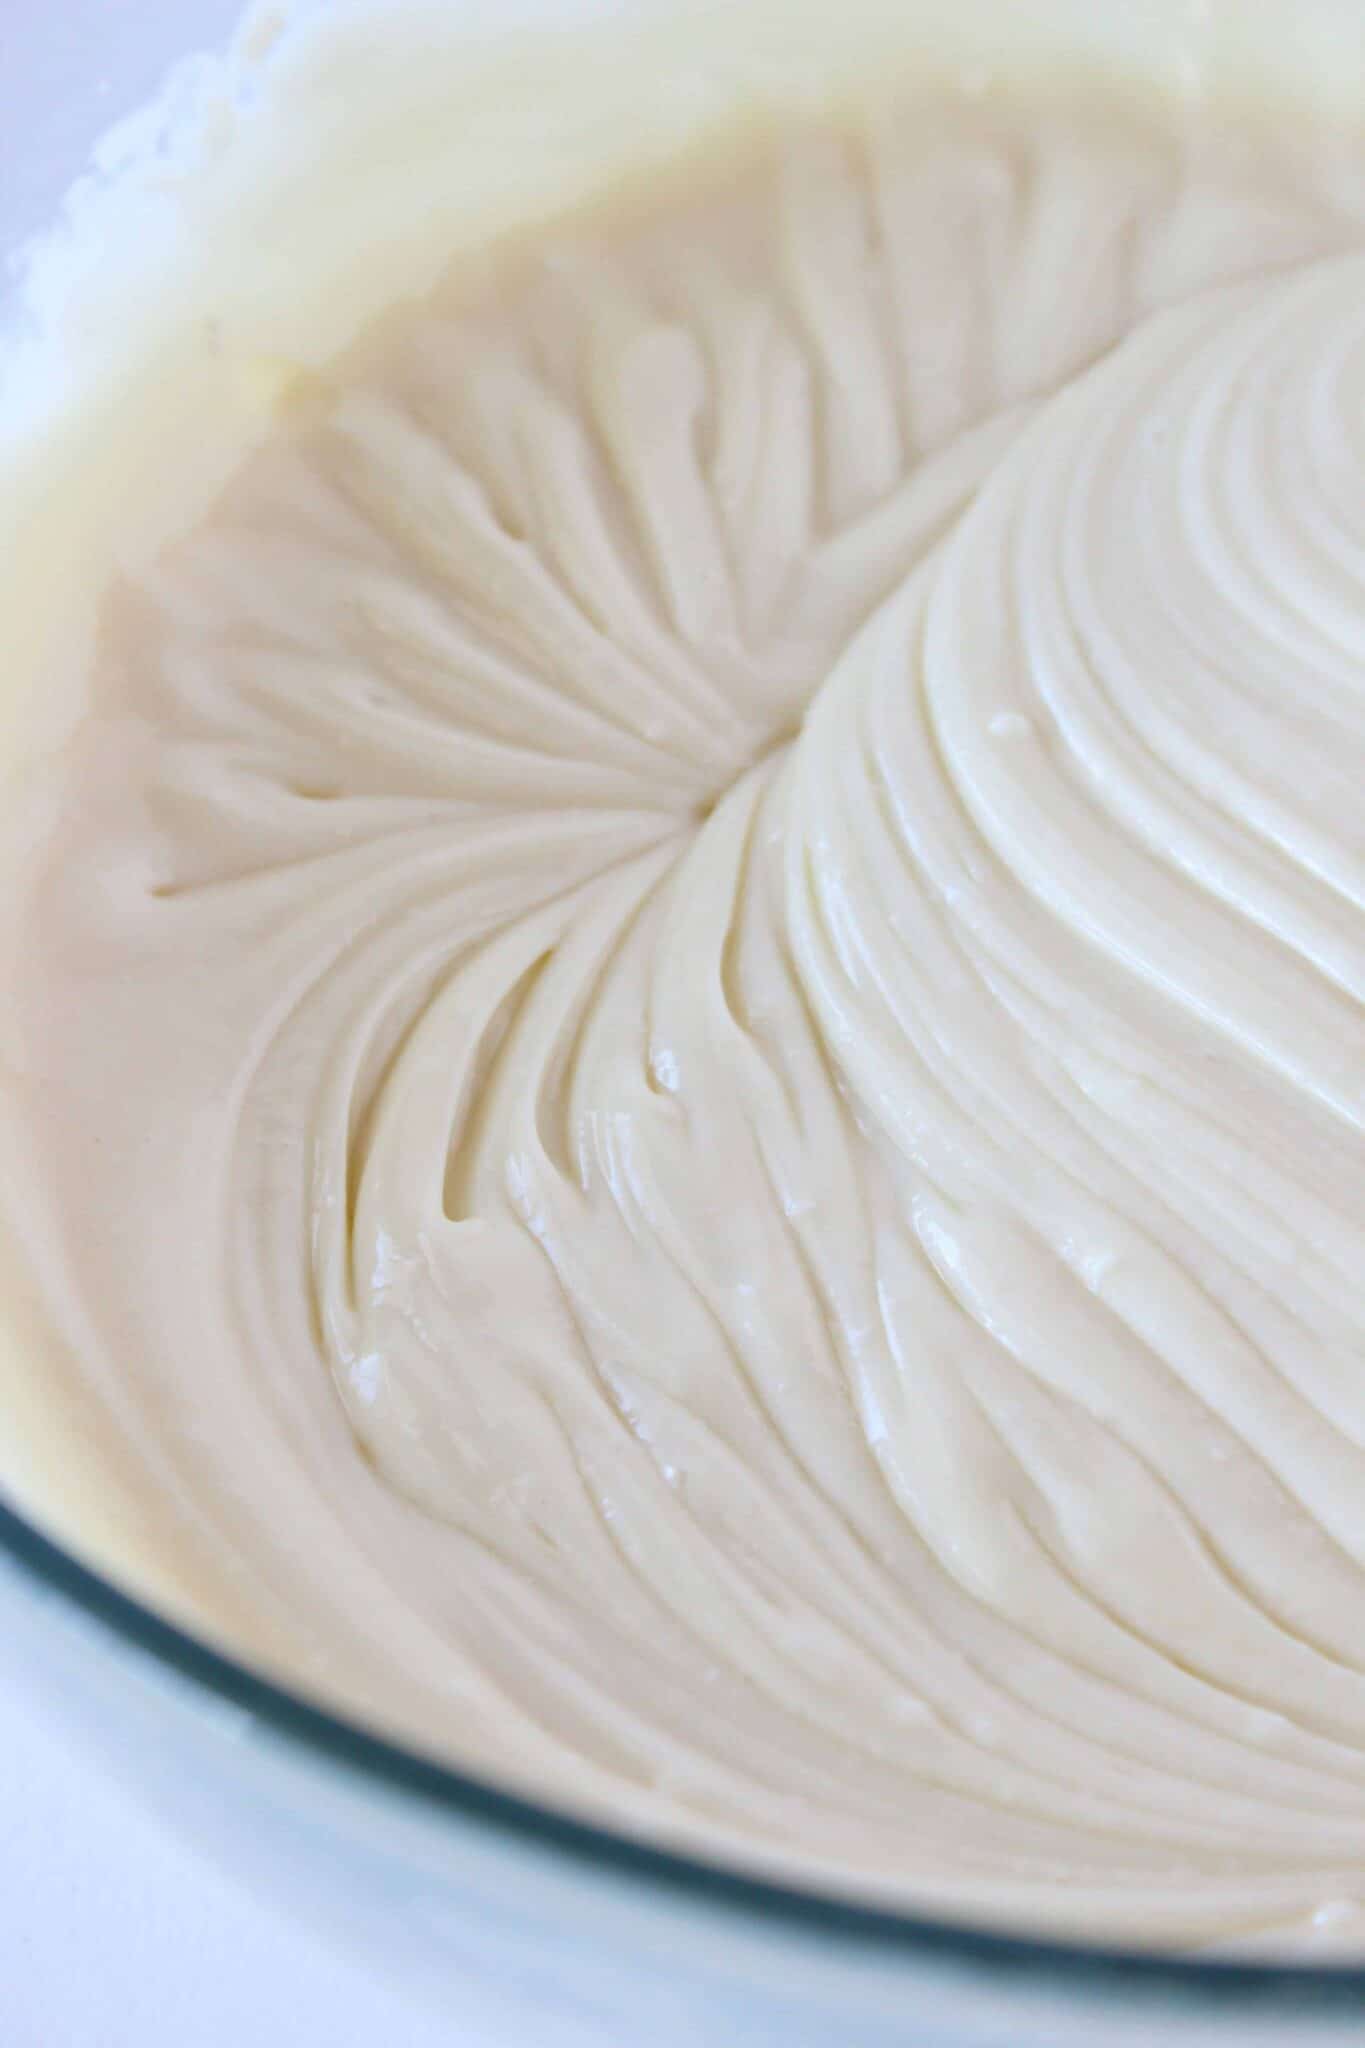
- Begin by combining two bricks of cream cheese and a can of sweetened condensed milk. I like to use a hand held mixer for this part. Add the peppermint extract, mix to combine. Then finally add the whipped topping. Be sure you are folding in the whipped topping to avoid deflating the cheesecake mixture. Divide the dough into two bowls, with 1/3 of the cheesecake in one bowl and 2/3 in another.
- To get the chocolate flavor into the cheesecake, melt 4 oz. of semi-sweet chocolate. Use the microwave to melt the chocolate starting with 30 seconds, stir and adding 10 second increments until it is smooth. Once the chocolate is melted and cooled add it to the cream cheese mixture bowl that is 2/3 full and mix to combine. Again, being sure to not deflate.
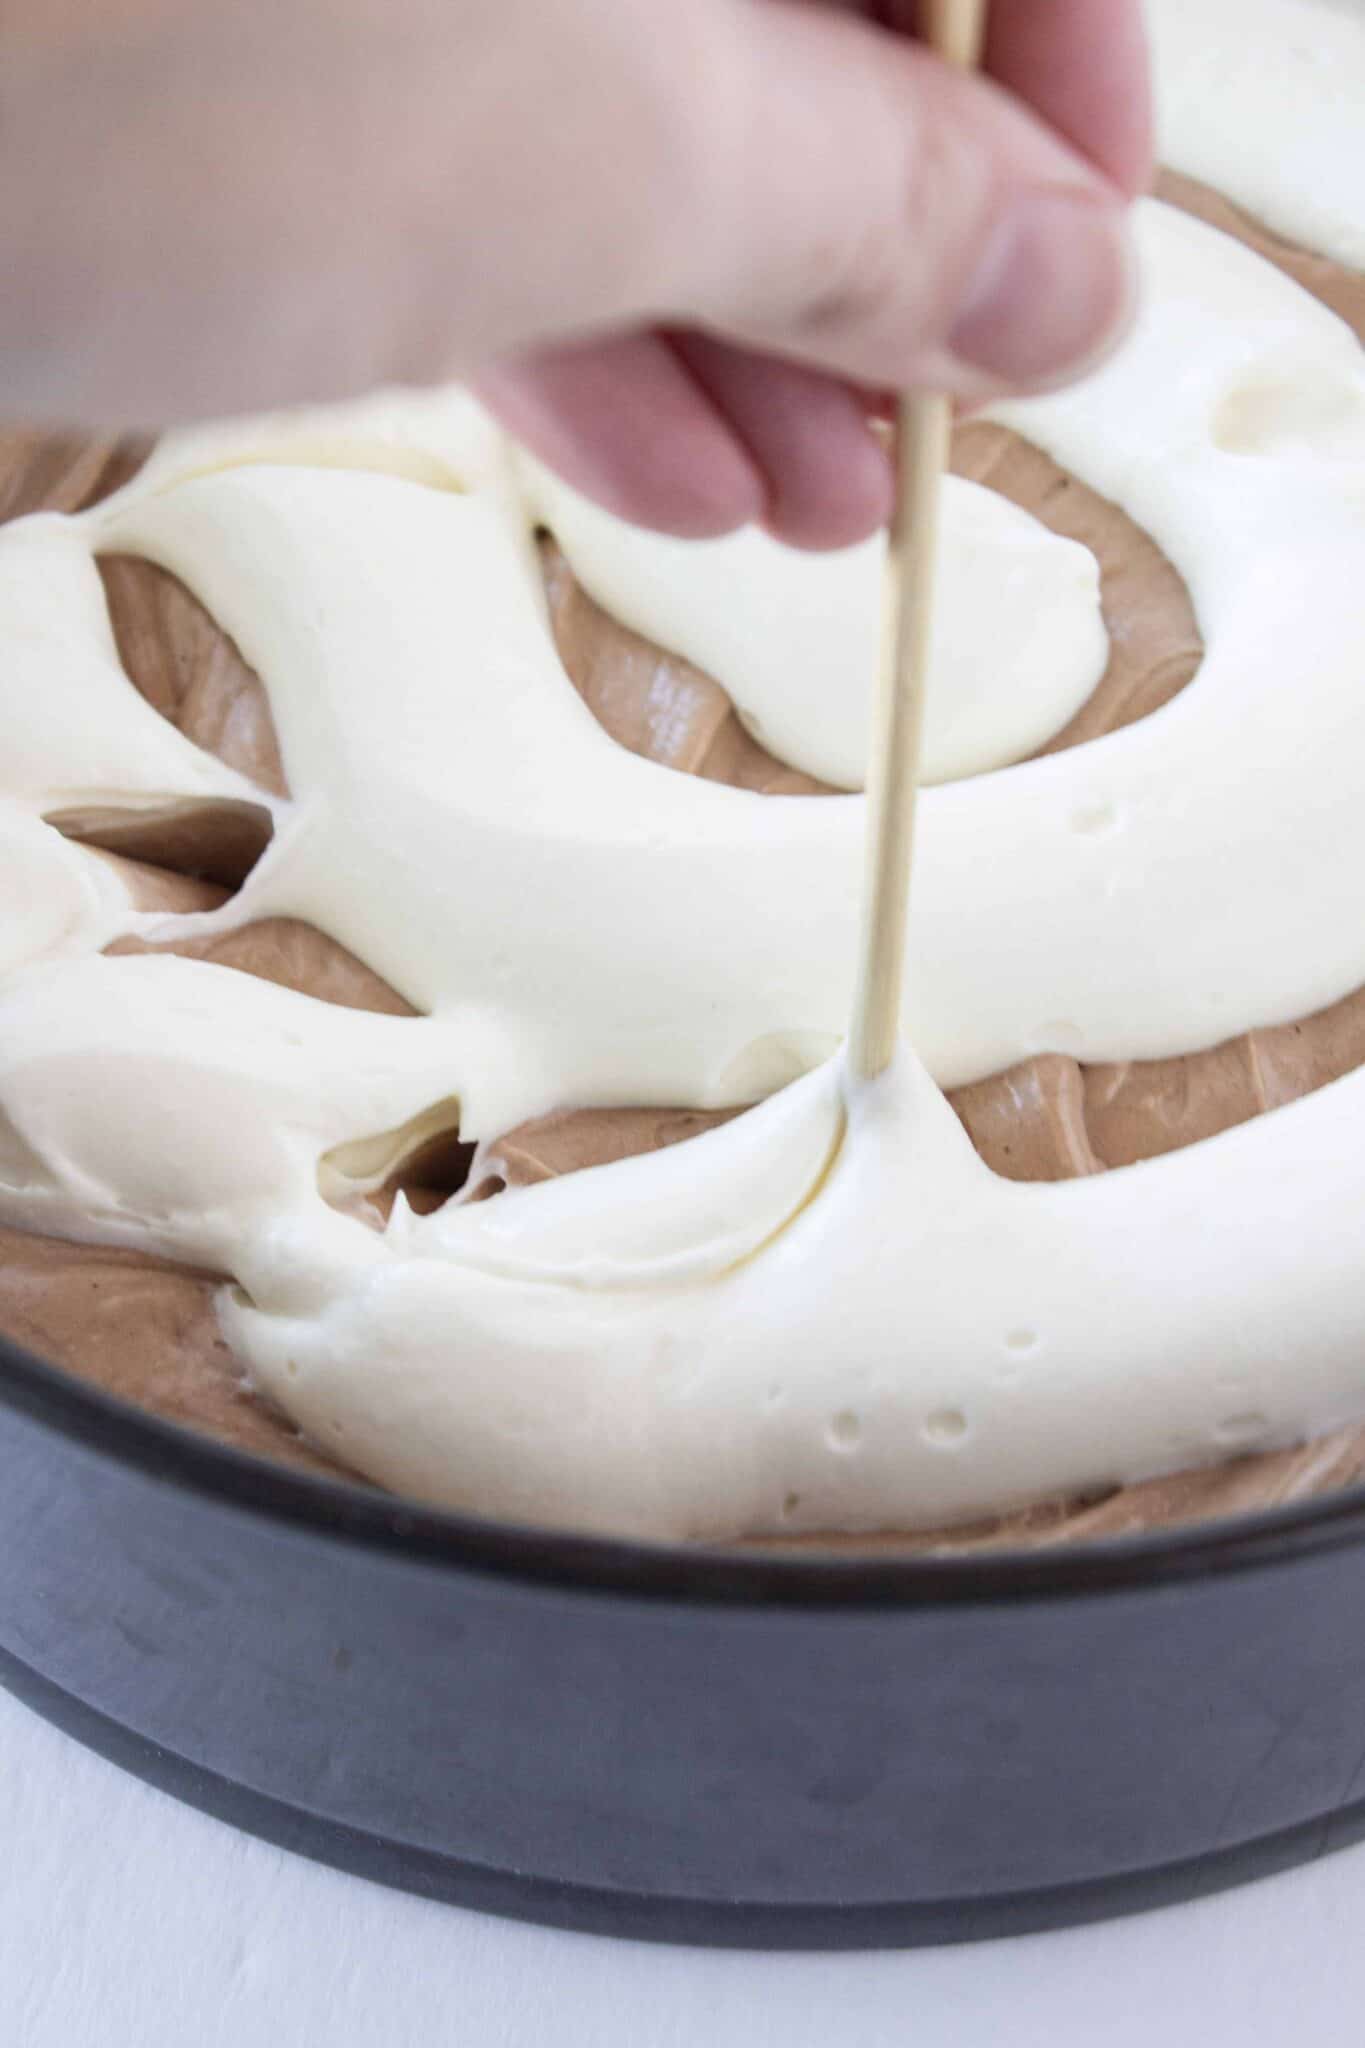
- To assemble, add the chocolate cheesecake batter to the crust first. Then add the regular cheesecake in dollops onto the top of the chocolate layer. Using a toothpick or skewer, drag the regular cheesecake through the chocolate.

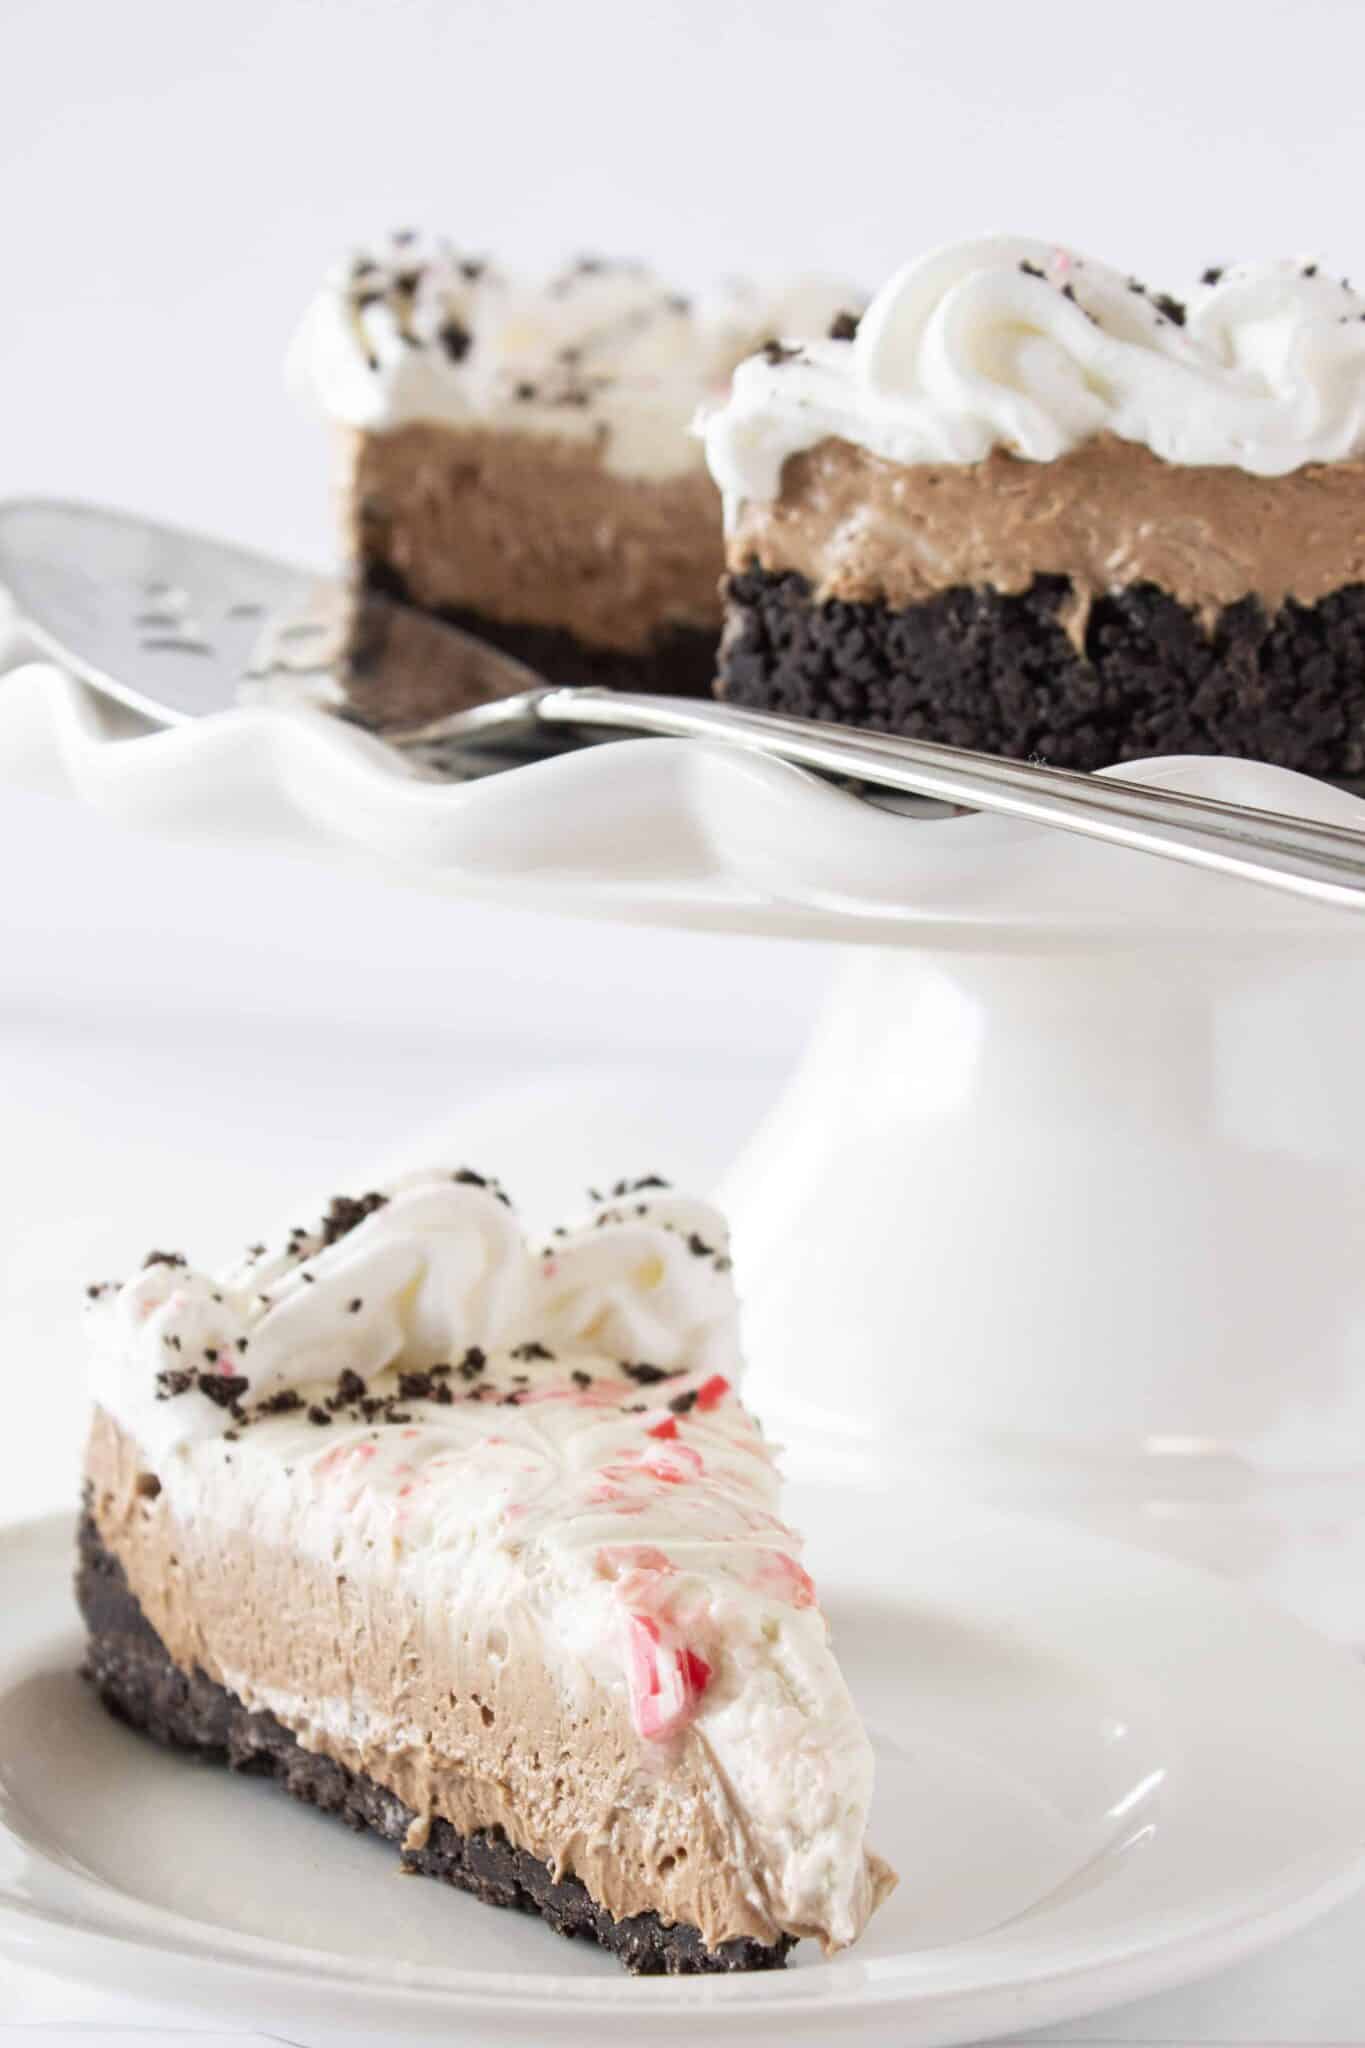
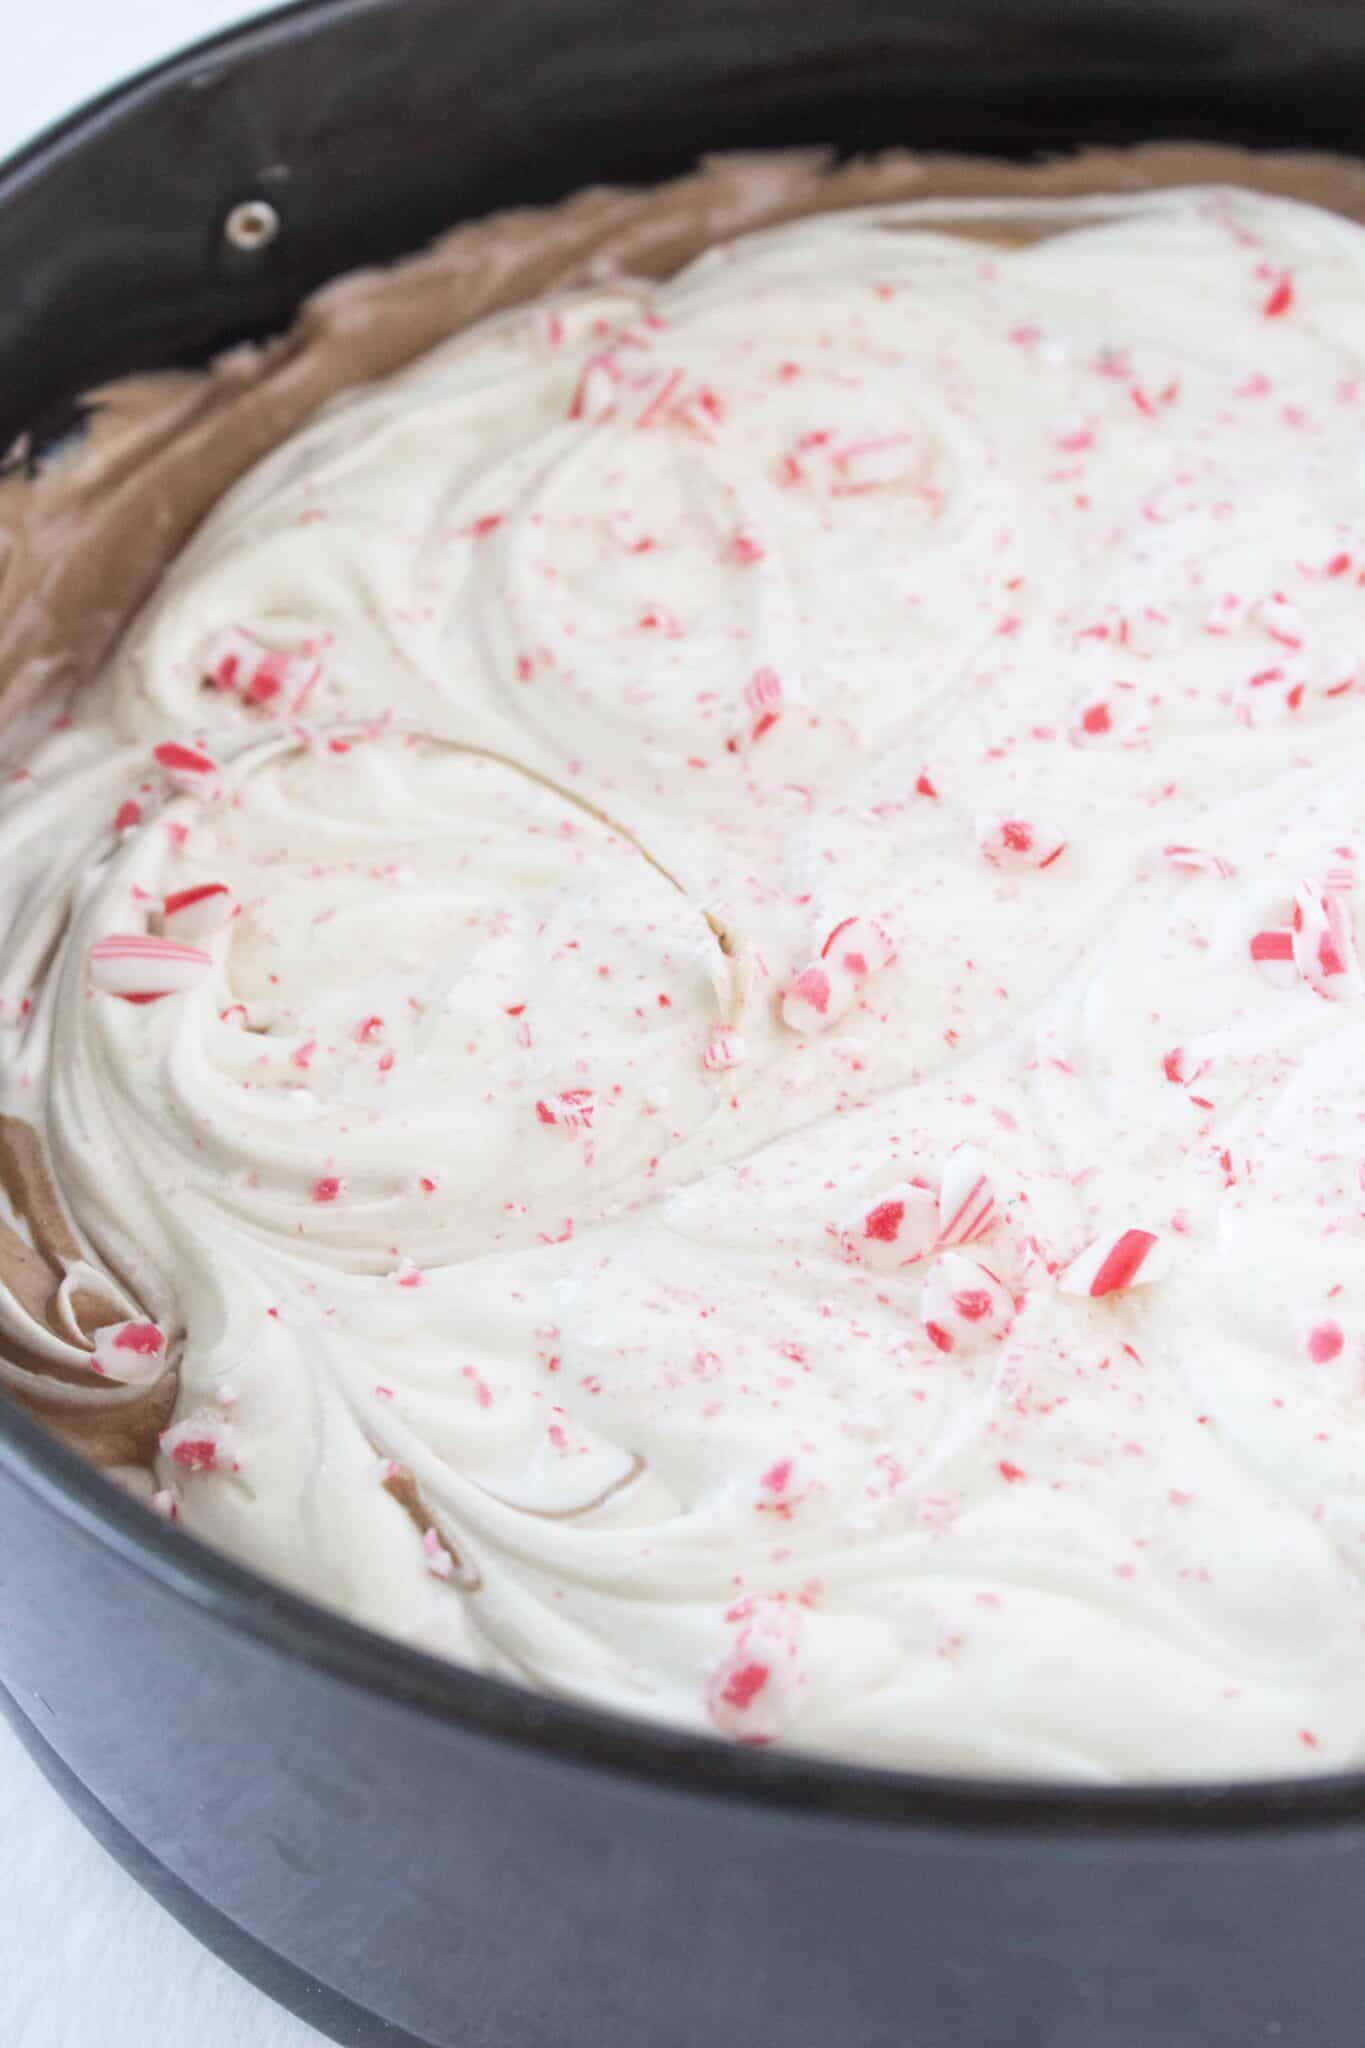
- Finish with a liberal sprinkling of crushed peppermint and refrigerate for at least 2 hours.
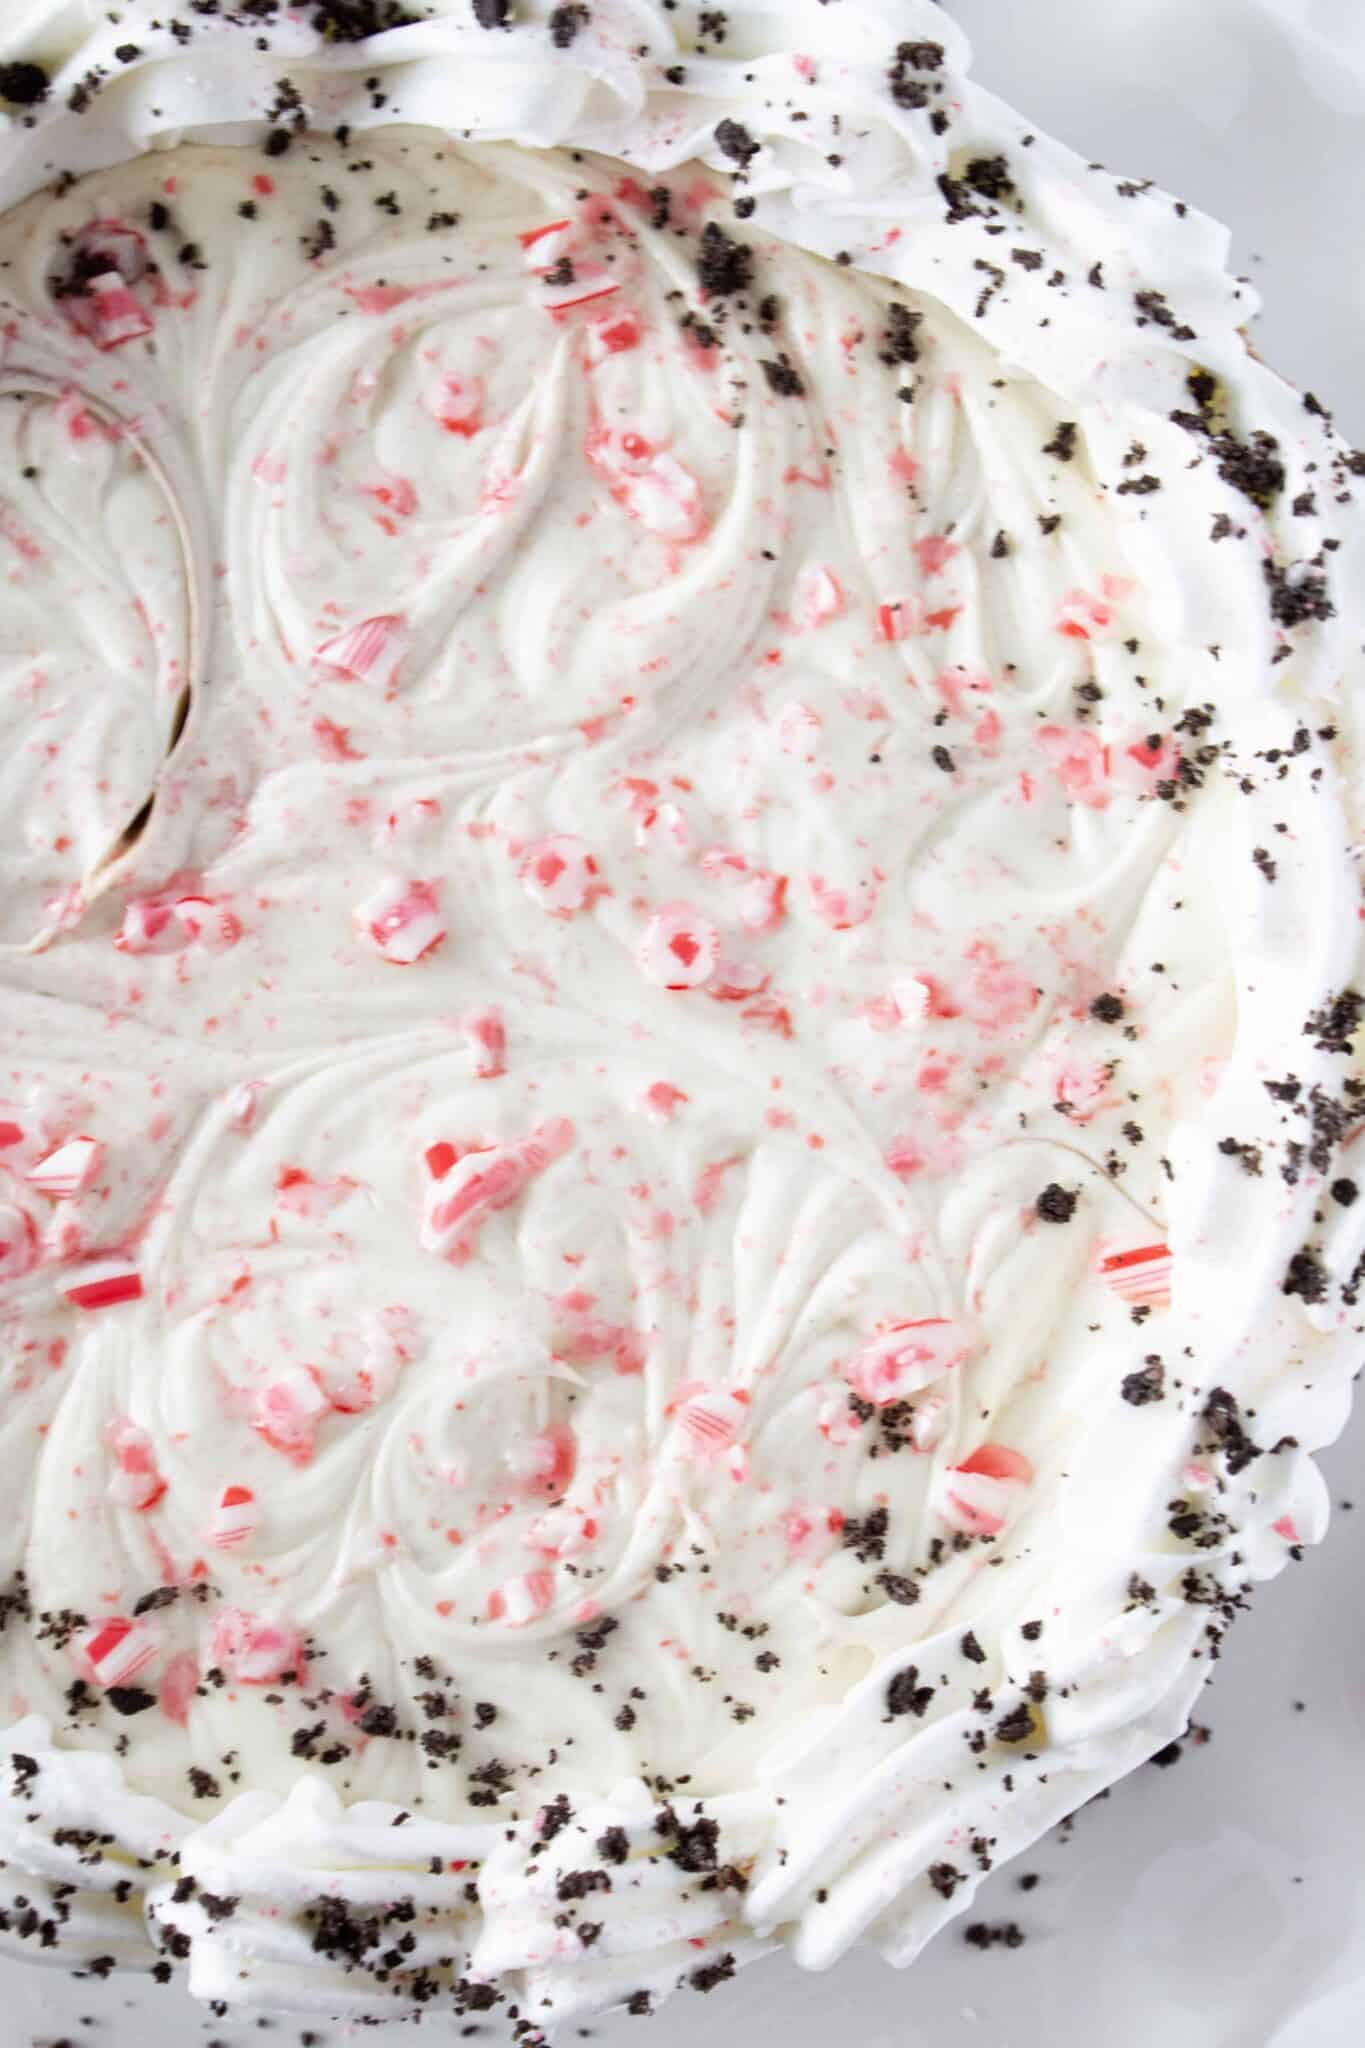
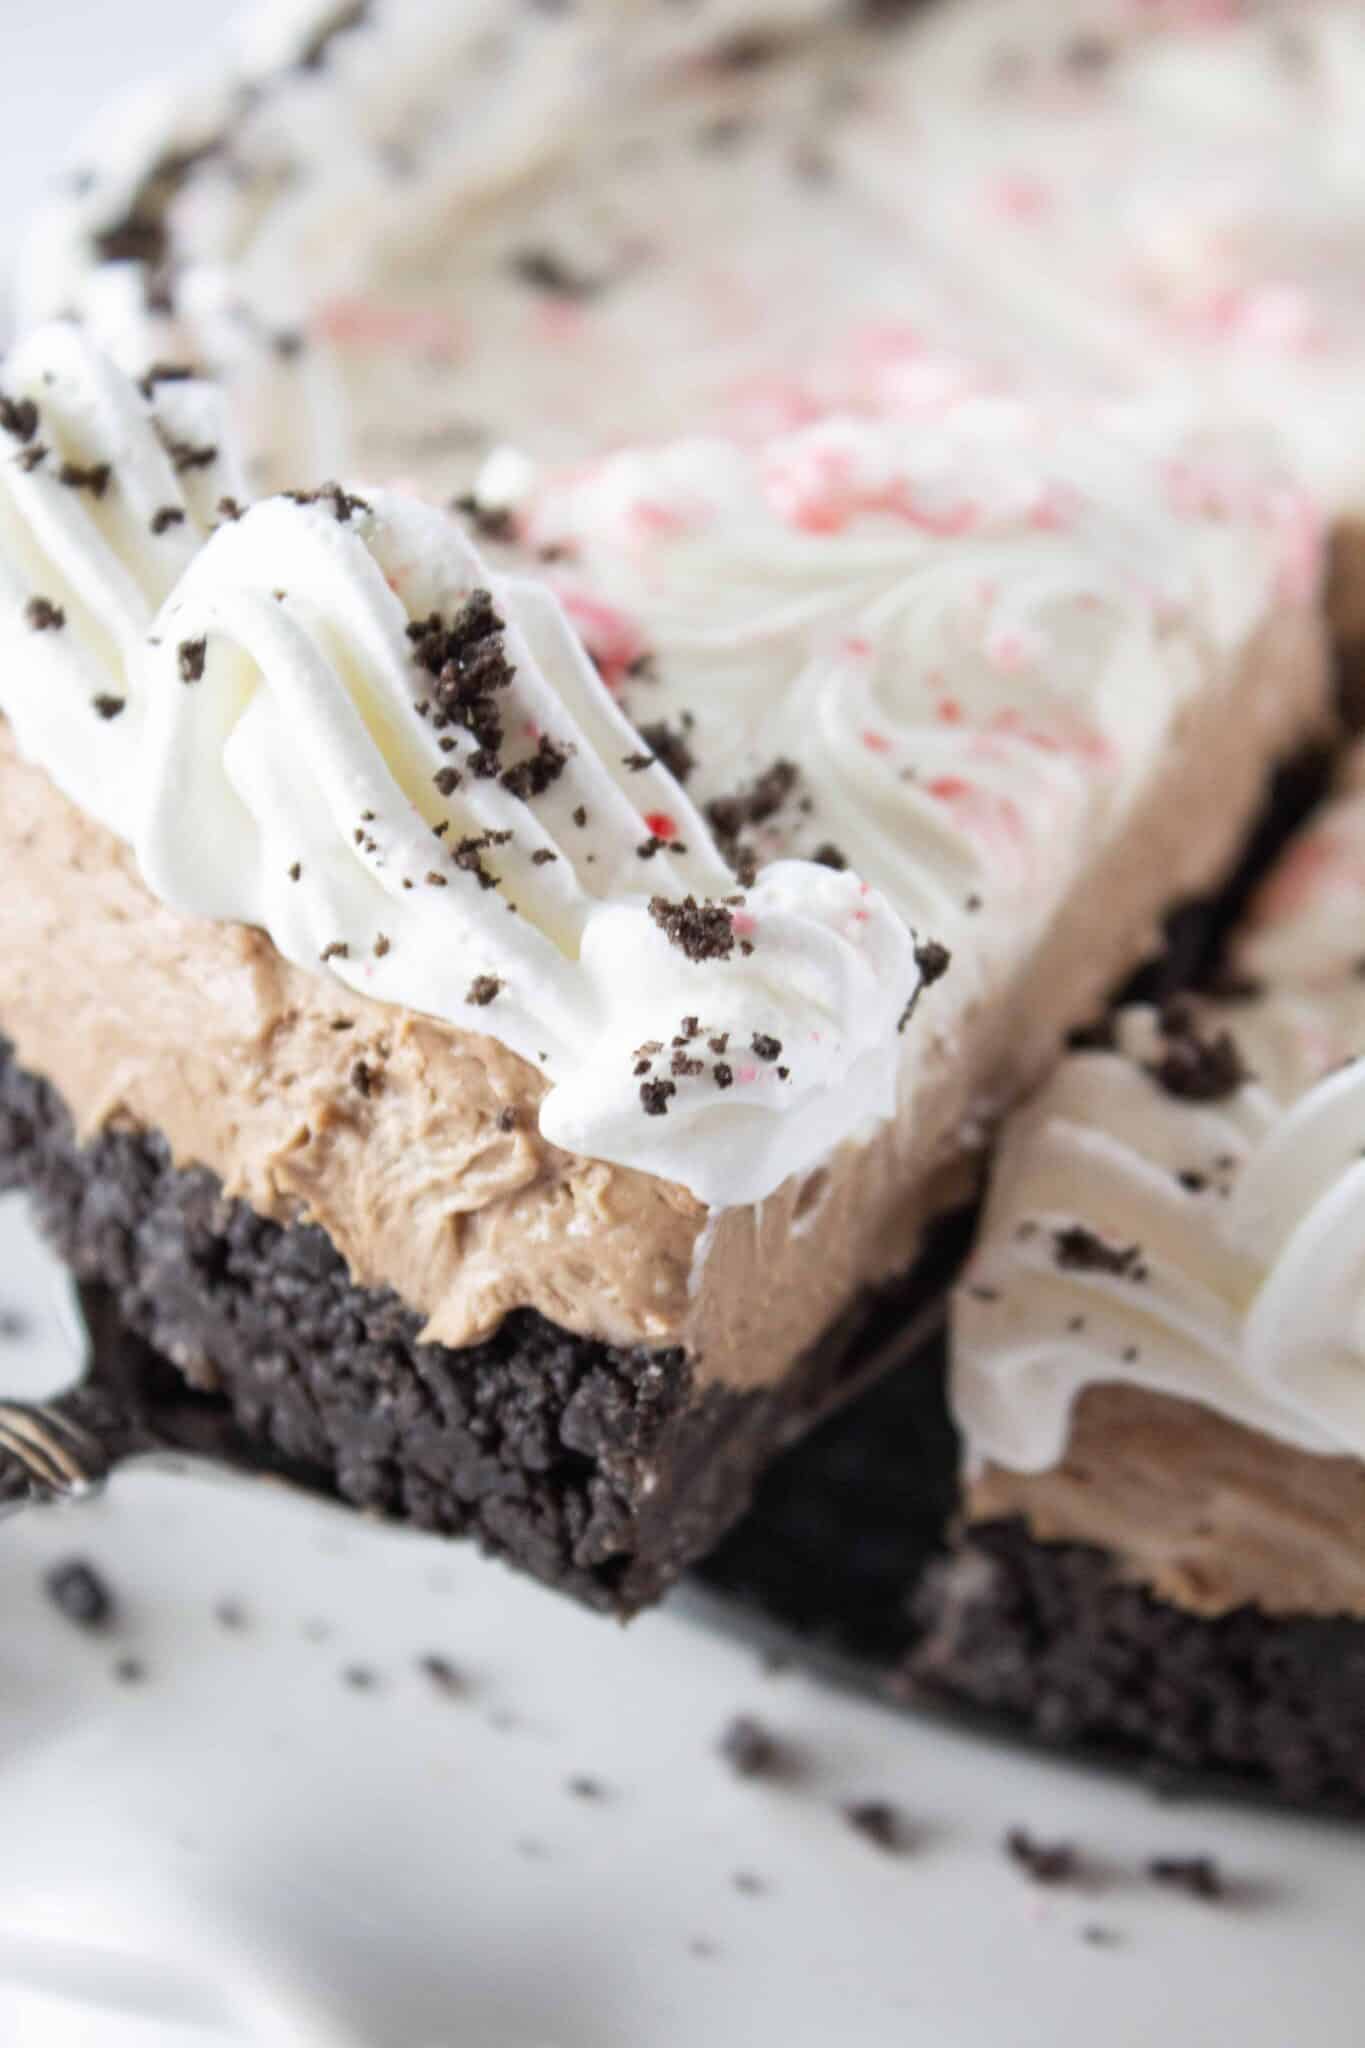
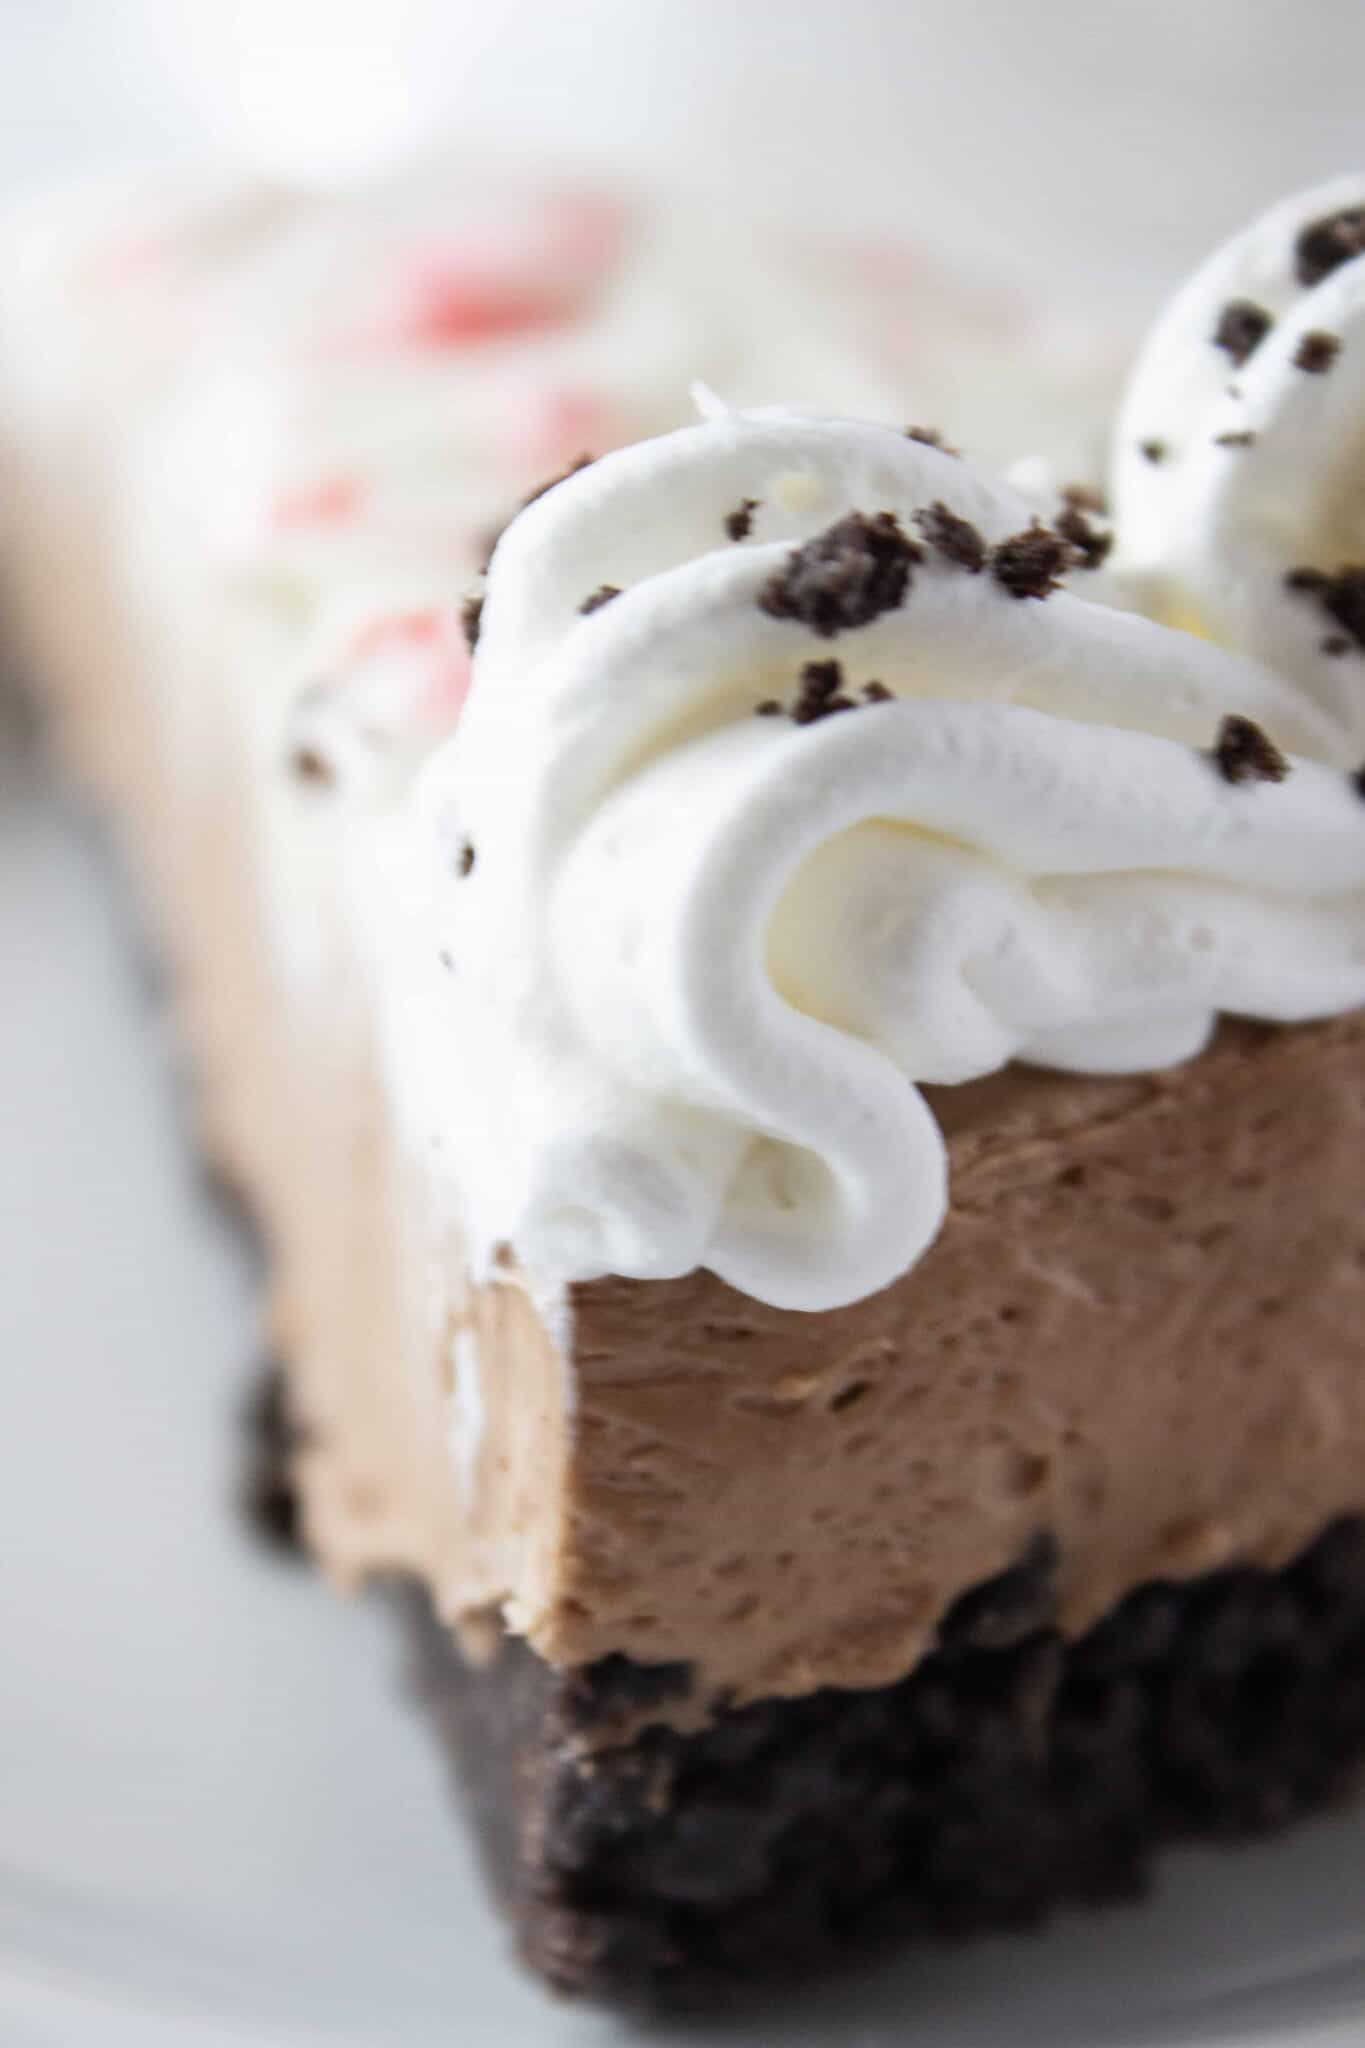
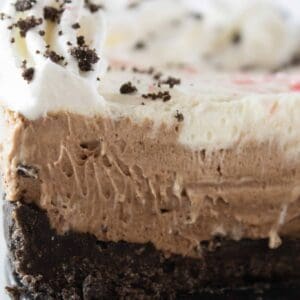
- Once the No Bake Chocolate Peppermint Cheesecake has set up completely, remove it from the refrigerator. Loosen the sides of the spring form pan and remove it. To finish the cheesecake add whipped topping {or homemade whipped cream} to the sides of the cheesecake. It looks great with a sprinkling of Oreo crumbs around the edge.
Now comes the best part!! Serving yourself and your friends a slice {or two}.
This baby has the crunch from the crust, followed by the creaminess of the cheesecake itself but I have to say that it is the perfectly kissed peppermint taste that makes this cheesecake!
It is so perfect for any holiday occasion or even on a random weeknight that you want to make special.
I am a firm believer that we shouldn’t wait for special occasions to enjoy wonderful things…life is too darn short!
What Kind of Pan Can I Use For a Cheesecake if I Don’t Have a Spring Form Pan?
If you don’t have a spring form pan, then I suggest using a large pie plate. You will still press the crust down firmly but you would want to make sure that you also went up the sides of the pie plate.
Otherwise, the steps for making the cheesecake are exactly the same.
Expert Tips
- If you don’t have a food processor, add the cookies to a Ziploc bag and crush them with a rolling pin.
- It might seem like a lot of butter in the crust and might even appear greasy, but the crumbs will absorb the butter as it sits. Because this crust isn’t baked, we want to be sure that it will hold together and the butter is our binder.
- The most important thing to remember is to have the cream cheese at room temperature. This will allow it to mix into the sweetened condensed milk easily and create a smooth mixture.
Do you love peppermint? Try these recipes…
No Bake Chocolate Peppermint Cheesecake
Ingredients
Oreo Cookie Crust
- 2 ¼ cup Oreo cookie crumbs
- ½ cup butter, melted
Chocolate Peppermint Cheesecake Filling
- 16 ounces cream cheese, softened
- 14 ounces sweetened condensed milk
- 8 ounces whipped topping
- 4 ounces semi-sweet chocolate, melted
- ½ teaspoon peppermint extract
- 1 candy cane, crushed
Optional Toppings:
- 2 Oreo cookies, broken into pieces
- 4 ounces whipped topping
Instructions
Oreo Cookie Crust
- Combine Oreo cookie crumbs and melted butter in a bowl. Mix together until everything is nicely incorporated. Pour into a ungreased spring form pan. Press crumbs firmly into the bottom and slightly up the sides of the spring form pan. Refrigerate until filling is ready.
Chocolate Peppermint Cheesecake Filling
- Mix together cream cheese and sweetened condensed milk until creamy using a hand held {or stand mixer}. Add the whipped topping and fold into the cream cheese mixture until combined. Add peppermint extract and gently mix until completely incorporated. Divide batter into two bowls {1/3 batter in 1 bowl and 2/3 batter in 1 bowl}.Melt semi-sweet chocolate in the microwave starting with 30 seconds, stir and then add 10 second increments until completely melted. Once cooled {but still melted} pour the chocolate into bowl filled with 2/3 of the cheesecake filling. Fold the chocolate into the mixture being sure not to deflate the batter.
Cheesecake Assembly
- Pour the chocolate cheesecake into the Oreo crust and smooth into an even layer. Take the other plain cheesecake batter add dollops on top of the chocolate cheesecake. Using a toothpick or skewer swirl the regular cheesecake into the chocolate cheesecake. This will create beautiful swirls on the top of the cheesecake. Top the cheesecake with the crushed candy cane and refrigerate for at least 2 hours.
- To serve, remove the outer portion of the spring form pan. If desired, pipe a border of whipped topping around the edge of the cheesecake and dust the whipped topping with crushed Oreo. Cut into wedges and serve. Refrigerate leftovers for up to 4 days.
Nutrition
Nutrition information is automatically calculated, so should only be used as an approximation.


I added this cheesecake to the Christmas dessert table and it disappeared first!