This post may contain affiliate sales links. Please see our full disclosure policy for details.
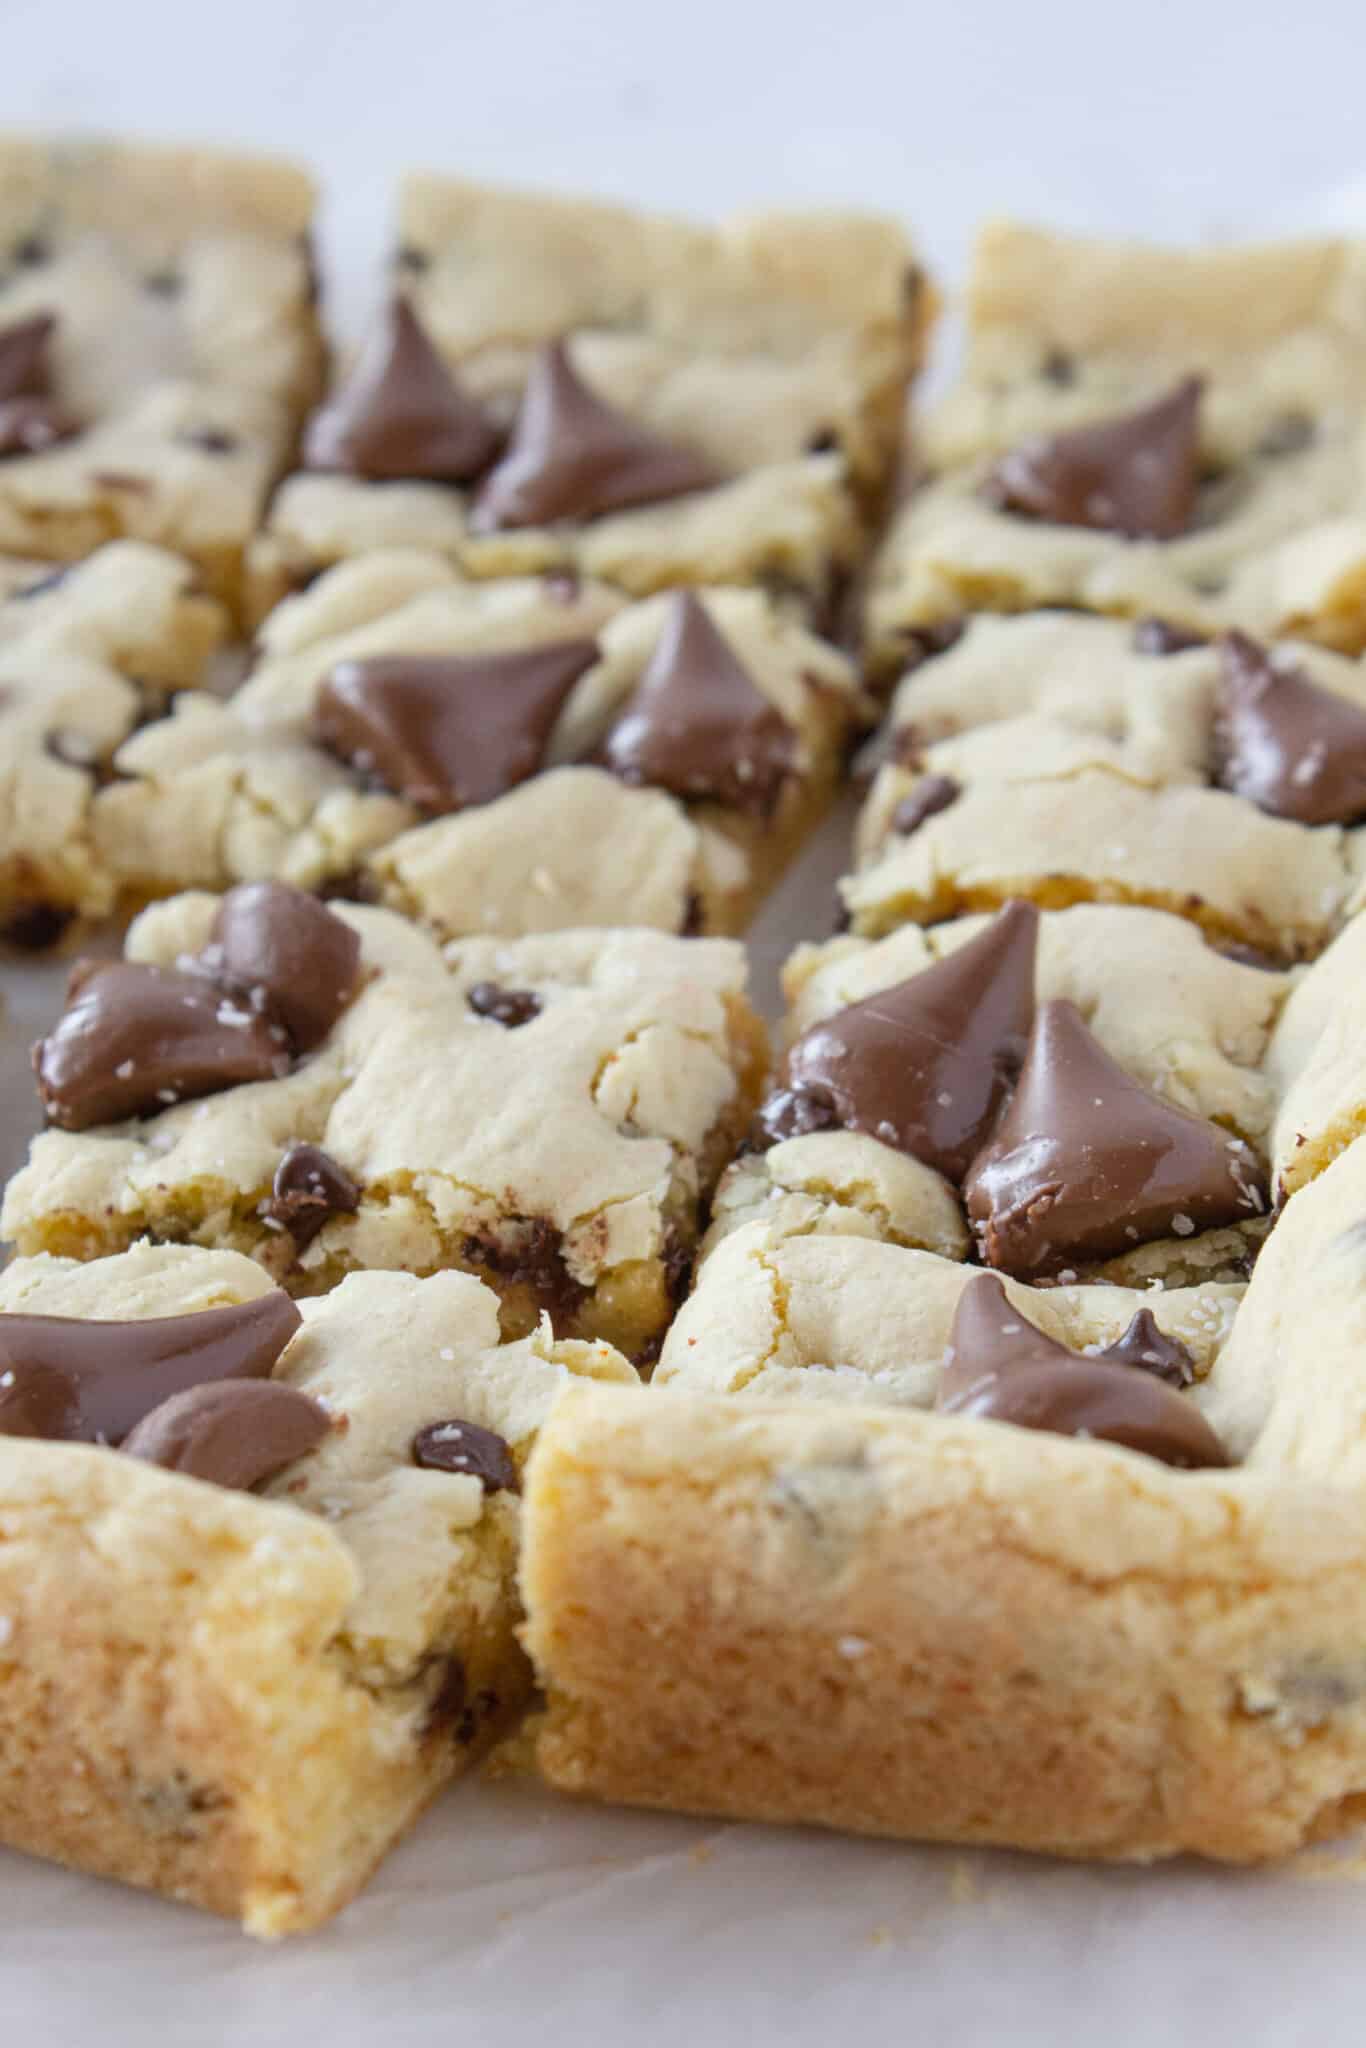
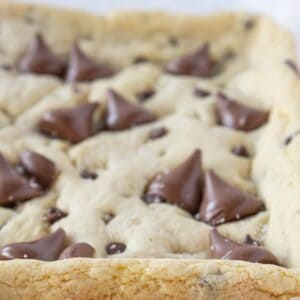
What do you get when you combine cake mix with brown butter and Hershey’s Kisses? The most wonderful and delicious Hersheys Kiss Cookie Bars EVER! You have gotta grab the recipe and make these babies for yourself!

When I set out to make these bars my idea was something a bit different but I am so glad that this is what I came up with.
There is something so amazing about adding brown butter to anything! If you haven’t made brown before then you have to! It is super easy to make and can take a dessert or dish from good to great.
My obsession with brown butter began with these Butter Pecan & Milk Chocolate Cookies and has only gotten more crazy since. Whether I am adding it to pasta for dinner or a Hershey’s Kiss Cookie Bars, I just can’t quite get enough.
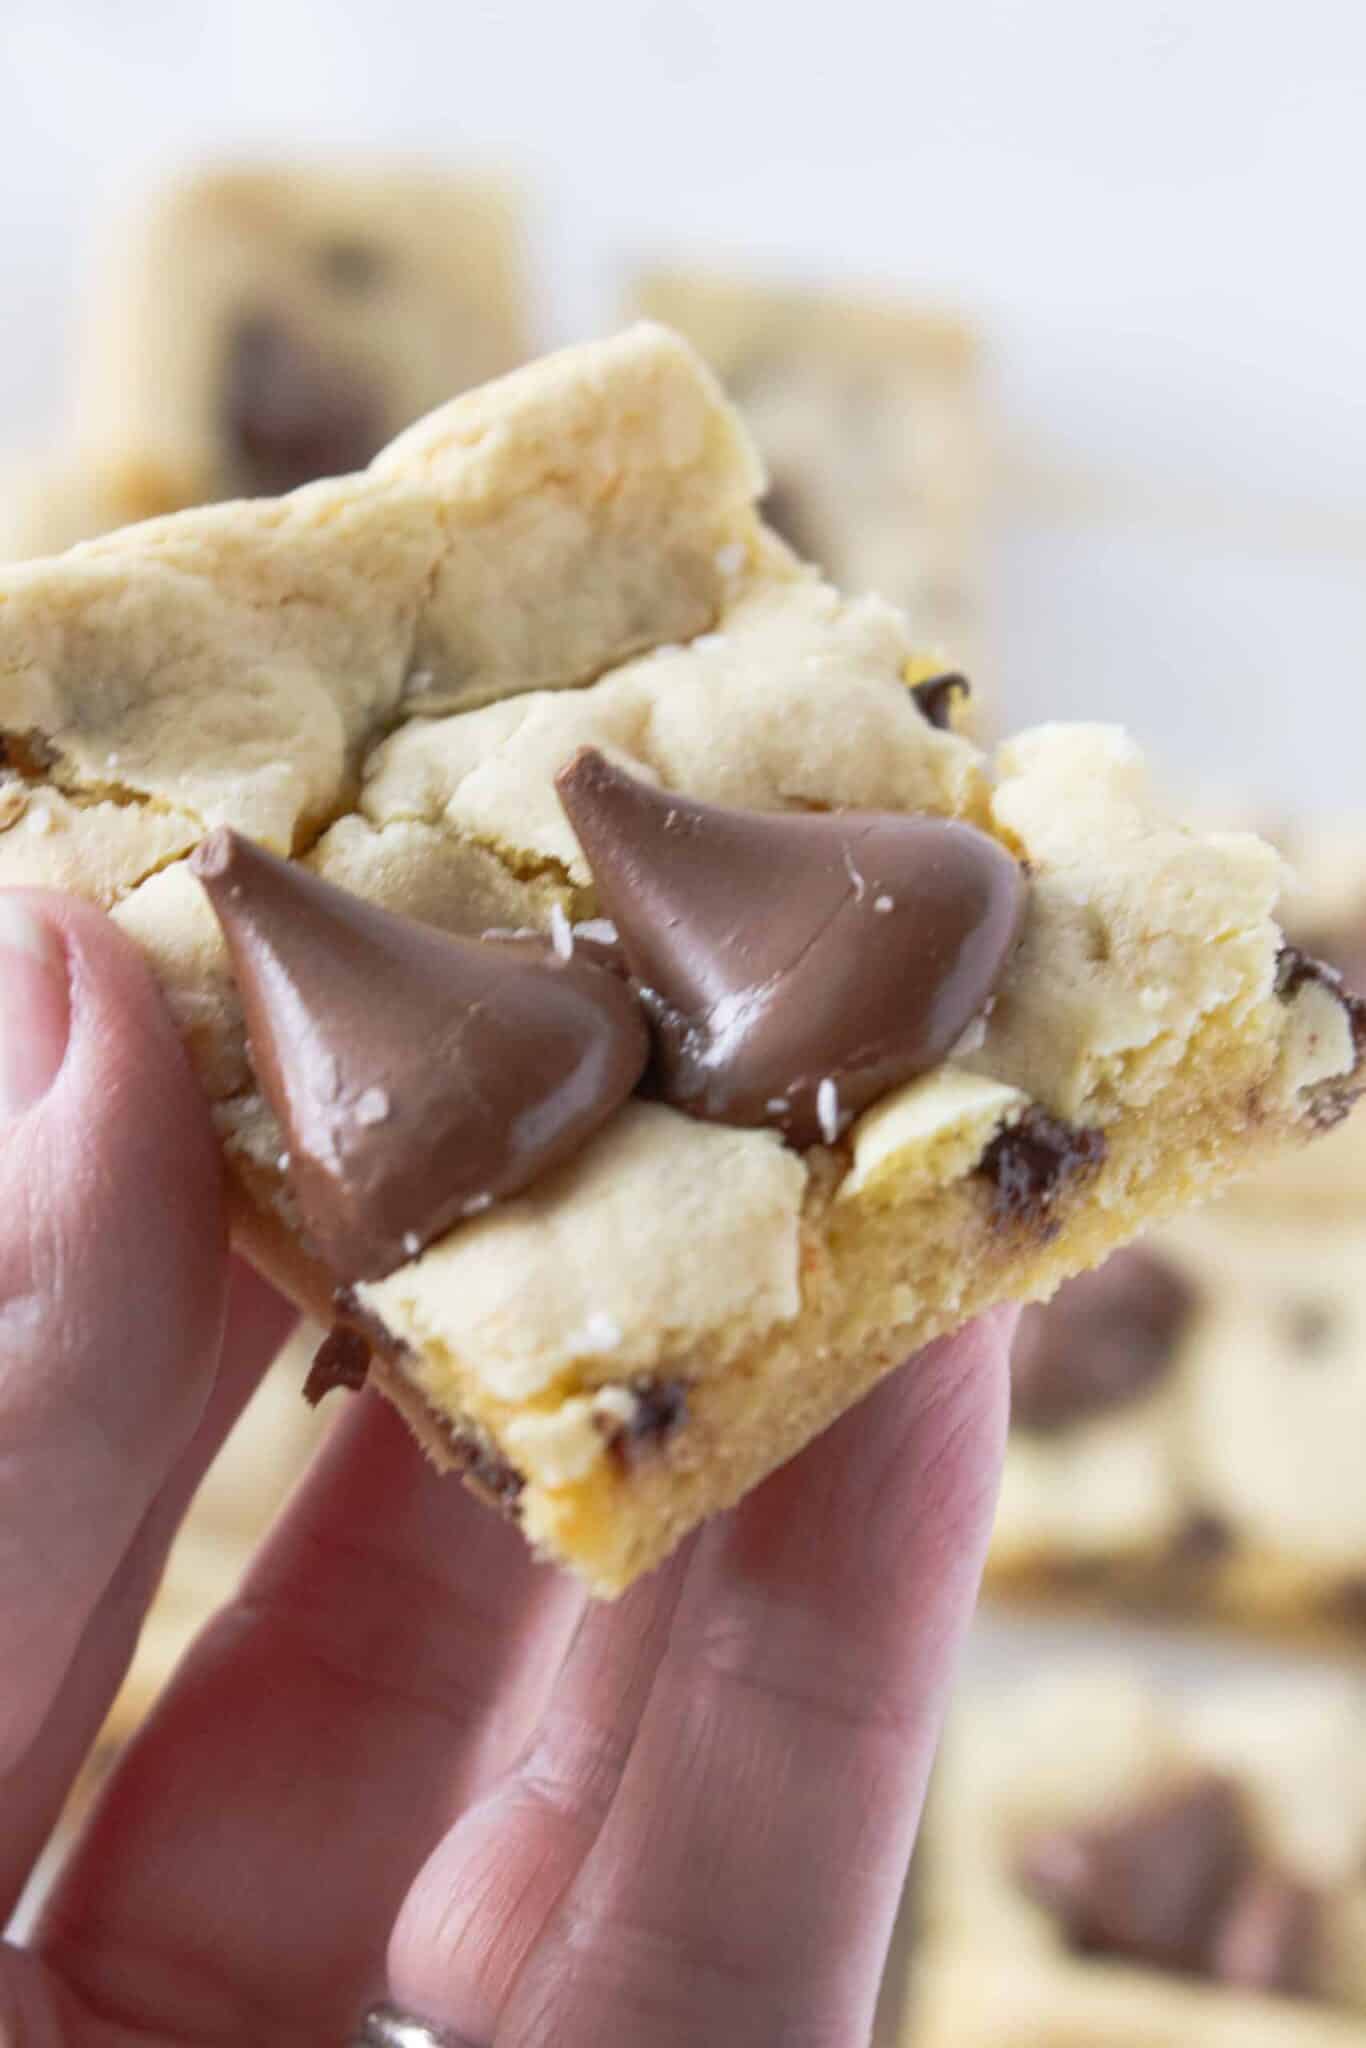
The nutty flavor it adds is magical but what takes these Hershey’s Kiss Cookie Bars over the top is the actual Hershey’s Kisses with the sprinkling of kosher salt.
From the simpleness of the cake mix base, the delicious brown butter, Hershey’s Kisses and kosher salt…these bars are make me as happy as my Monster Cookie Bars, Chocolate Chip Cookie Bars, and Salted Caramel Butter Bars. I am certain they will make you do a happy dance, too.
How to make Hersheys Kiss Cookie Bars
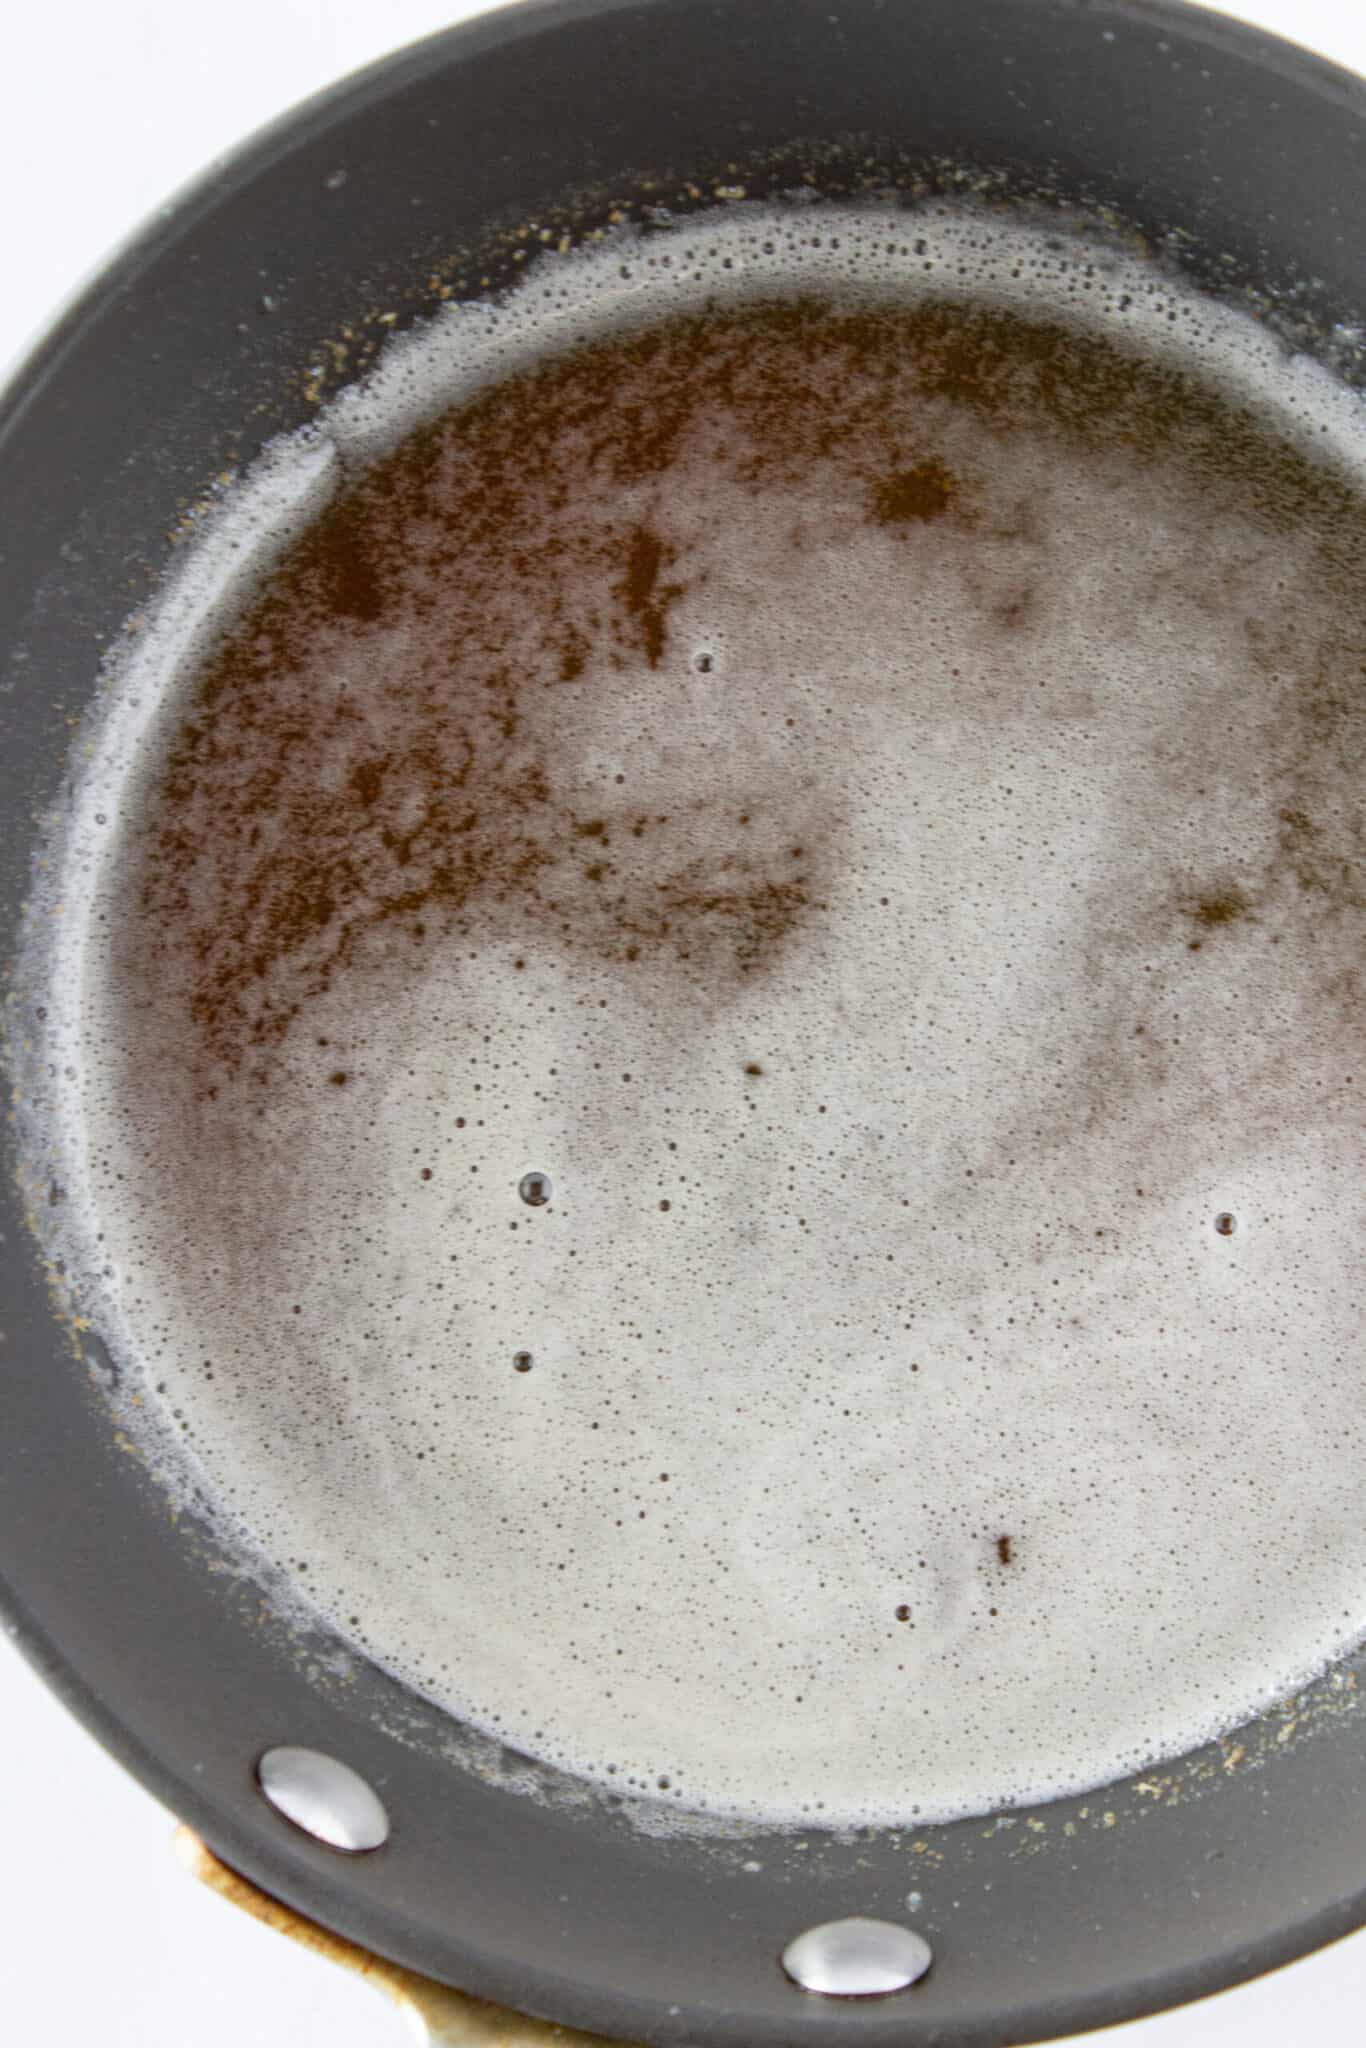
- Add butter to a skillet or saucepan over medium heat. As the butter melts begin to move it around the pan for 5-8 minutes. The butter will turn golden brown, foam up and sizzle a bit around the edges. Once you can smell the nutty flavor remove it from the heat and allow it to cool before adding it to the recipe.
- Next, combine the cake mix, brown butter {that has cooled…we don’t want to scramble the eggs}, milk and eggs. Mix with a hand held mixer or by hand until you have a thick and sticky dough.
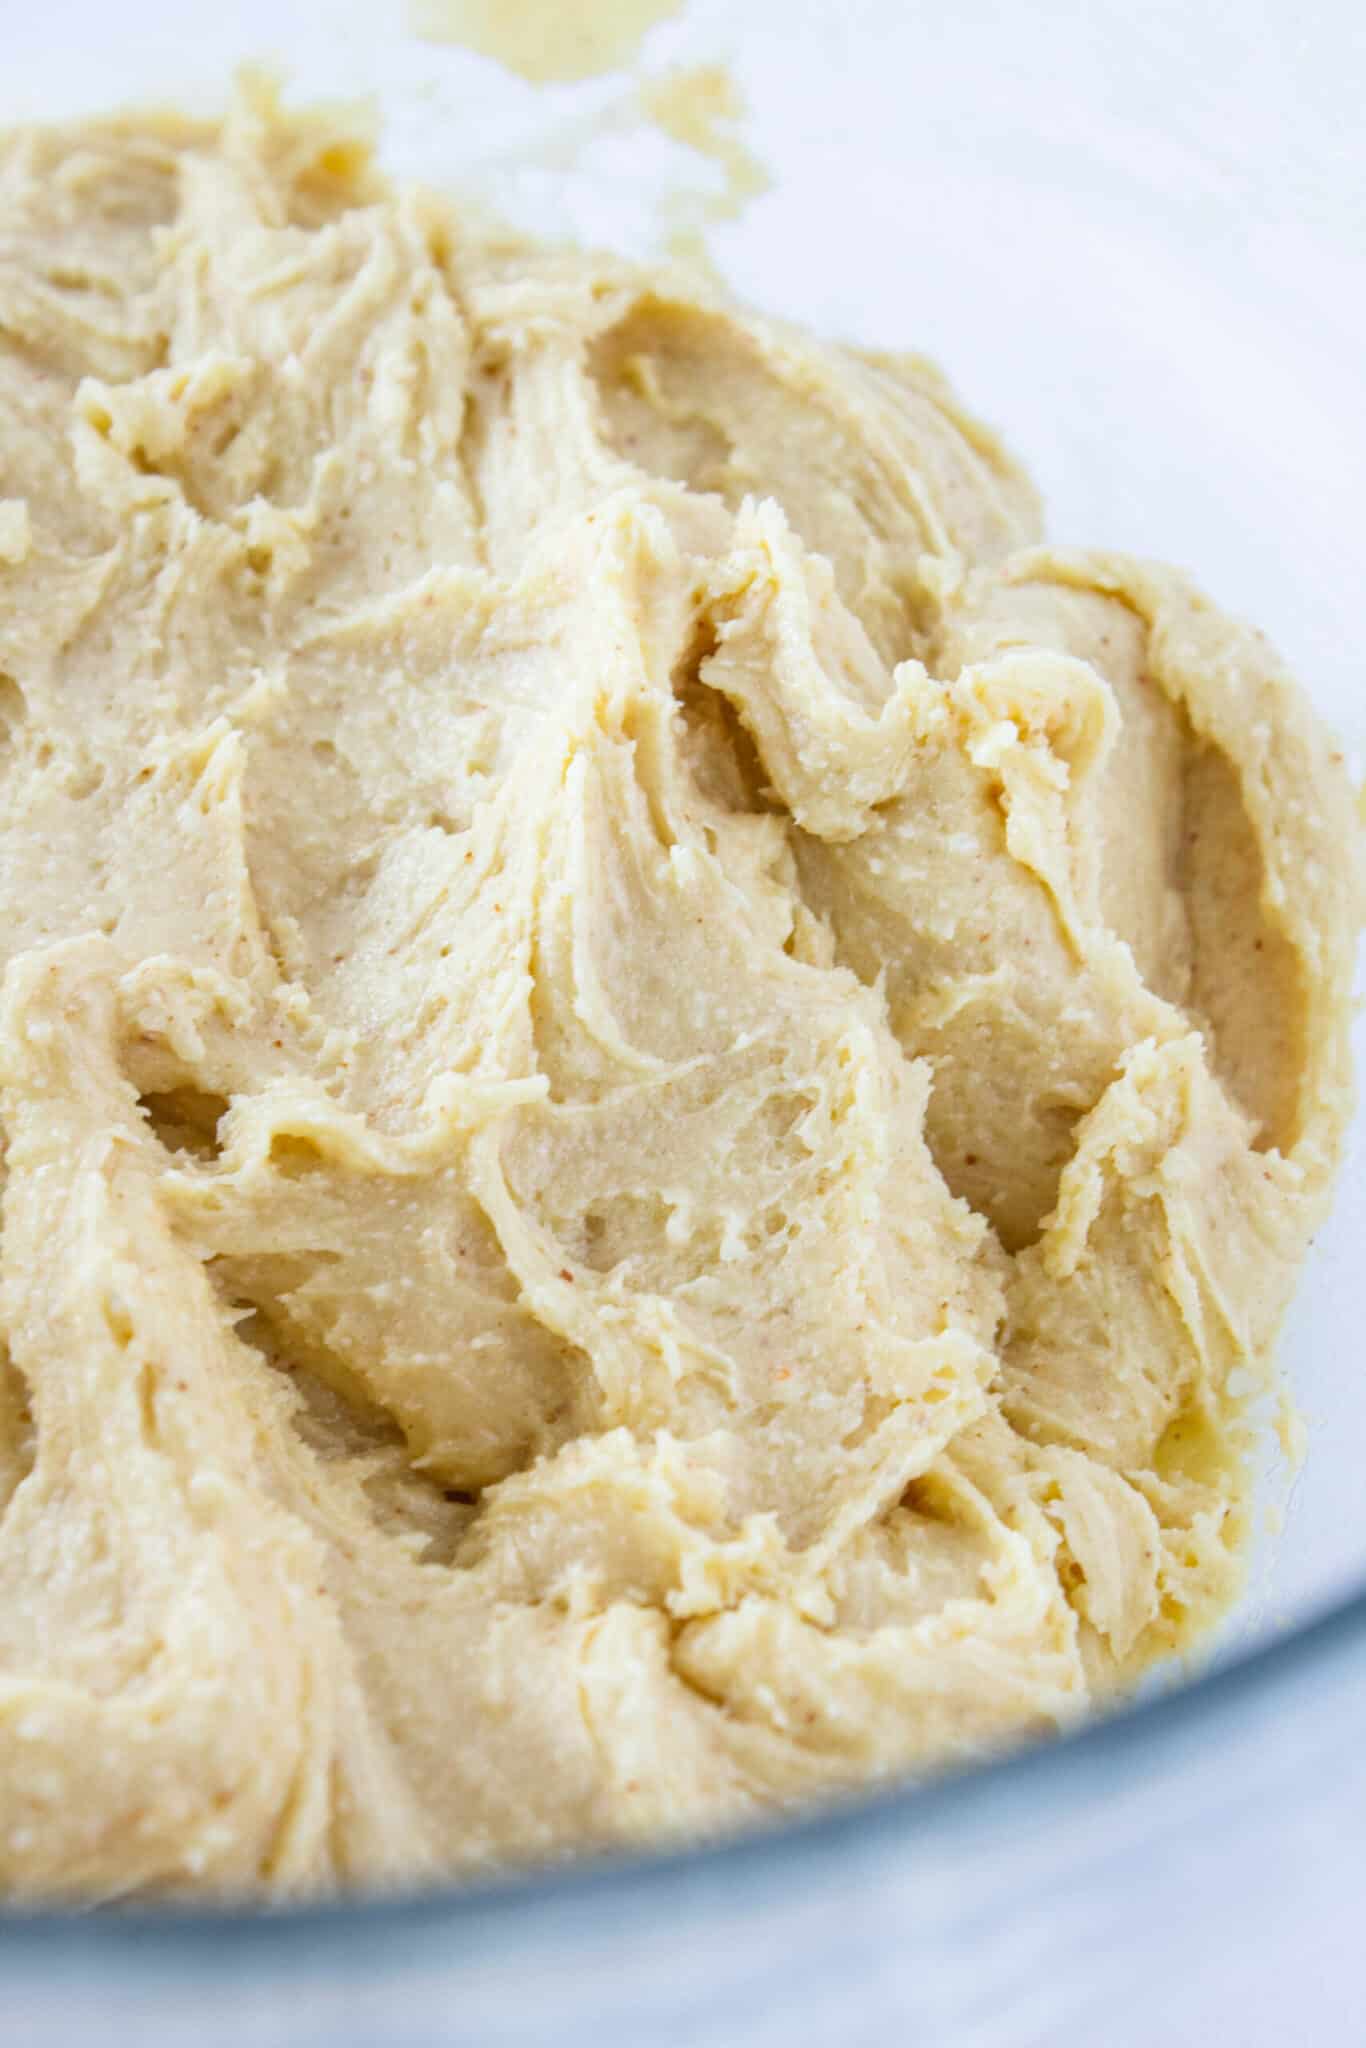
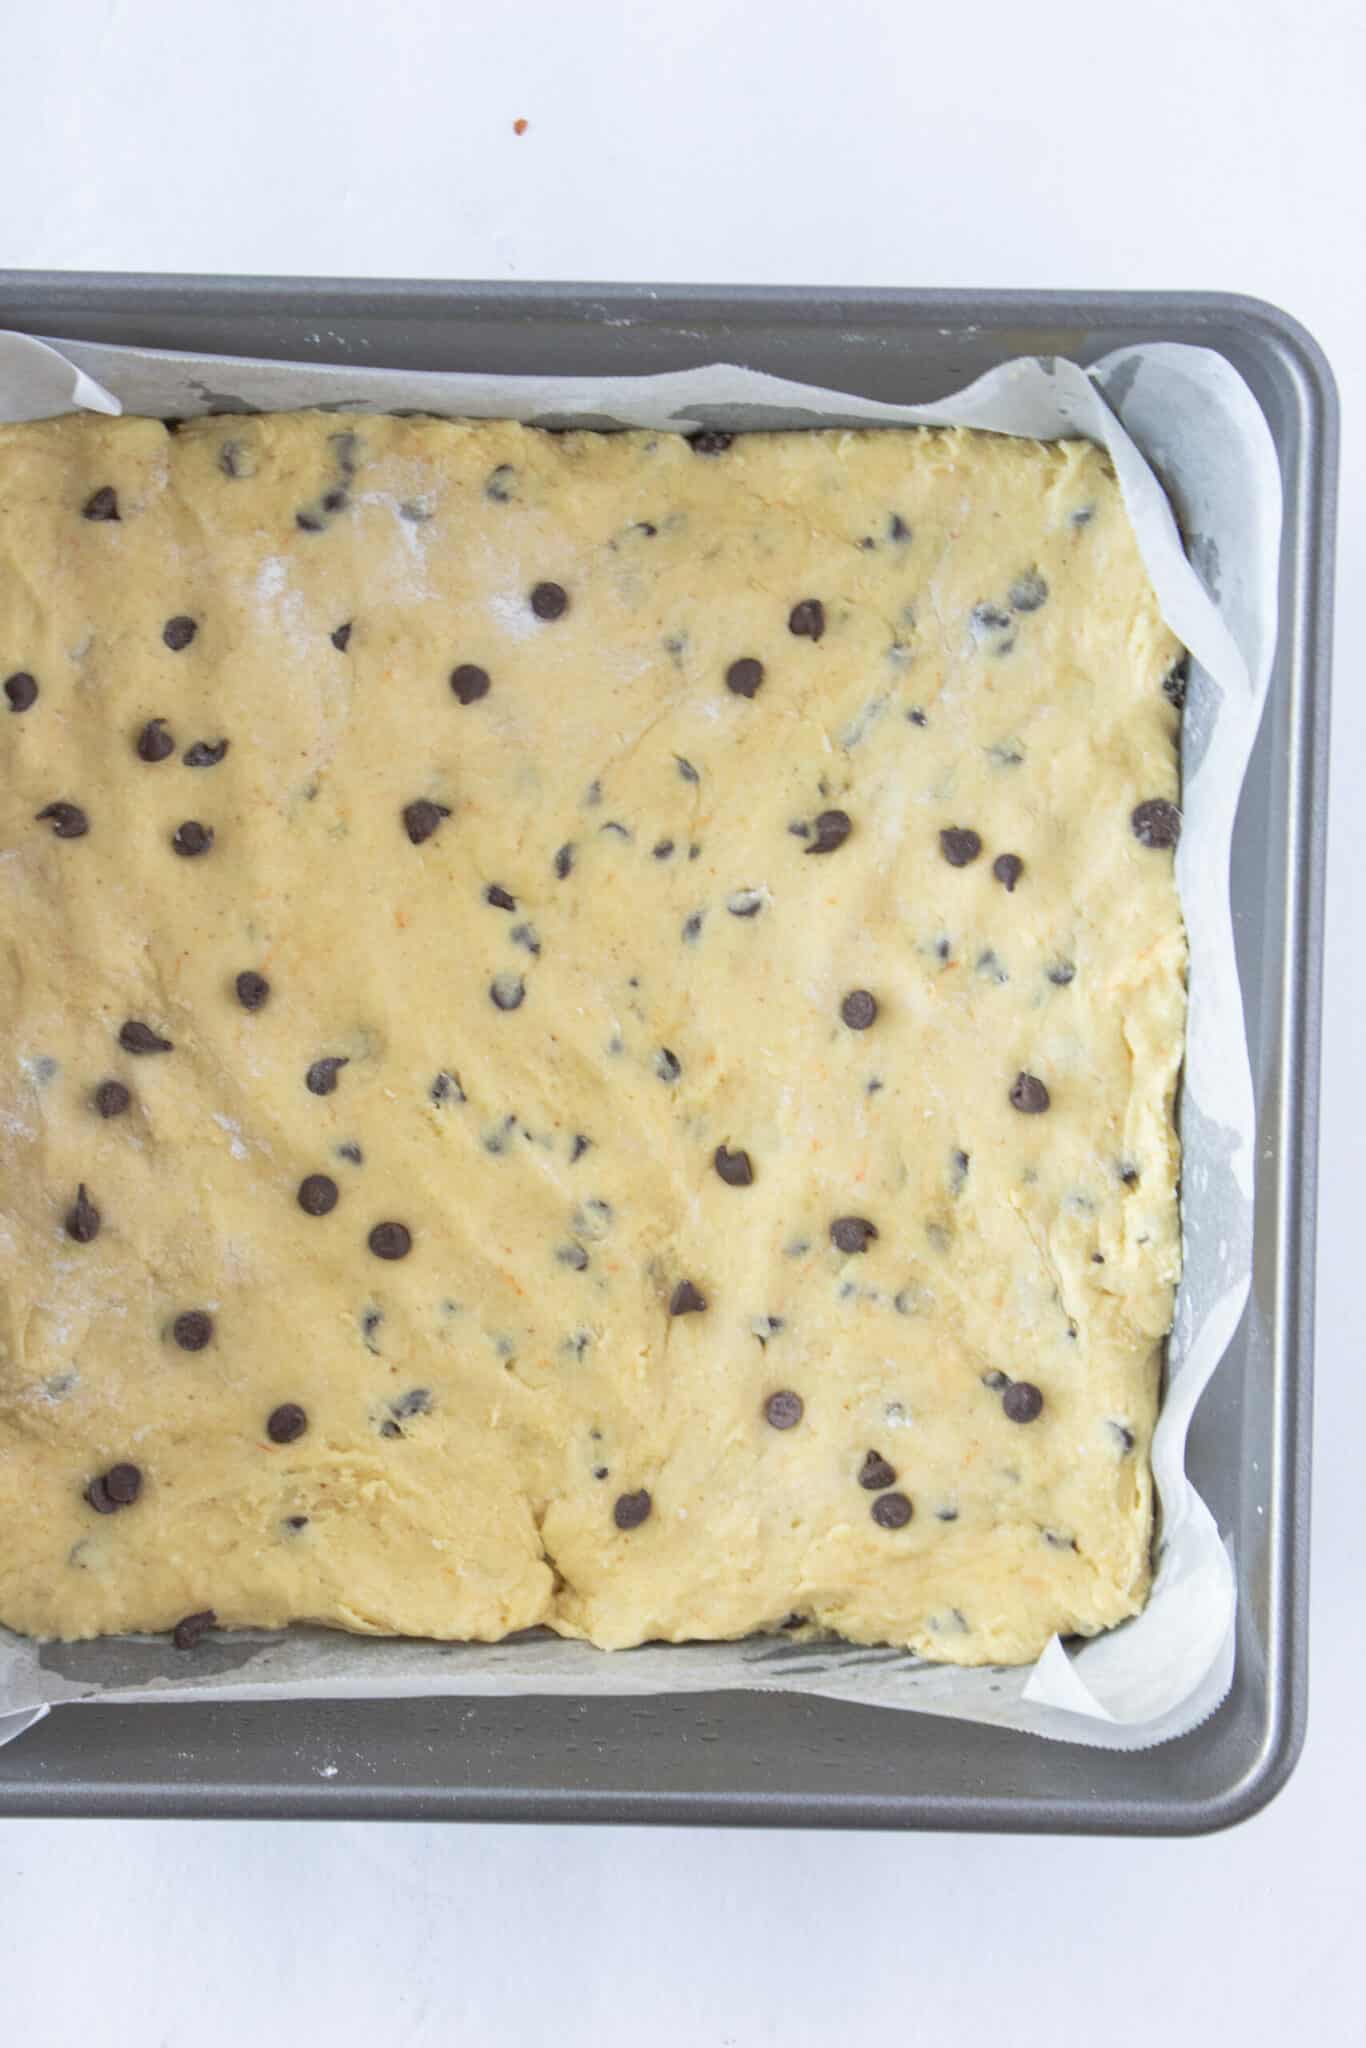
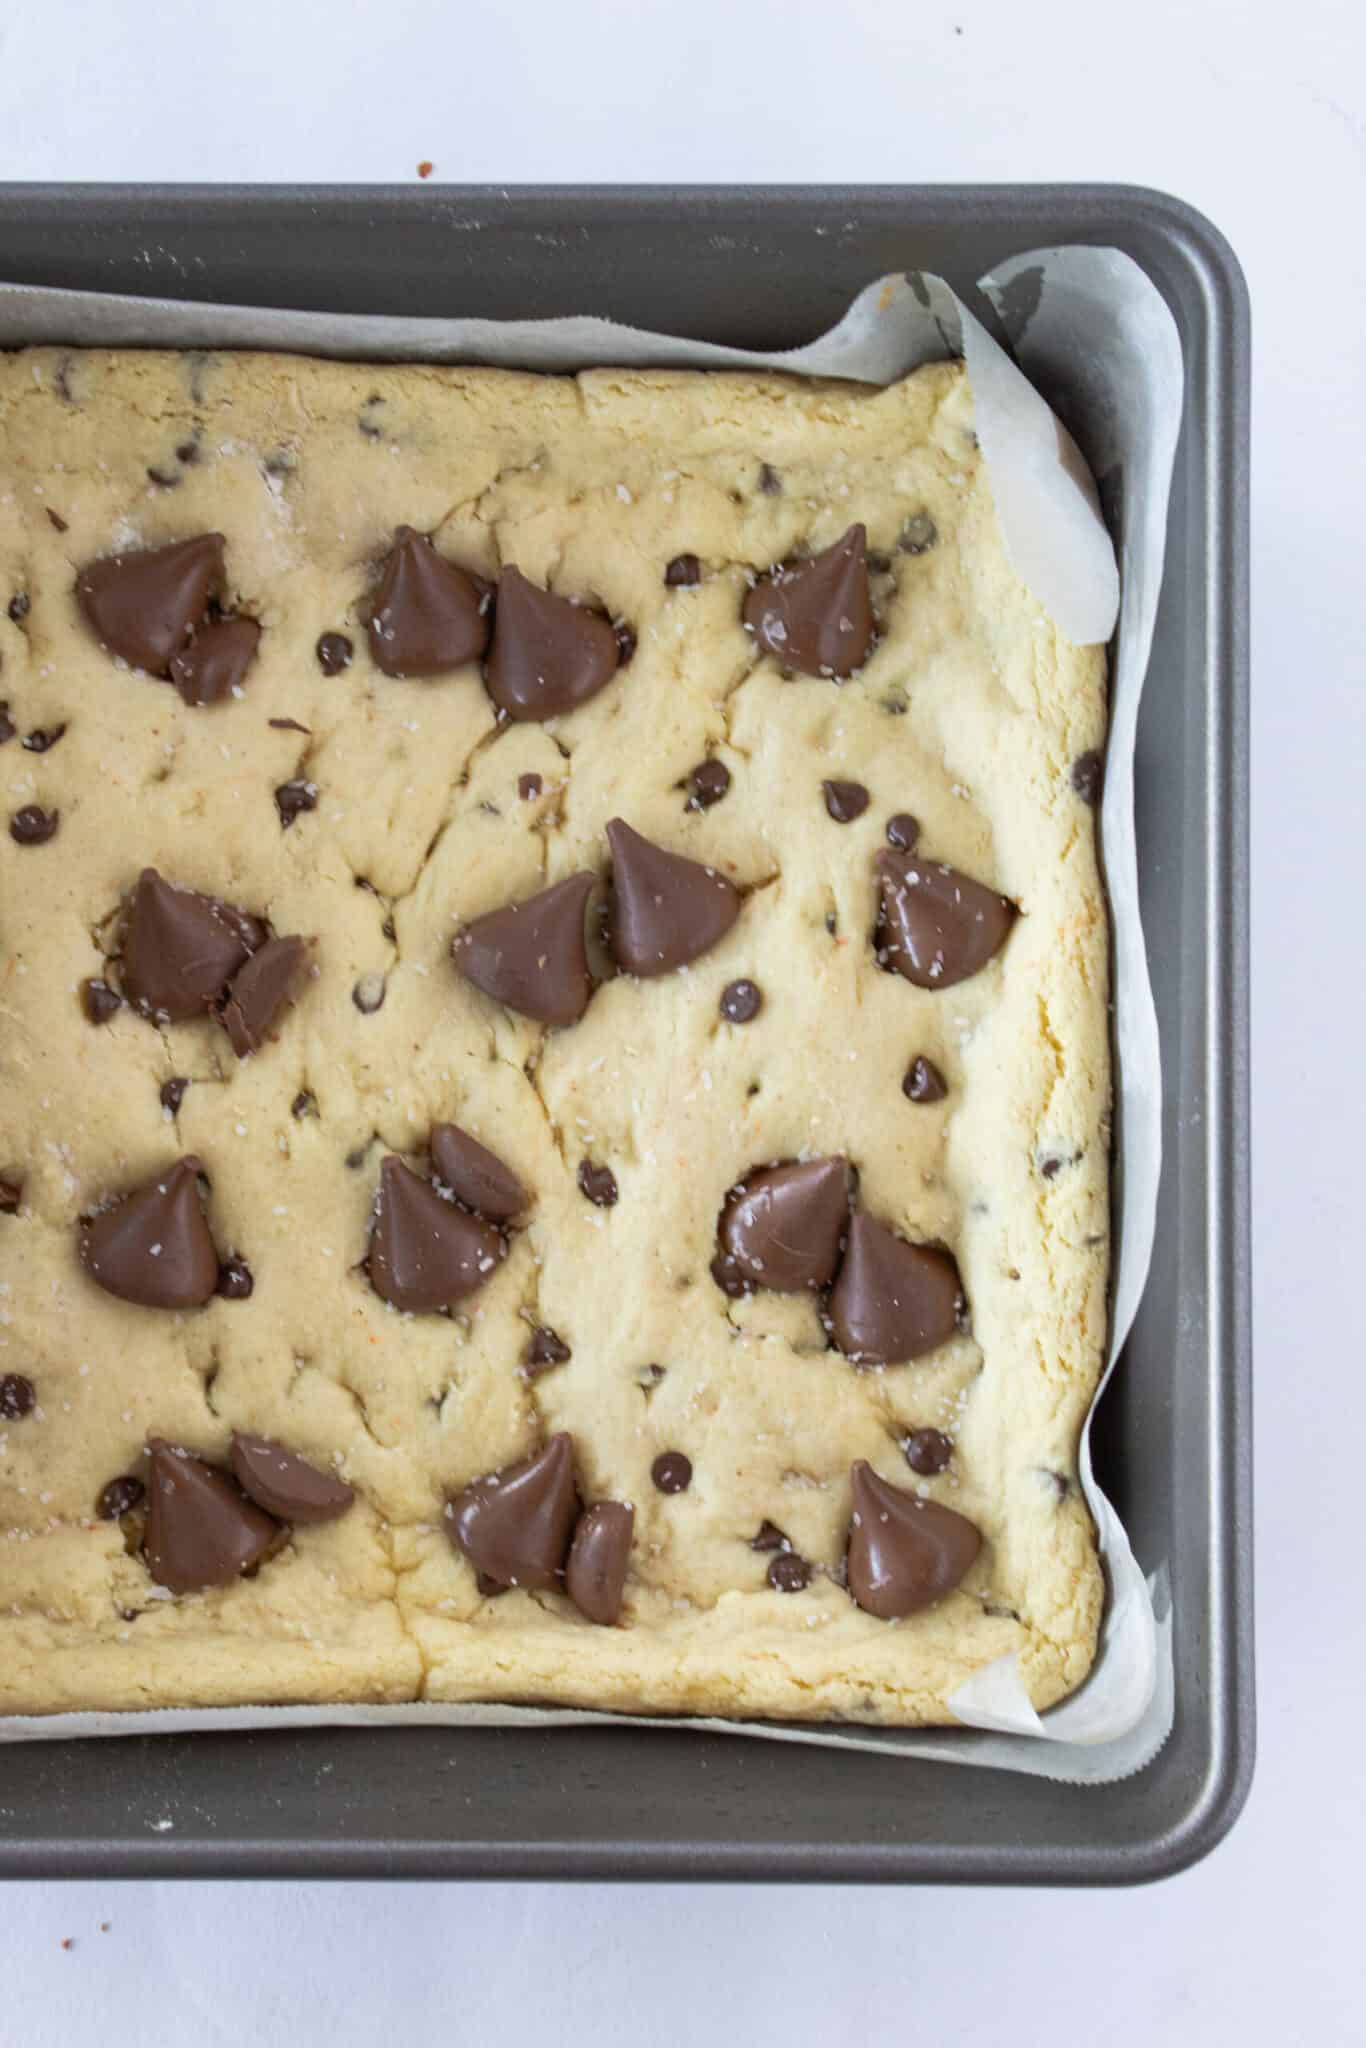
- Add the mini chocolate chips to the dough and mix until they are evenly distributed throughout. Press dough into a 9×9 baking pan that has been sprayed with nonstick spray {or lined with parchment paper}. I added a few additional mini chocolate chips to the top.
- Bake in a 350 degree oven for 15 minutes. The cookie bars will be set but not baked through. Remove them from the oven.
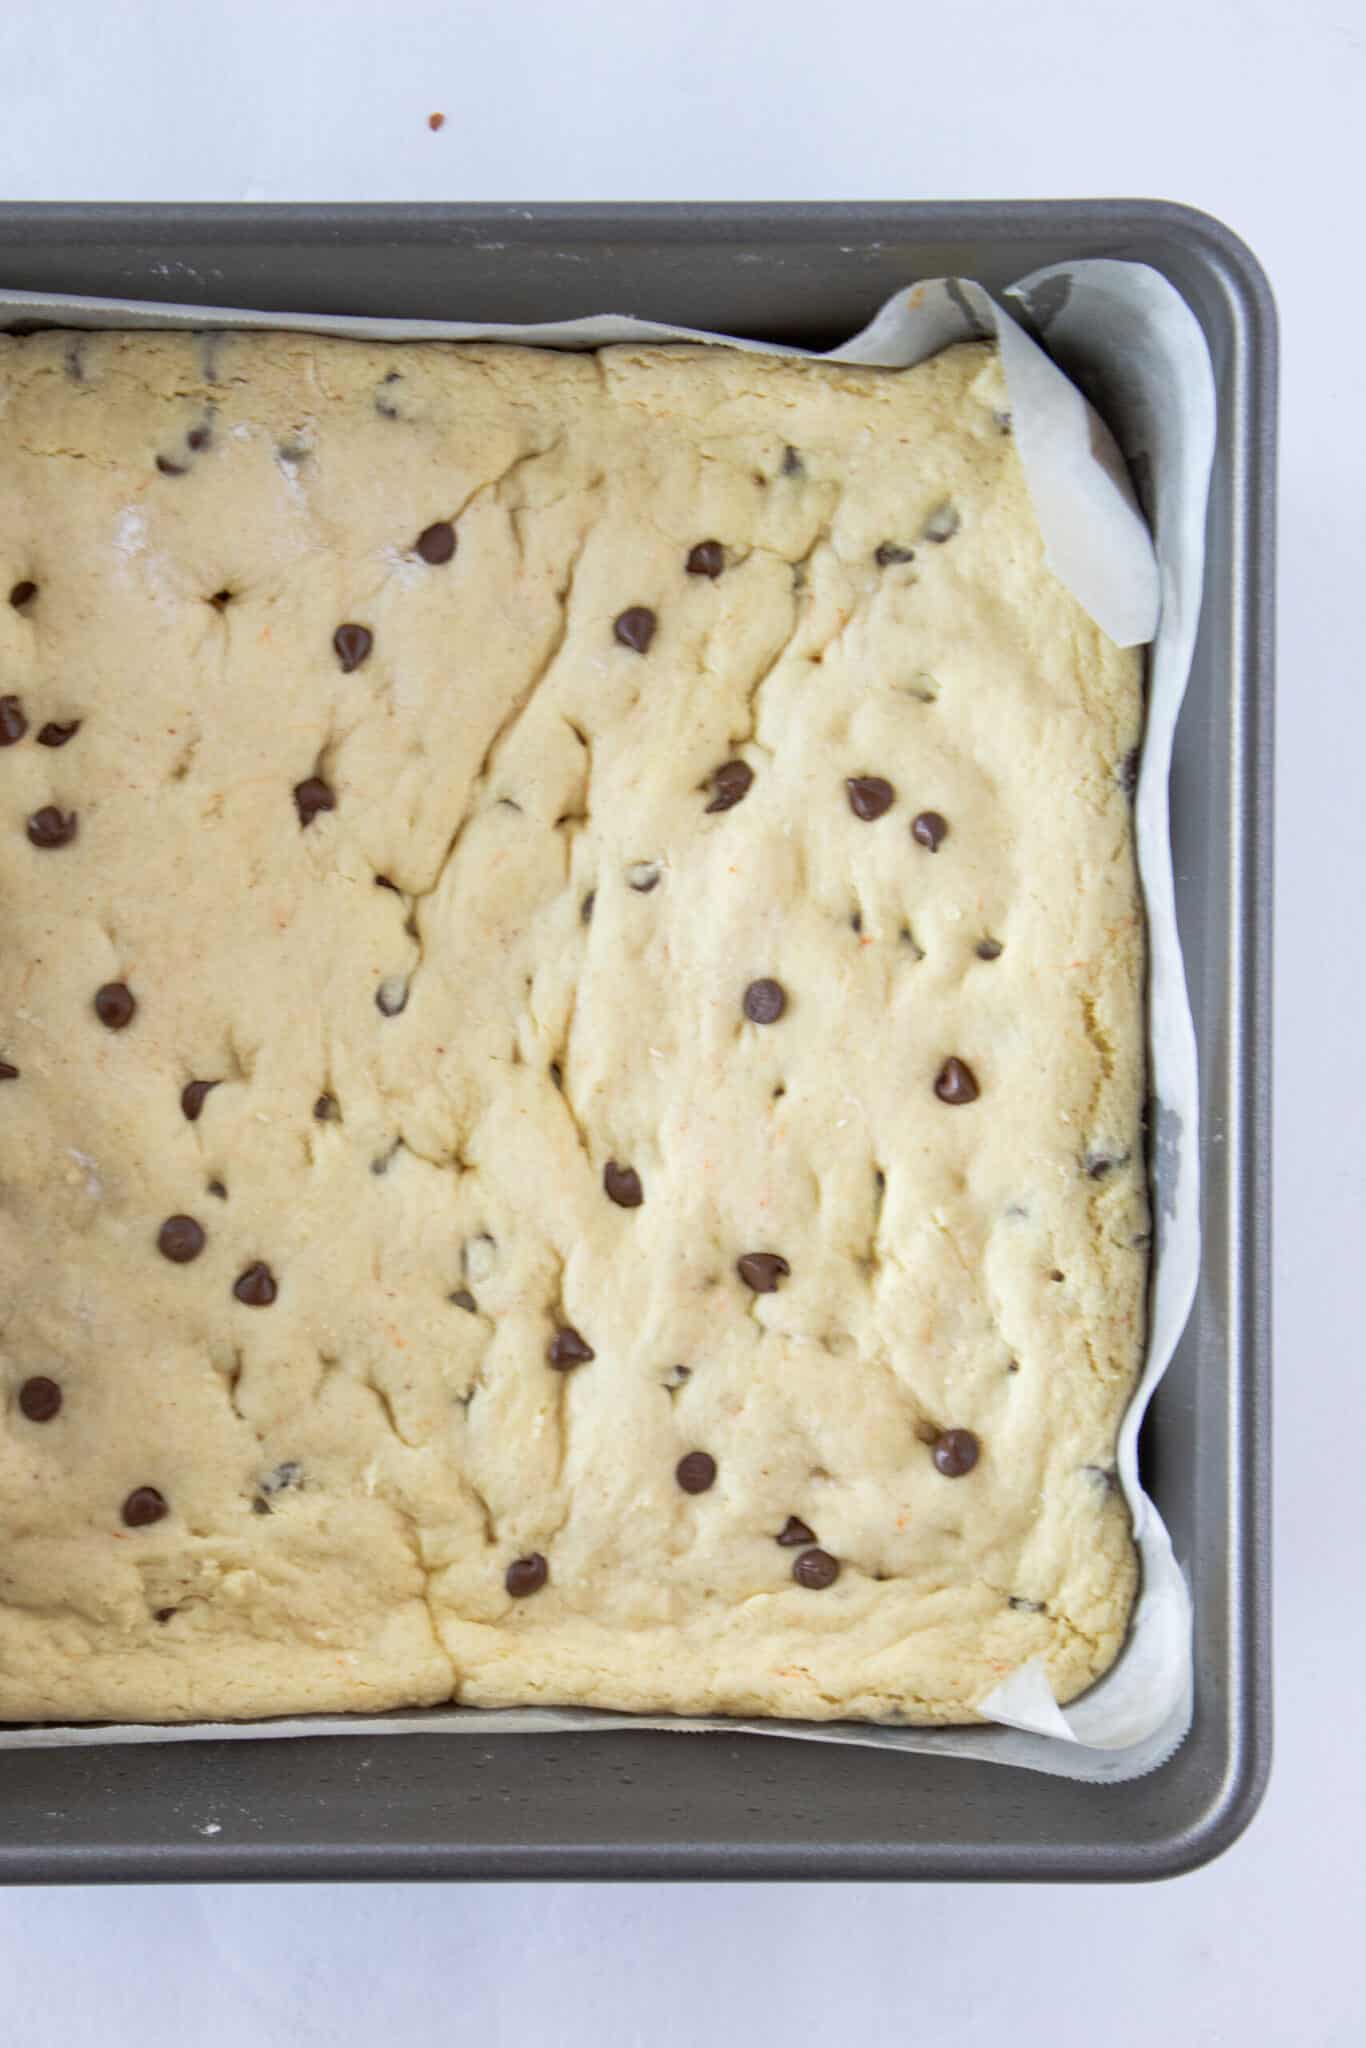
- Press your Hershey’s Kisses into the top of the cookie bars. Sprinkle with kosher salt and return to the oven for 5 minutes. The additional time allows the cookie bars to finish baking, as well as baked around the Hershey’s Kisses.
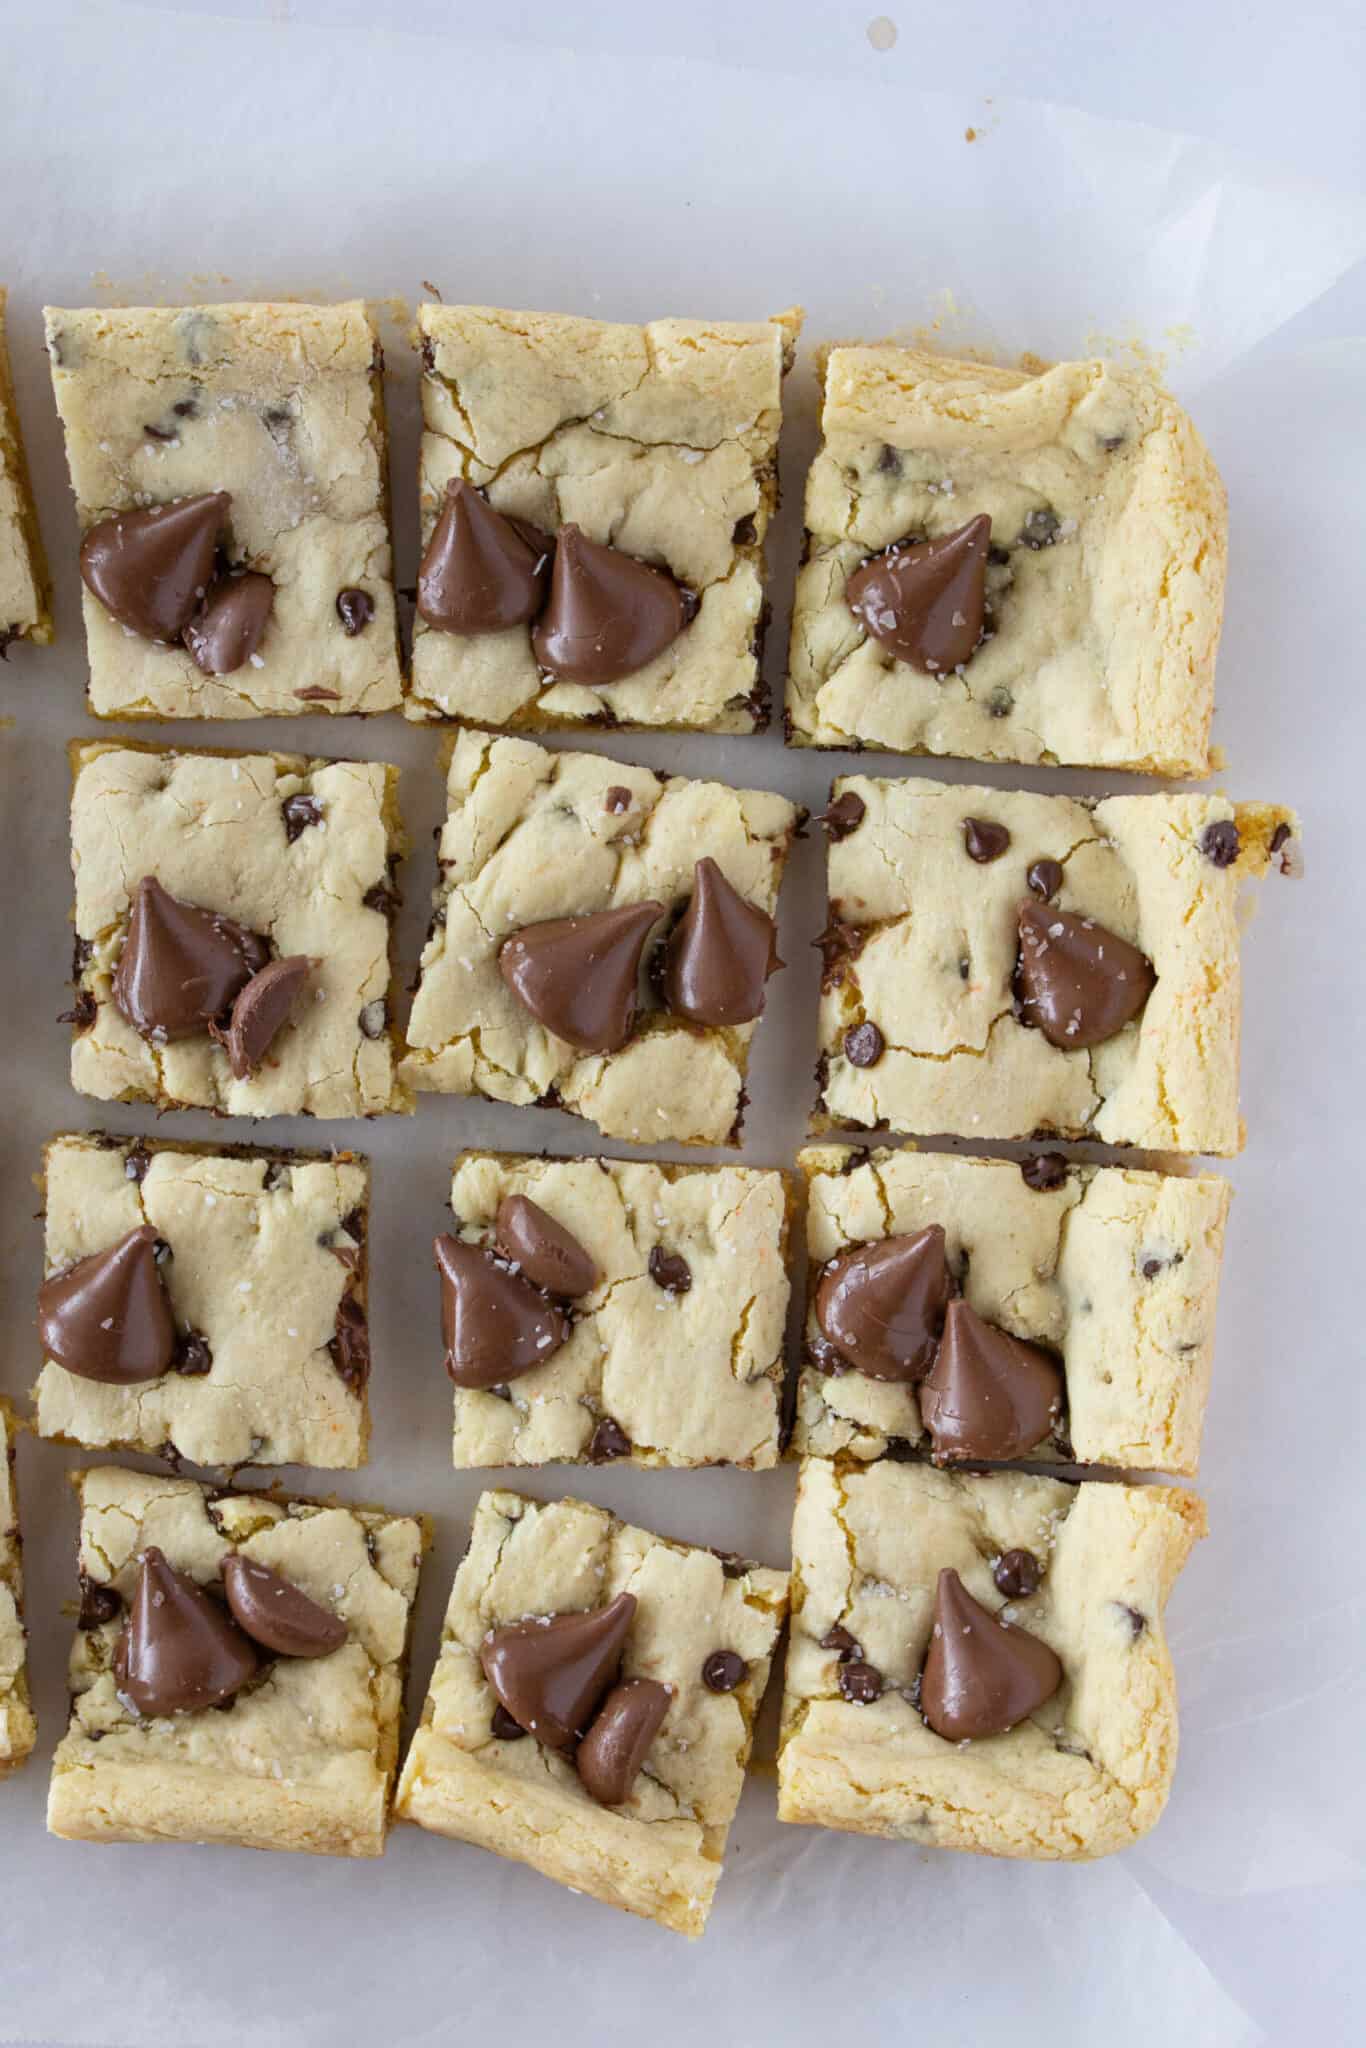
- Allow the cookie bars to cool completely in the pan. If you have lined the pan with parchment paper, remove the entire pan of cookie bars and cut into squares. Otherwise, you can cut them directly in the pan.
Expert Tips
- Be sure to keep a close eye on your brown butter – it can burn easily!
- Be mindful of where you put your Hershey Kisses. I like to place them so that as I cut them later they will be nicely nestled into each bar.
- You can leave the Hershey’s Kisses whole or do like I have and cut the back 1/3 of the kiss off. This allows you to stack them more easily.
Do you love saving time with a cake mix? Try these recipes…

Browned Butter & Hersheys Kiss Cookie Bars
Ingredients
- 15.25 ounces yellow butter cake mix
- ¼ cup brown butter
- ⅓ cup milk
- 1 egg
- ¼ cup mini chocolate chips
- Hershey's Kisses
- ⅛ teaspoon kosher salt
Instructions
- Preheat oven to 350°. Spray a 9×9 baking pan with nonstick cooking spray {or line with parchment paper} and set aside.
- Combine cake mix, *brown butter, milk and egg with a handheld mixer {or by hand} until you have a thick dough. Add mini chocolate chips and mix until they are evenly distributed.
- Pour dough into prepared pan and spread into and even layer. Bake for 15 minutes. After 15 minutes, remove cookie bars. Add the Hershey's Kisses to the top of the bars. I like to add them in a way that when I cut them later they will each be on a cookie. You can use the Hershey's Kisses whole or cut the back 1/3 of the Kiss from the candy.
- Return the cookie bars to the oven for an additional 5 minutes. This will finish baking the bars and allow the cookie to bake around the Kisses.
- Remove the cookie bars from the oven and place on a cooling rack. Allow to cool for at least 15 minutes before cutting into 16 squares. Store leftovers in an airtight container at room temperature or freeze for up to 3 months.
Notes
Nutrition
Nutrition information is automatically calculated, so should only be used as an approximation.