This post may contain affiliate sales links. Please see our full disclosure policy for details.
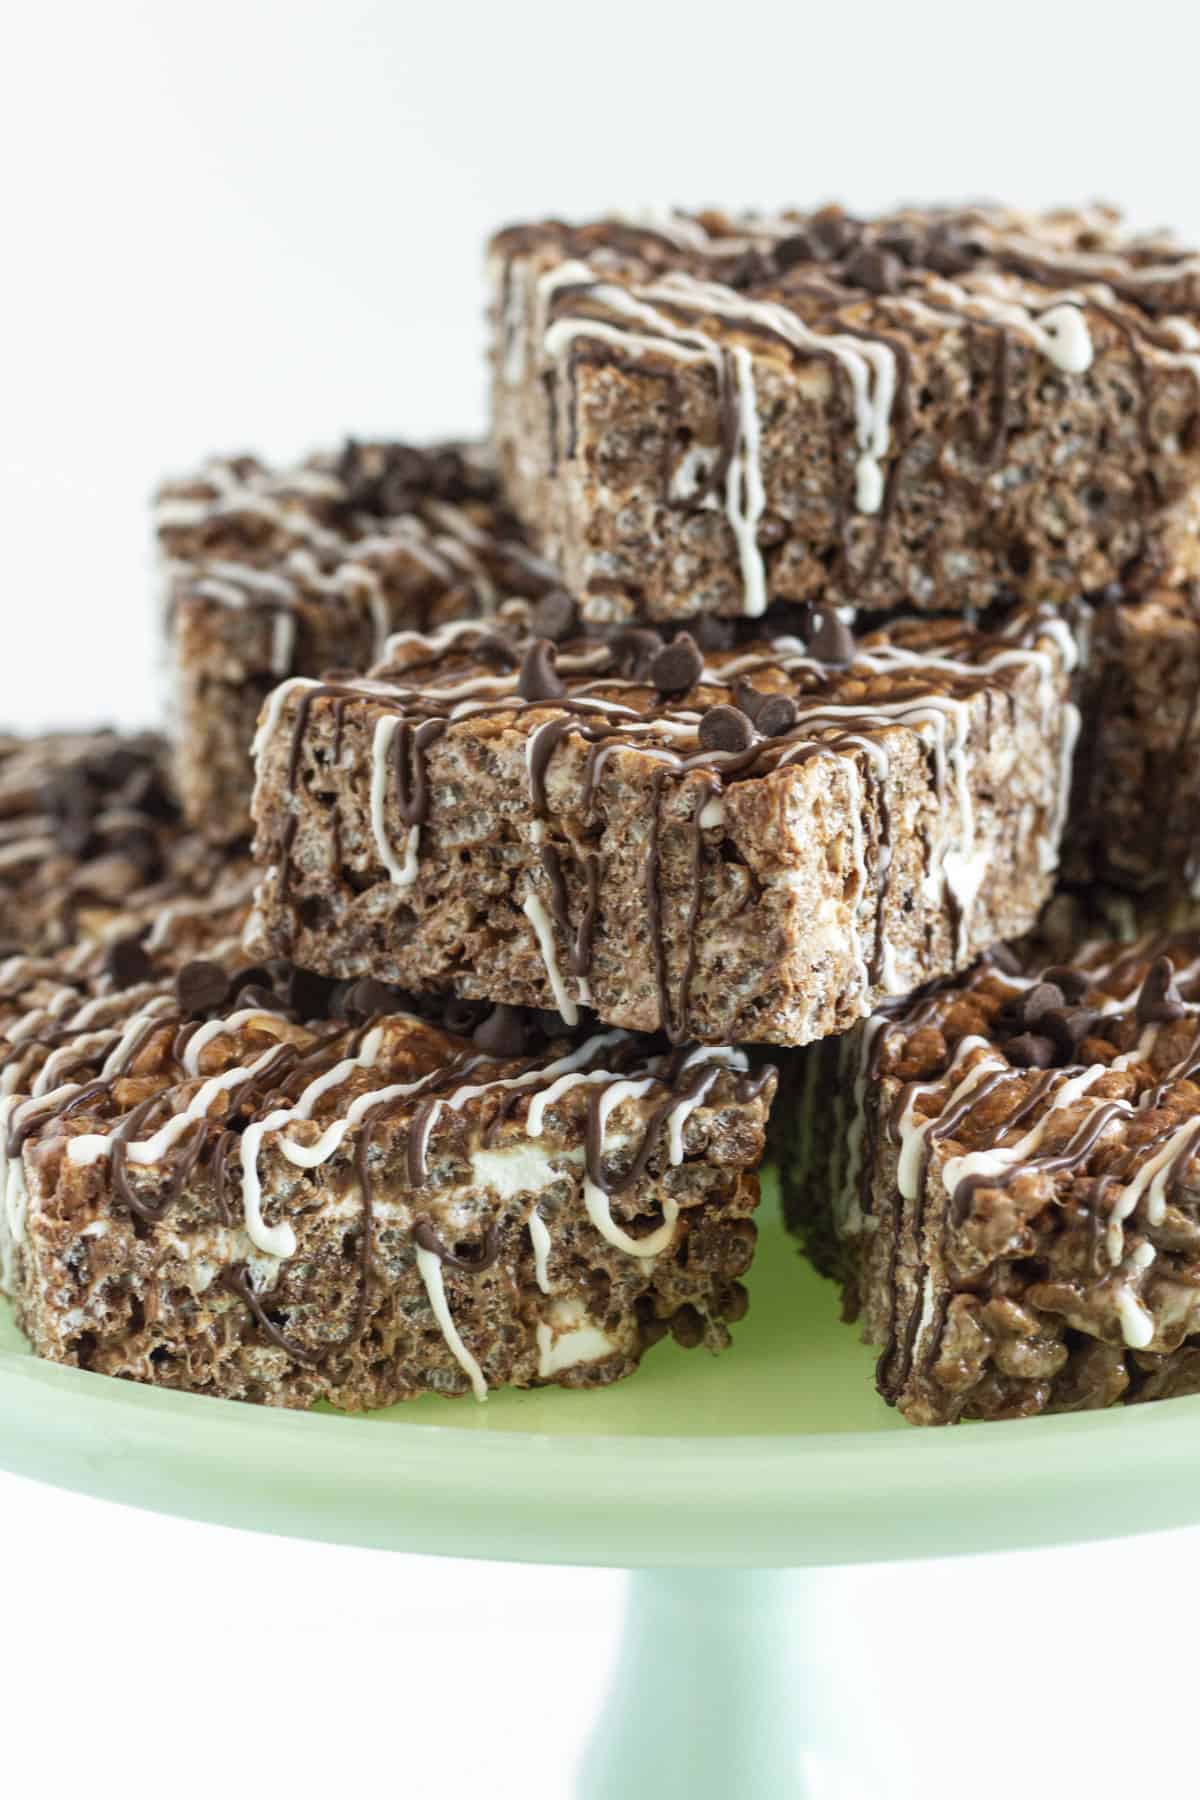
No bake desserts, like these Chocolate Rice Krispies Treats are super simple to make. A few easy steps, a handful of ingredients and a small pocket of time is all it takes to create this mouthwatering sweet treat. They are nostalgic, they are tasty and they deserve a place at the dessert table.
What are Chocolate Rice Krispie Treats?
Chocolate Rice Krispie Treats are just like the classic rice krispies treats you know and love but for chocolate lovers.
The only difference {at least in this recipe} is that you are adding chocolate rice cereal and chocolate chips. You will also love these Cinnamon Toast Crunch Bars.
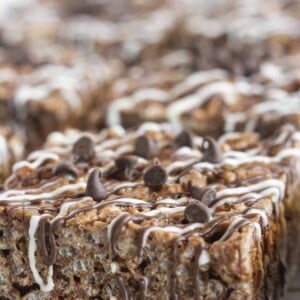
The crispy treats still have the same soft texture and amazing crunch from the rice cereal. With chunks of whole marshmallows and pockets of chocolate chips they are next level amazing.
Ingredients Needed for this Recipe
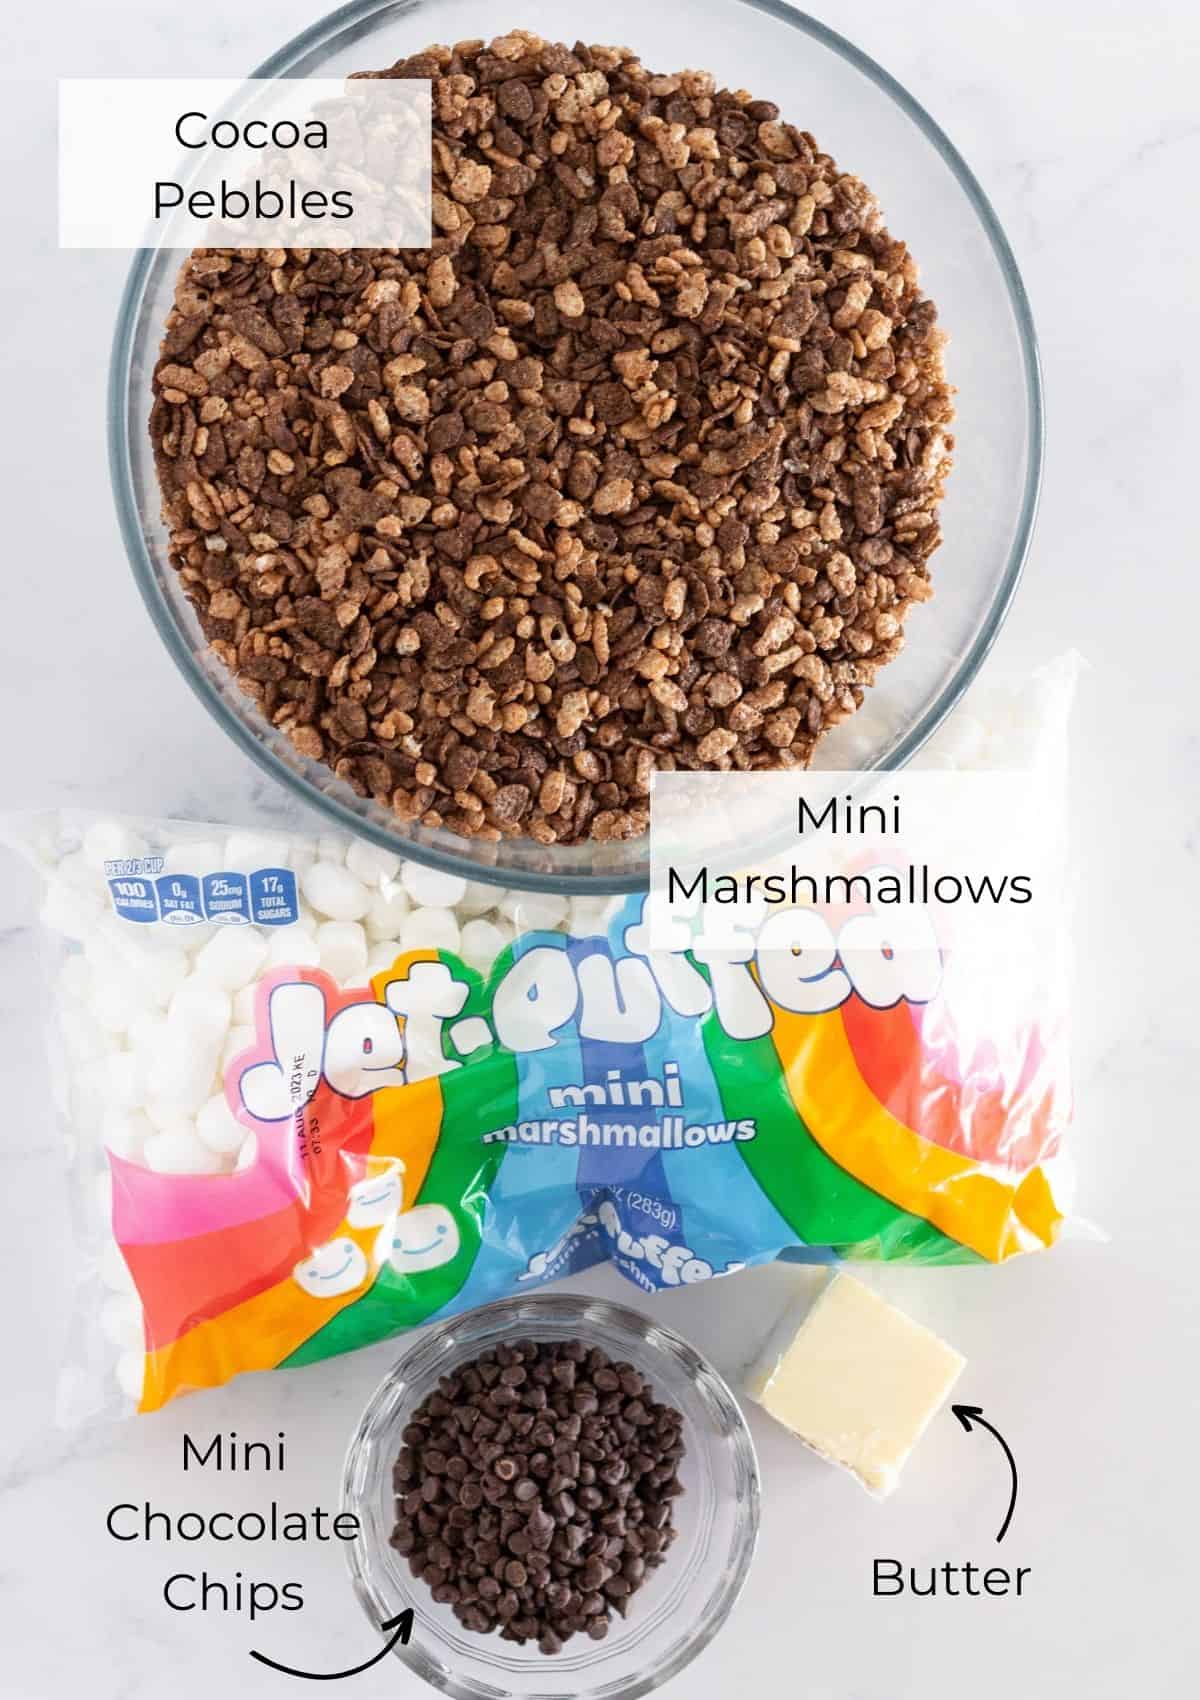
- Butter- Melted with the marshmallows, the butter helps to thin the marshmallows out and give the bars a super rich flavor.
- Marshmallows- Added both whole and melted, the marshmallows act as the glue to hold the rice krispies cereal together. Miniature or large marshmallows both work.
- Semi sweet chocolate chips- Mini chocolate chips are my preference but whatever you love is what you should go with.
- Cocoa Krispies cereal- The chocolate version of traditional rice krispies cereal. Cocoa pebbles also work great.
See recipe card for full information on ingredients and quantities.
Variations
Marshmallows- There are different flavored marshmallows that you can purchase now that would be a fun way to change things up. Look around on Amazon or your favorite grocery store and see what they have.
Chocolate Chips- Add a variety of different chip flavors or keep it simple with only white chocolate chips. There are also amazing cinnamon chips which would taste fabulous in a rice krispie treat. Milk chocolate or semi-sweet chocolate chips are my favorite.
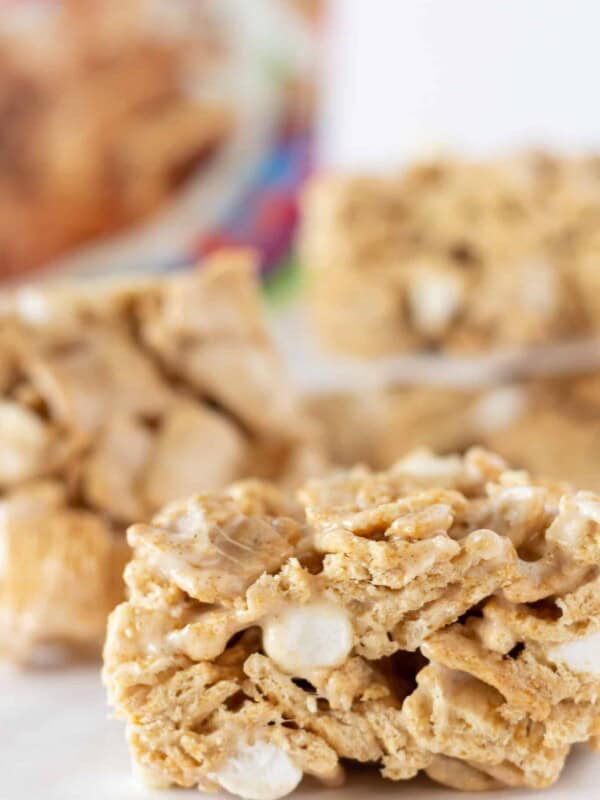
Rice Cereal- Go crazy with the kind of rice cereal you choose. Go fruity or with classic rice krispies! You could even try a different cereal altogether. These Rice Krispies Cookies are another great option.
Other Ingredients- Add a half cup of peanut butter, almond butter, Nutella or cookie butter for a delicious twist.
How to make Easy Chocolate Rice Krispie Treats
- Pour the chocolate Rice Krispies cereal into a large bowl. Add 1 cup of mini marshmallows and a half cup of chocolate chips, set aside.
- Add the butter to a medium saucepan and melt butter over medium heat. Pour the remaining marshmallows into the melted butter and continue to cook over medium-low heat until melted.
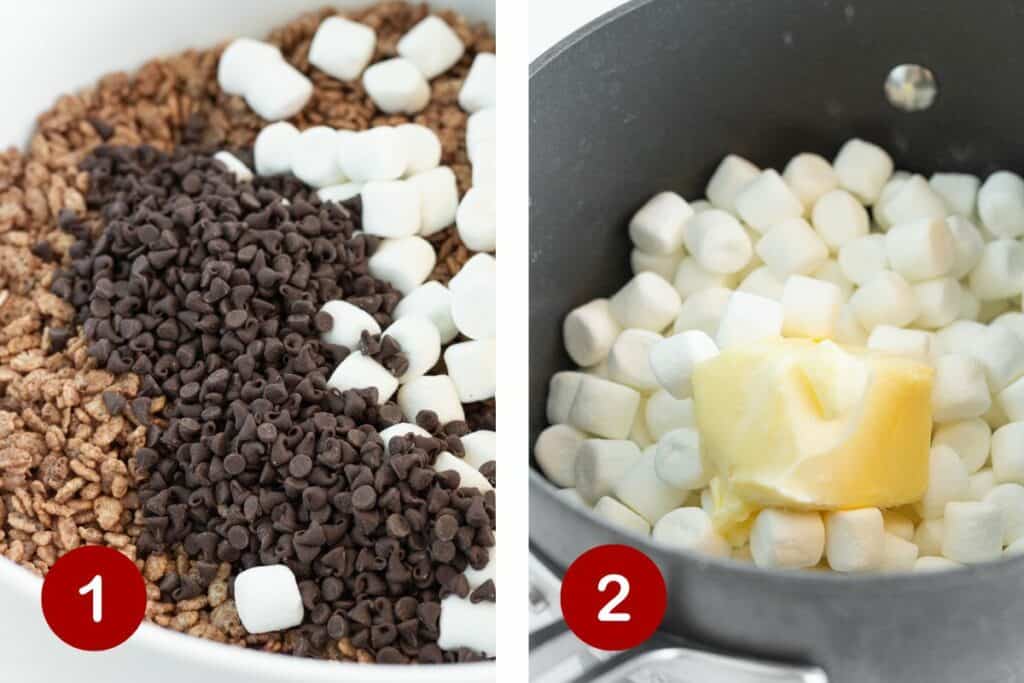
- Pour the melted marshmallows mixture over the chocolate cereal mixture and stir until everything is combined and evenly distributed. You can also add a few extra marshmallows so there are pockets in each bar.
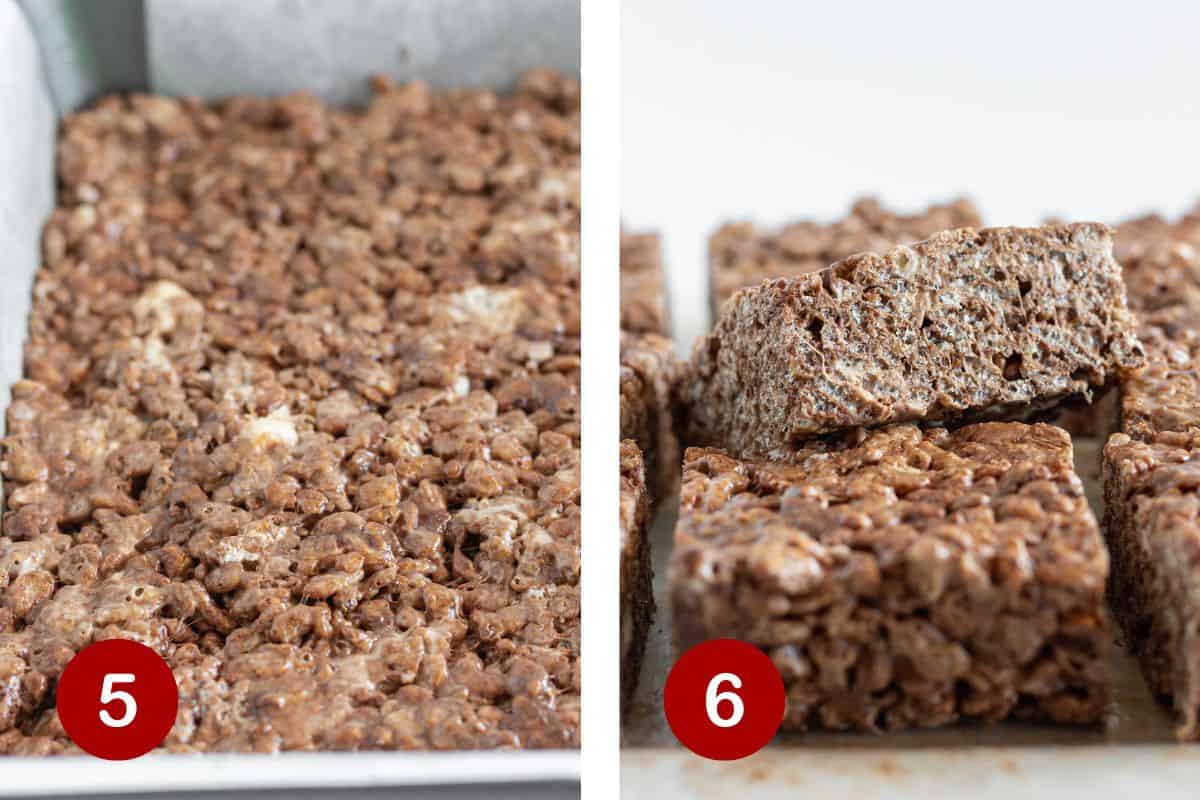
- Pour the mixture into the prepared 9×9 square pan and press down firmly. NOTE: I like to use a zipper bag over my hand that is sprayed with non-stick spray to be sure it doesn’t stick to my fingers.

- Cover with plastic wrap and allow the no bake bars to set up at room temperature for 2 hours to overnight {or refrigerate for 1 hour}.
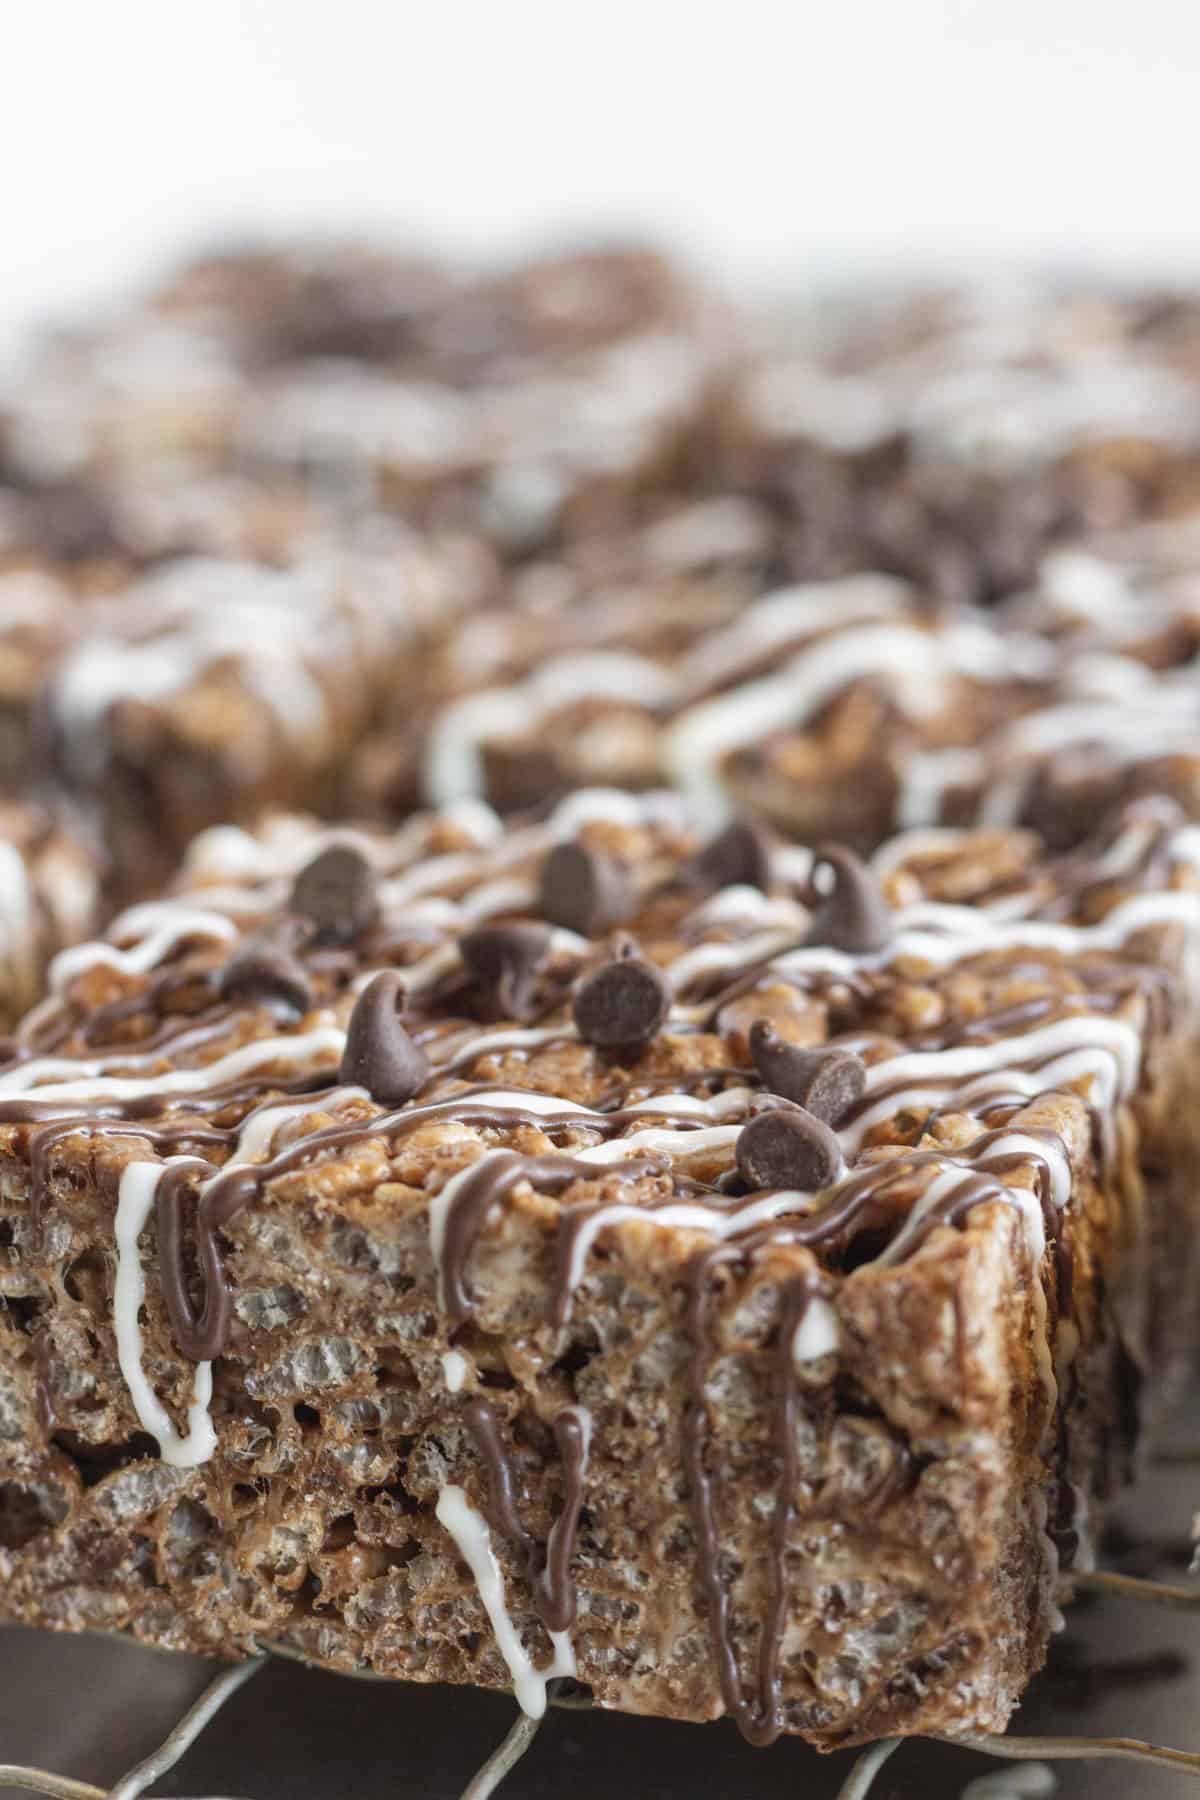
- Cut into squares on a cutting board. If desired, melt chocolate and drizzle over the top of each bar. Store the leftovers in an airtight container for up to 3 days. Use parchment or wax paper between layers.
Tips for the perfect no bake cereal bars:
- Prepare your pan {spray liberally with nonstick cooking spray} ahead of time. Once you have the sticky mixture ready to pour you don’t want to have to go back and do that step.
- Add your butter and marshmallow mixture to the dry ingredients and not vice versa. By adding the melted mixture to the dry ingredients it allows everything to be coated a bit more evenly. It also keeps the cereal from breaking up when you stir.
- Put a buttered sandwich bag on your hand before you press the mixture down. Adding the sandwich bag to your hand will keep it from sticking to your fingers. It is also a breeze to clean up.
- Allow the crispy treats to cool completely before cutting. In order to get good clean cuts I suggest refrigerating them for an hour or so.
- Go the extra mile and drizzle a bit of melted chocolate on the top of the treats. This doesn’t take much time, effort or special skills but the end result is amazing.
Storing and Freezing
Store: The best way to store Chocolate Rice Krispies Treats is in an airtight container at room temperature. They will stay fresh for 2-3 days.
If you have to stack the treats then be sure to add a piece of parchment paper {or wax paper} between the layers so that they don’t stick together.
Freeze: You can freeze rice crispy treats but I don’t recommend it. Once they are defrosted they lose some of the crispy texture that you expect from a rice crispy treat.
The truth is that this dessert is so simple to make, I would only make and eat them fresh.
Recipe FAQs
This Chocolate Rice Crispy Treat recipe can easily be doubled. Use a 9×13 pan to press them into and enjoy.
If your rice crispy treats are falling apart there could be a couple of problems. First of all, you may have added too many marshmallows or too much butter to them.
Secondly, if you don’t press them firmly into the pan and allow them to cool completely they may fall apart.
The great news is that yes! These Krispie Treats can be made in the microwave. Melt the butter and marshmallows in the microwave for 1 and half minutes, stir and repeat 30 second intervals until you have a nice smooth mixture. Pour over the dry ingredients, stir and press into the pan.
Do you love no bake desserts? Try these amazing recipes…


Did you try this recipe?
Leave a ⭐️ review below and tag @practicallyhomemade on Pinterest!
Chocolate Rice Crispy Treats
Ingredients
- 5 Tablespoons butter
- 13 ounces mini marshmallows
- ½ cup mini chocolate chips
- 4 ½ cups chocolate rice crispy cereal, {like Cocoa Krispies}
Optional Toppings
- ¼ cup chocolate melting wafers
- ¼ cup white chocolate melting wafers
Instructions
- Spray a 9×9 baking pan liberally with non stick cooking spray and set aside.
- Pour the chocolate Rice Krispie cereal into a large bowl. Add 1 cup of mini marshmallows and mini chocolate chips, set aside.
- Add the butter to a medium saucepan and melt over medium-low heat. Pour the remaining marshmallows into the melted butter and continue to cook over medium-low heat until melted.
- Pour the melted butter and marshmallow mixture over the chocolate cereal mixture and stir until everything is combined and evenly distributed.
- Pour the mixture into the prepared 9×9 baking pan and press down firmly. NOTE: I like to use a zipper bag over my hand that is sprayed with non stick spray to be sure it doesn't stick to my fingers.
- Cover and allow the no bake bars to set up at room temperature for 2 hours to overnight {or refrigerate for 1 hour}. Cut into squares. If desired, melt chocolate and drizzle over the top of each bar. Store the leftovers in an airtight container for up to 3 days. Use parchment or wax paper between layers.
Video
Notes
- Prepare your pan {spray liberally with nonstick cooking spray} ahead of time. Once you have the sticky mixture ready to pour you don’t want to have to go back and do that step.
- Add your butter and marshmallow mixture to the dry ingredients and not vice versa. By adding the melted mixture to the dry ingredients it allows everything to be coated a bit more evenly. It also keeps the cereal from breaking up when you stir.
- Put a buttered sandwich bag on your hand before you press the mixture down. Adding the sandwich bag to your hand will keep it from sticking to your fingers. It is also a breeze to clean up.
- Go the extra mile and drizzle a bit of melted chocolate on the top of the treats. This doesn’t take much time, effort or special skills but the end result is amazing.
Nutrition
Nutrition information is automatically calculated, so should only be used as an approximation.