This post may contain affiliate sales links. Please see our full disclosure policy for details.
These pumpkin pie hand pies have all the flavors you’d expect from a traditional pumpkin pie, baked into a small handheld shape you can grab and eat anywhere.
Instead of rolling out and baking a full pie, the filling goes into rounds of refrigerated pie crust, so each one is ready in a fraction of the time. A simple cinnamon glaze finishes them off with one more layer of flavor.
The result is a portable fall dessert with the same cozy spice and creamy pumpkin filling you love in a classic pumpkin pie.
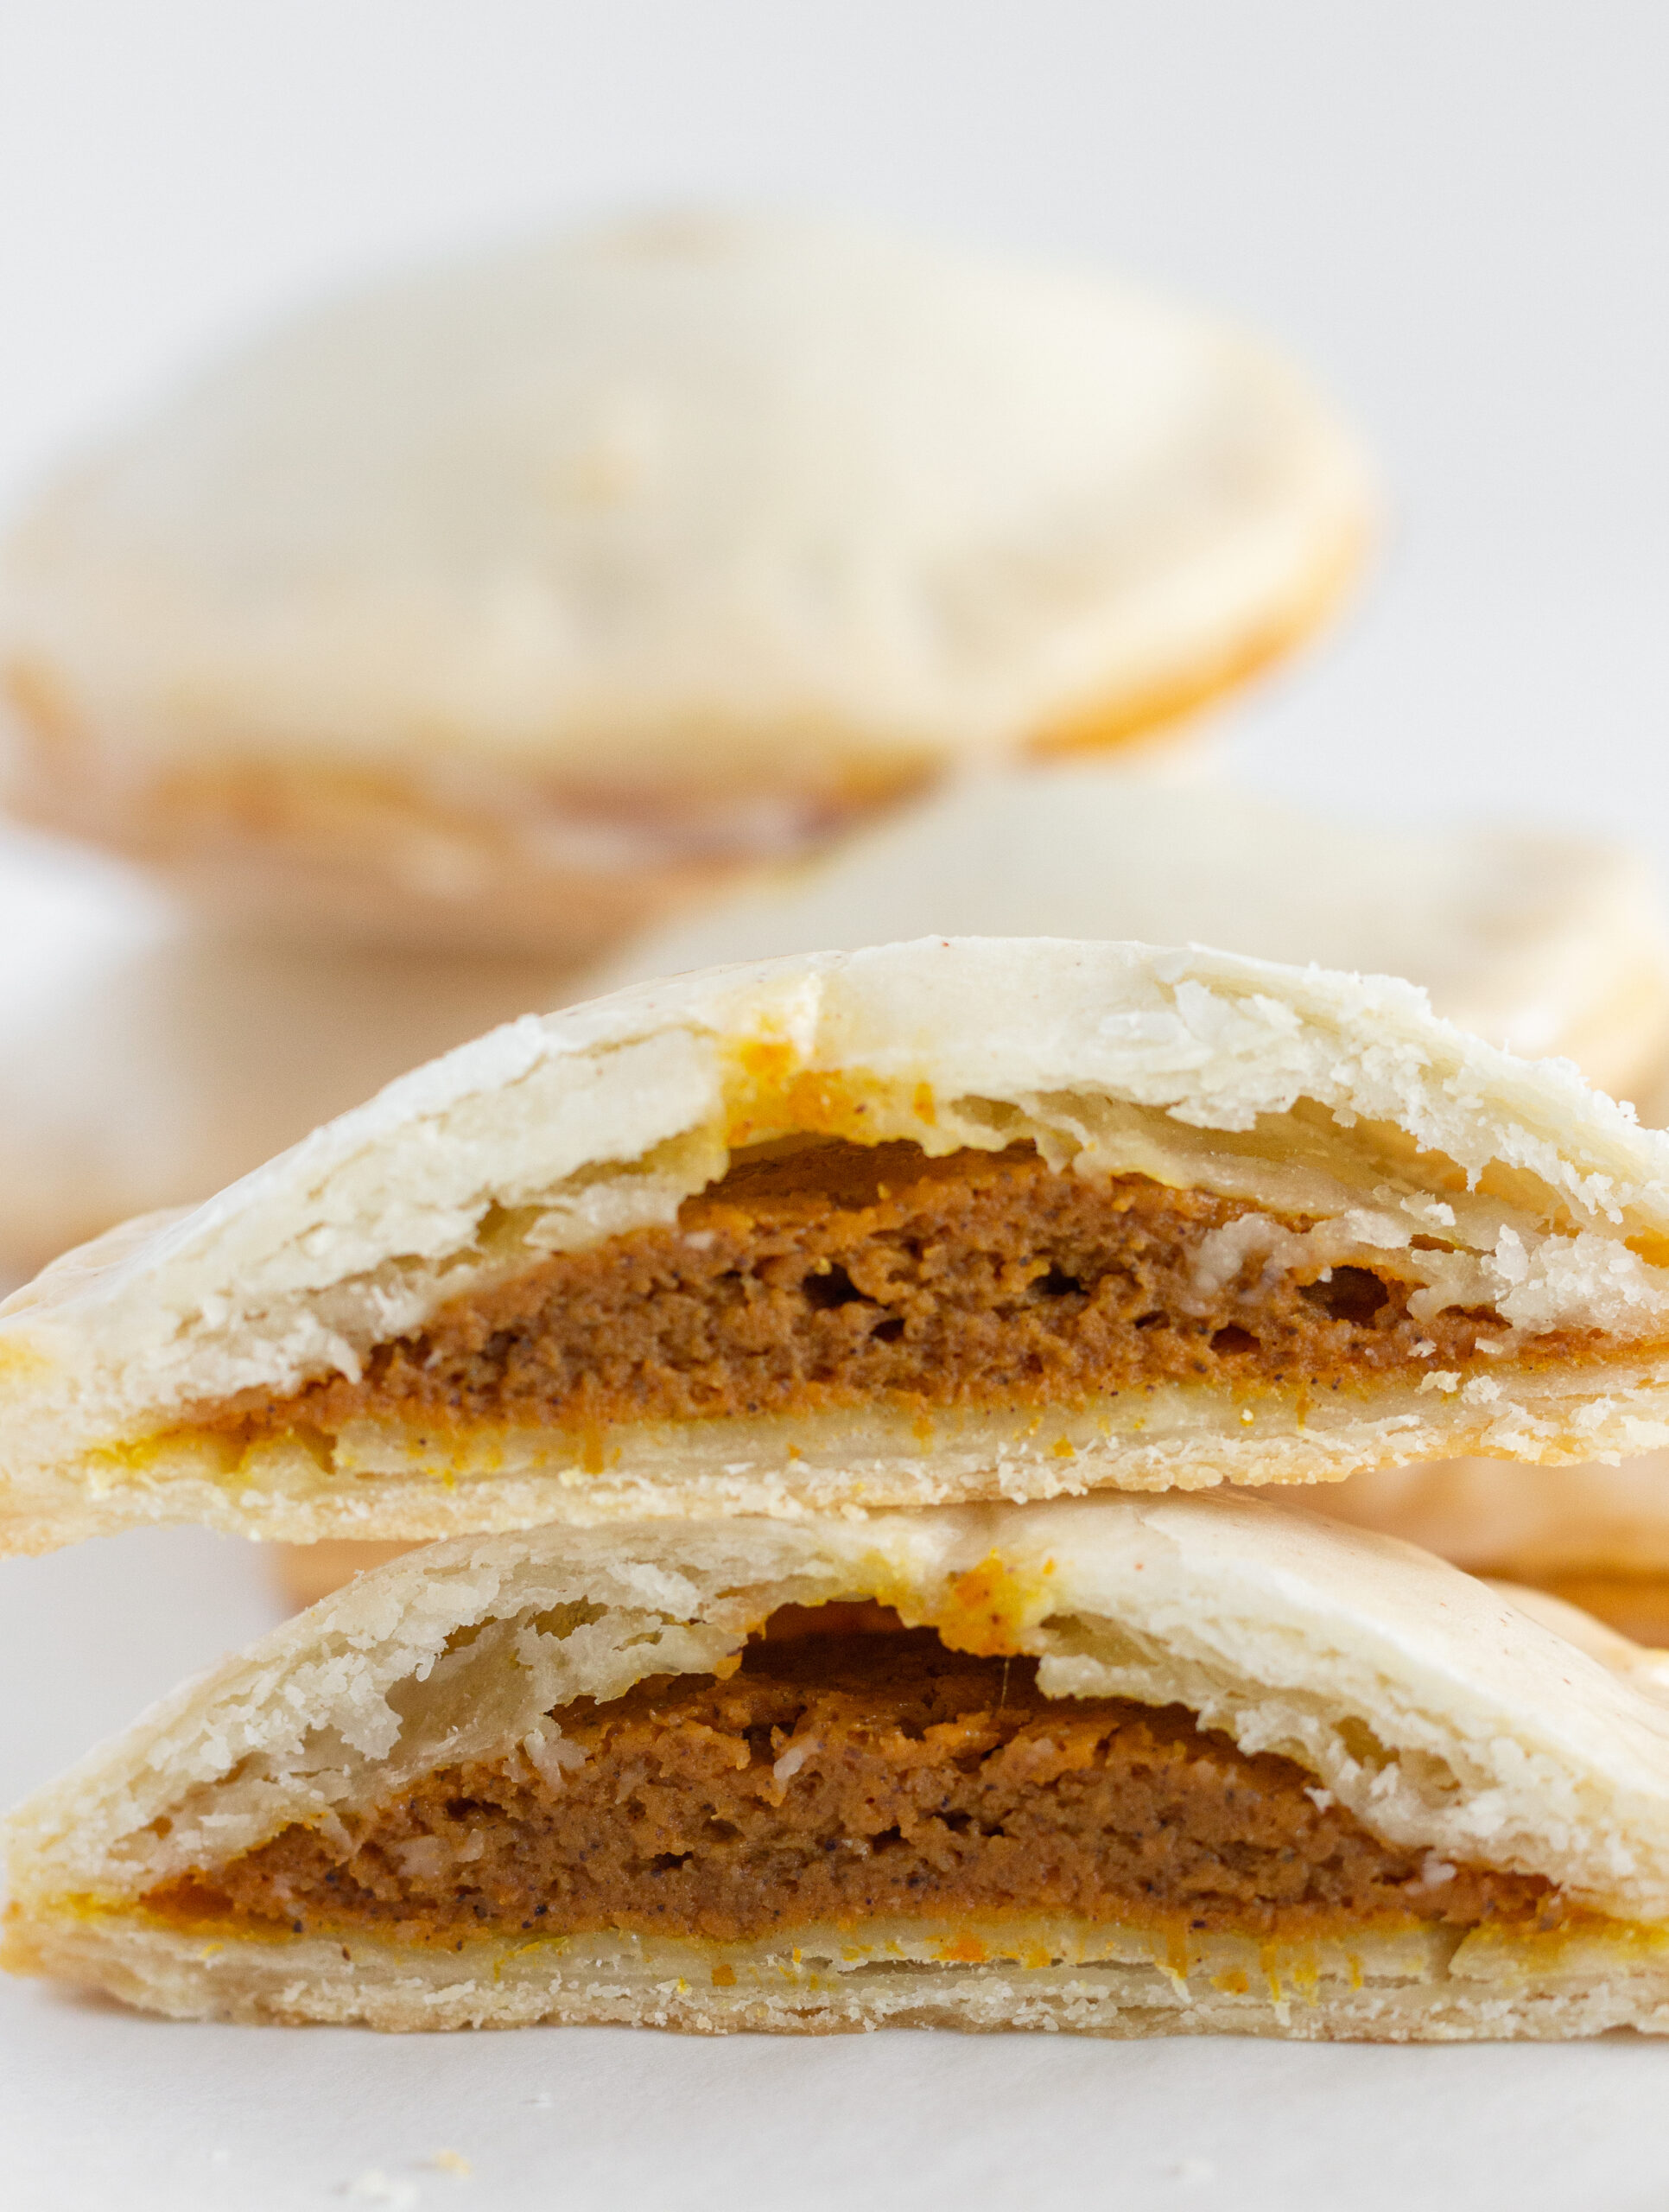
Table of Contents
Why This Recipe Works
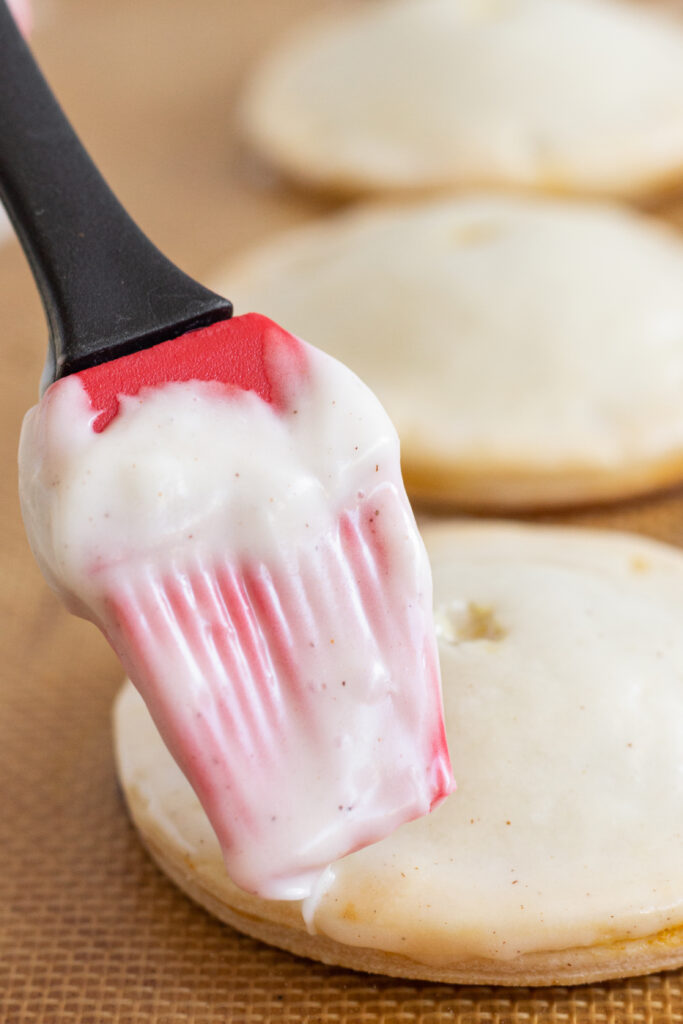
These pumpkin hand pies come together with refrigerated pie crust, which keeps the recipe simple. The pumpkin pie filling bakes right inside the crust, and a cinnamon glaze brushed over the top is what really makes these pies stand out. It’s a small finishing touch that gives them an extra layer of flavor.
If you love pumpkin desserts, you’ll also want to try this Pumpkin Snickerdoodle Snack Cake and Pumpkin Mousse Pie!
Ingredients Needed
- Refrigerated Pie Crusts – Using refrigerated pie crusts keep this recipe super simple but still amazing.
- Pumpkin Puree – Be sure to use pure pumpkin puree, not pumpkin pie filling. I also love using this ingredient in No Bake Pumpkin Cheesecake Bars!
- Brown Sugar – White sugar can also be used but the brown sugar gives it a deep wonderful sweetness.
- Pumpkin Pie Spice – It can be purchased from the grocery store or you can make your very own Homemade Pumpkin Pie Spice!
See recipe card for full information on ingredients and quantities.
How to Make Pumpkin Pie Hand Pies
- Combine the pie filling ingredients in a medium bowl and whisk to combine.
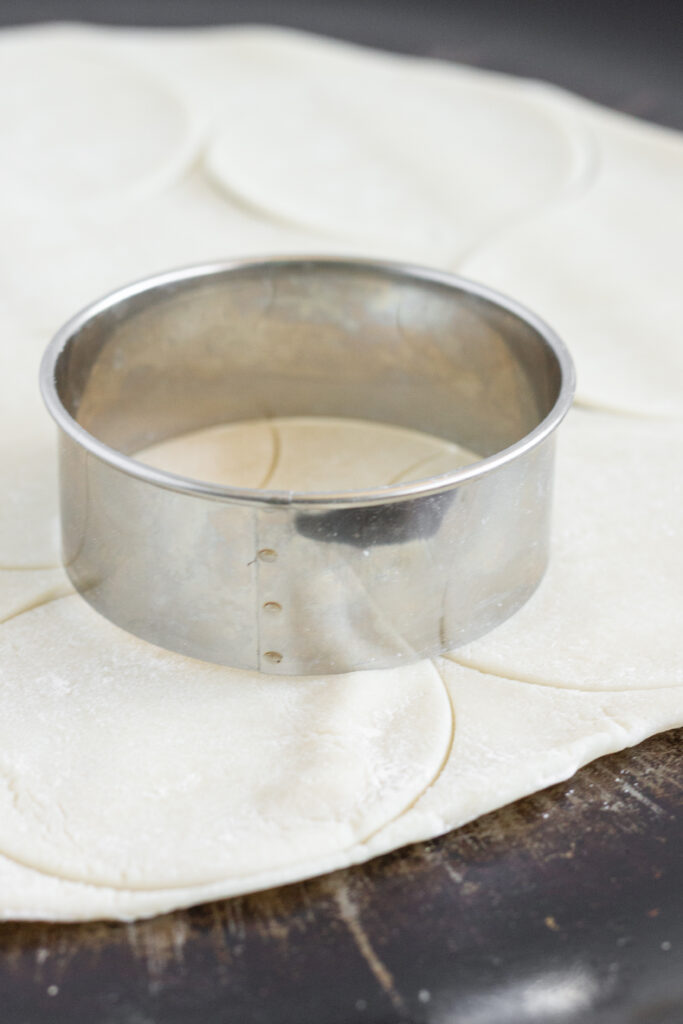
- Unroll the pie crusts {after they have come to room temperature} and cut 8 rounds from each crust.

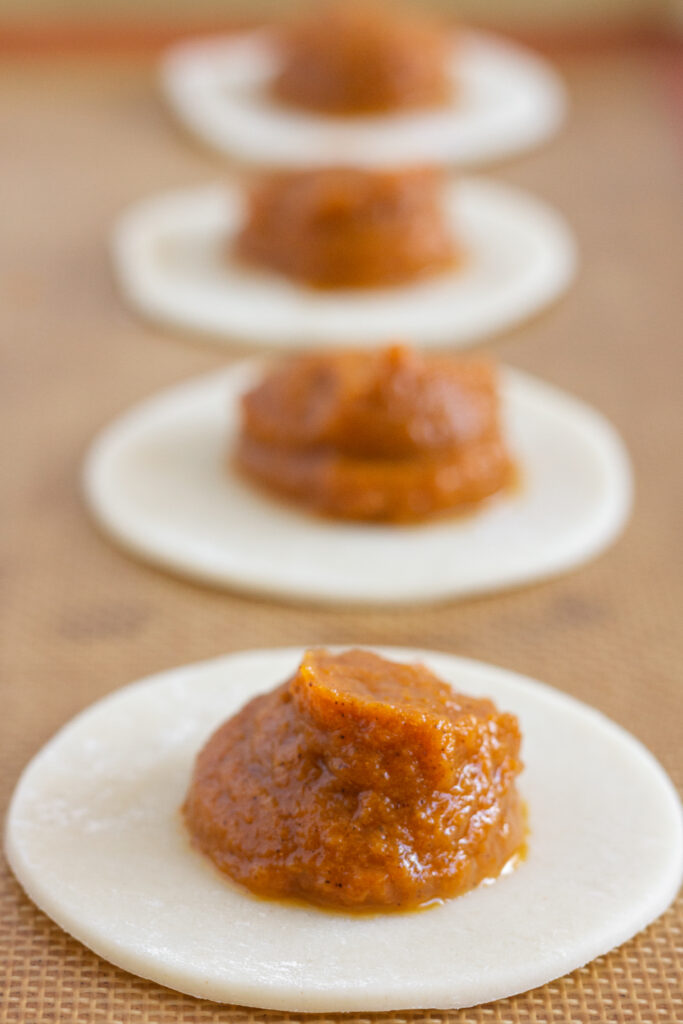
- Use a medium cookie scoop {or 1 1/2 tablespoons} and scoop pumpkin filling into the middle of half of the circles.
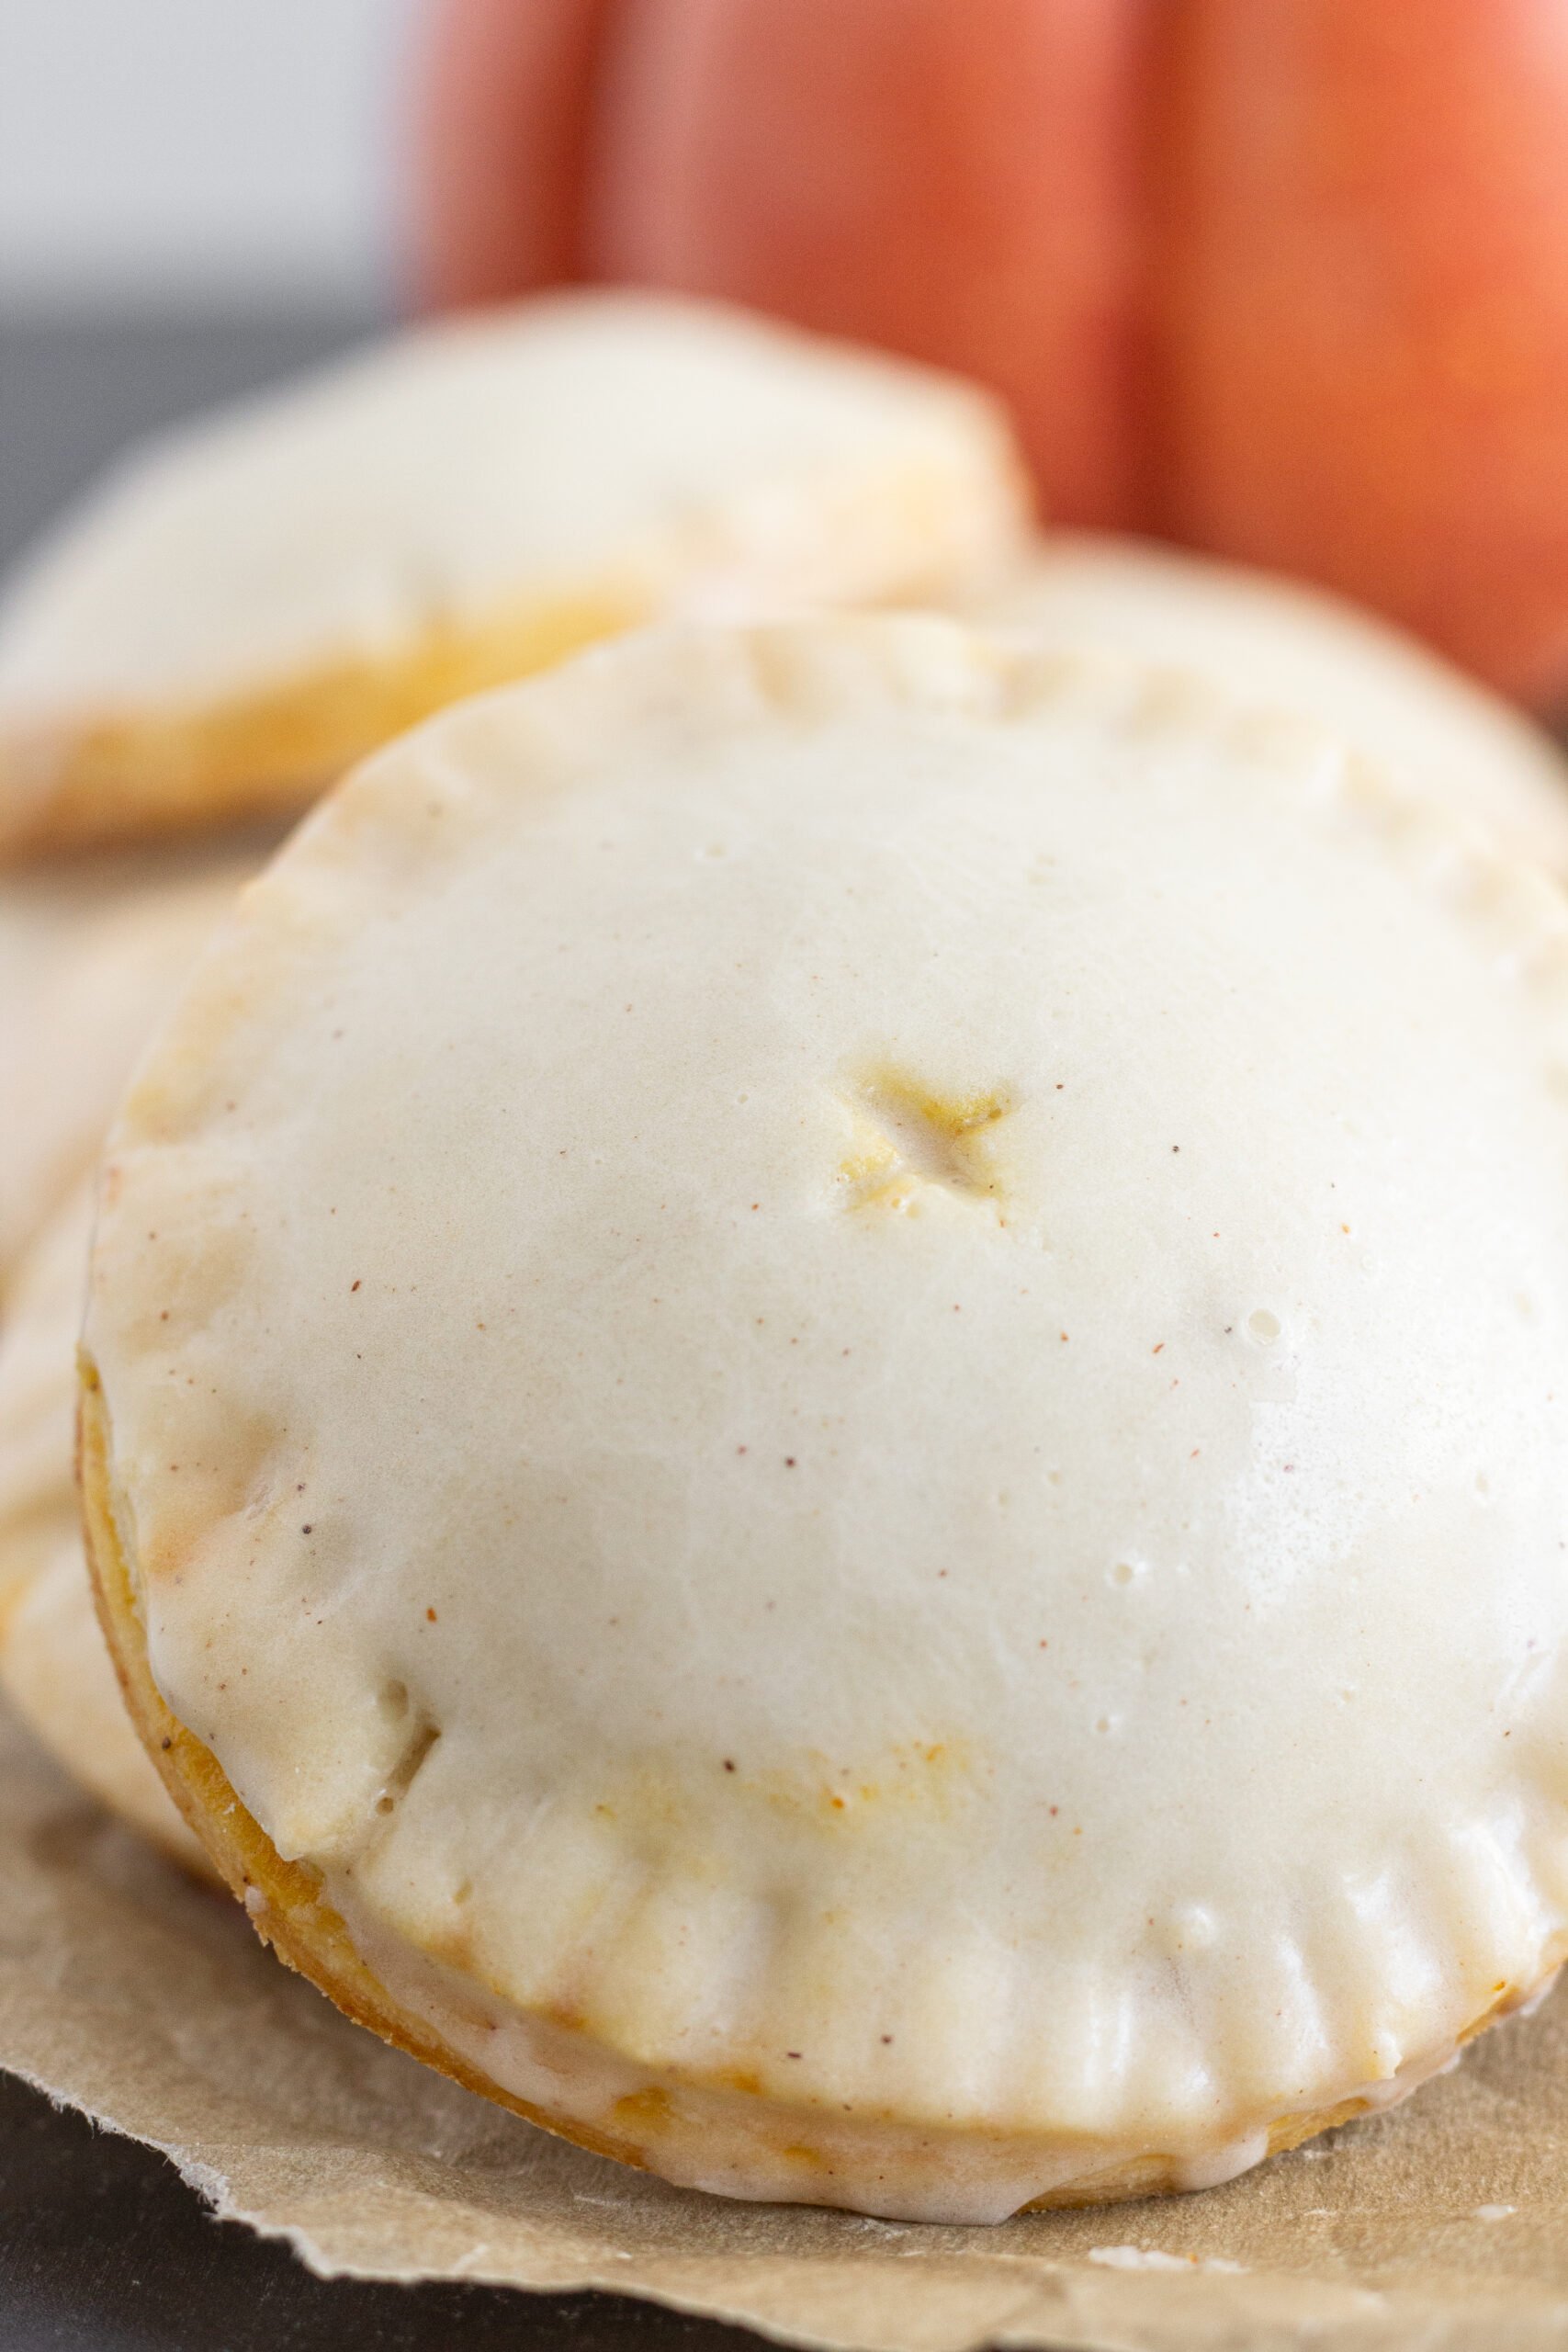
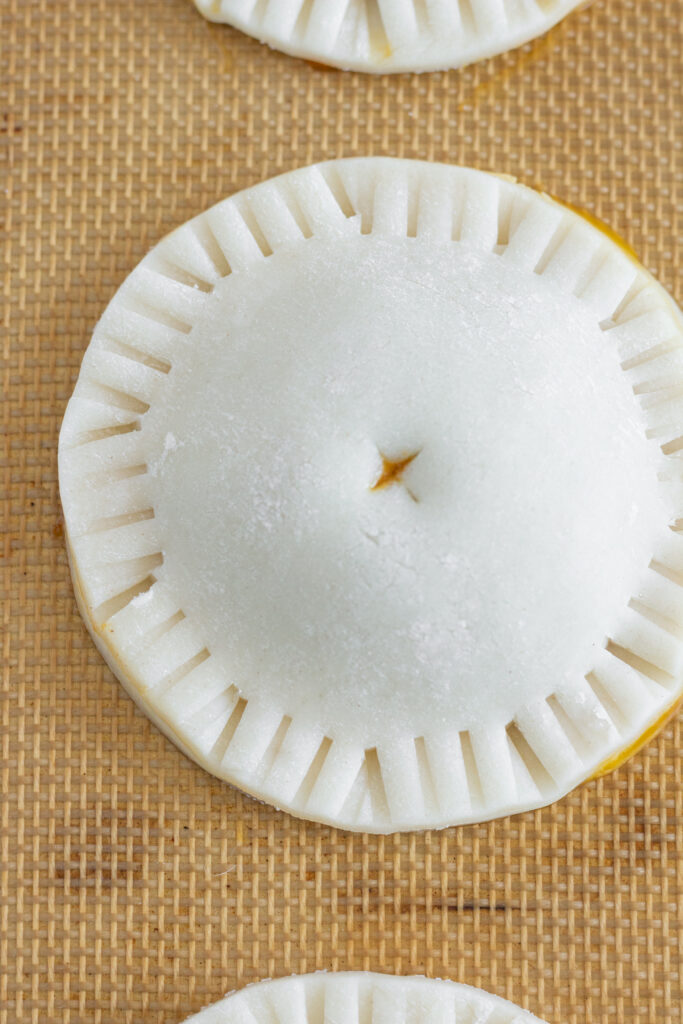
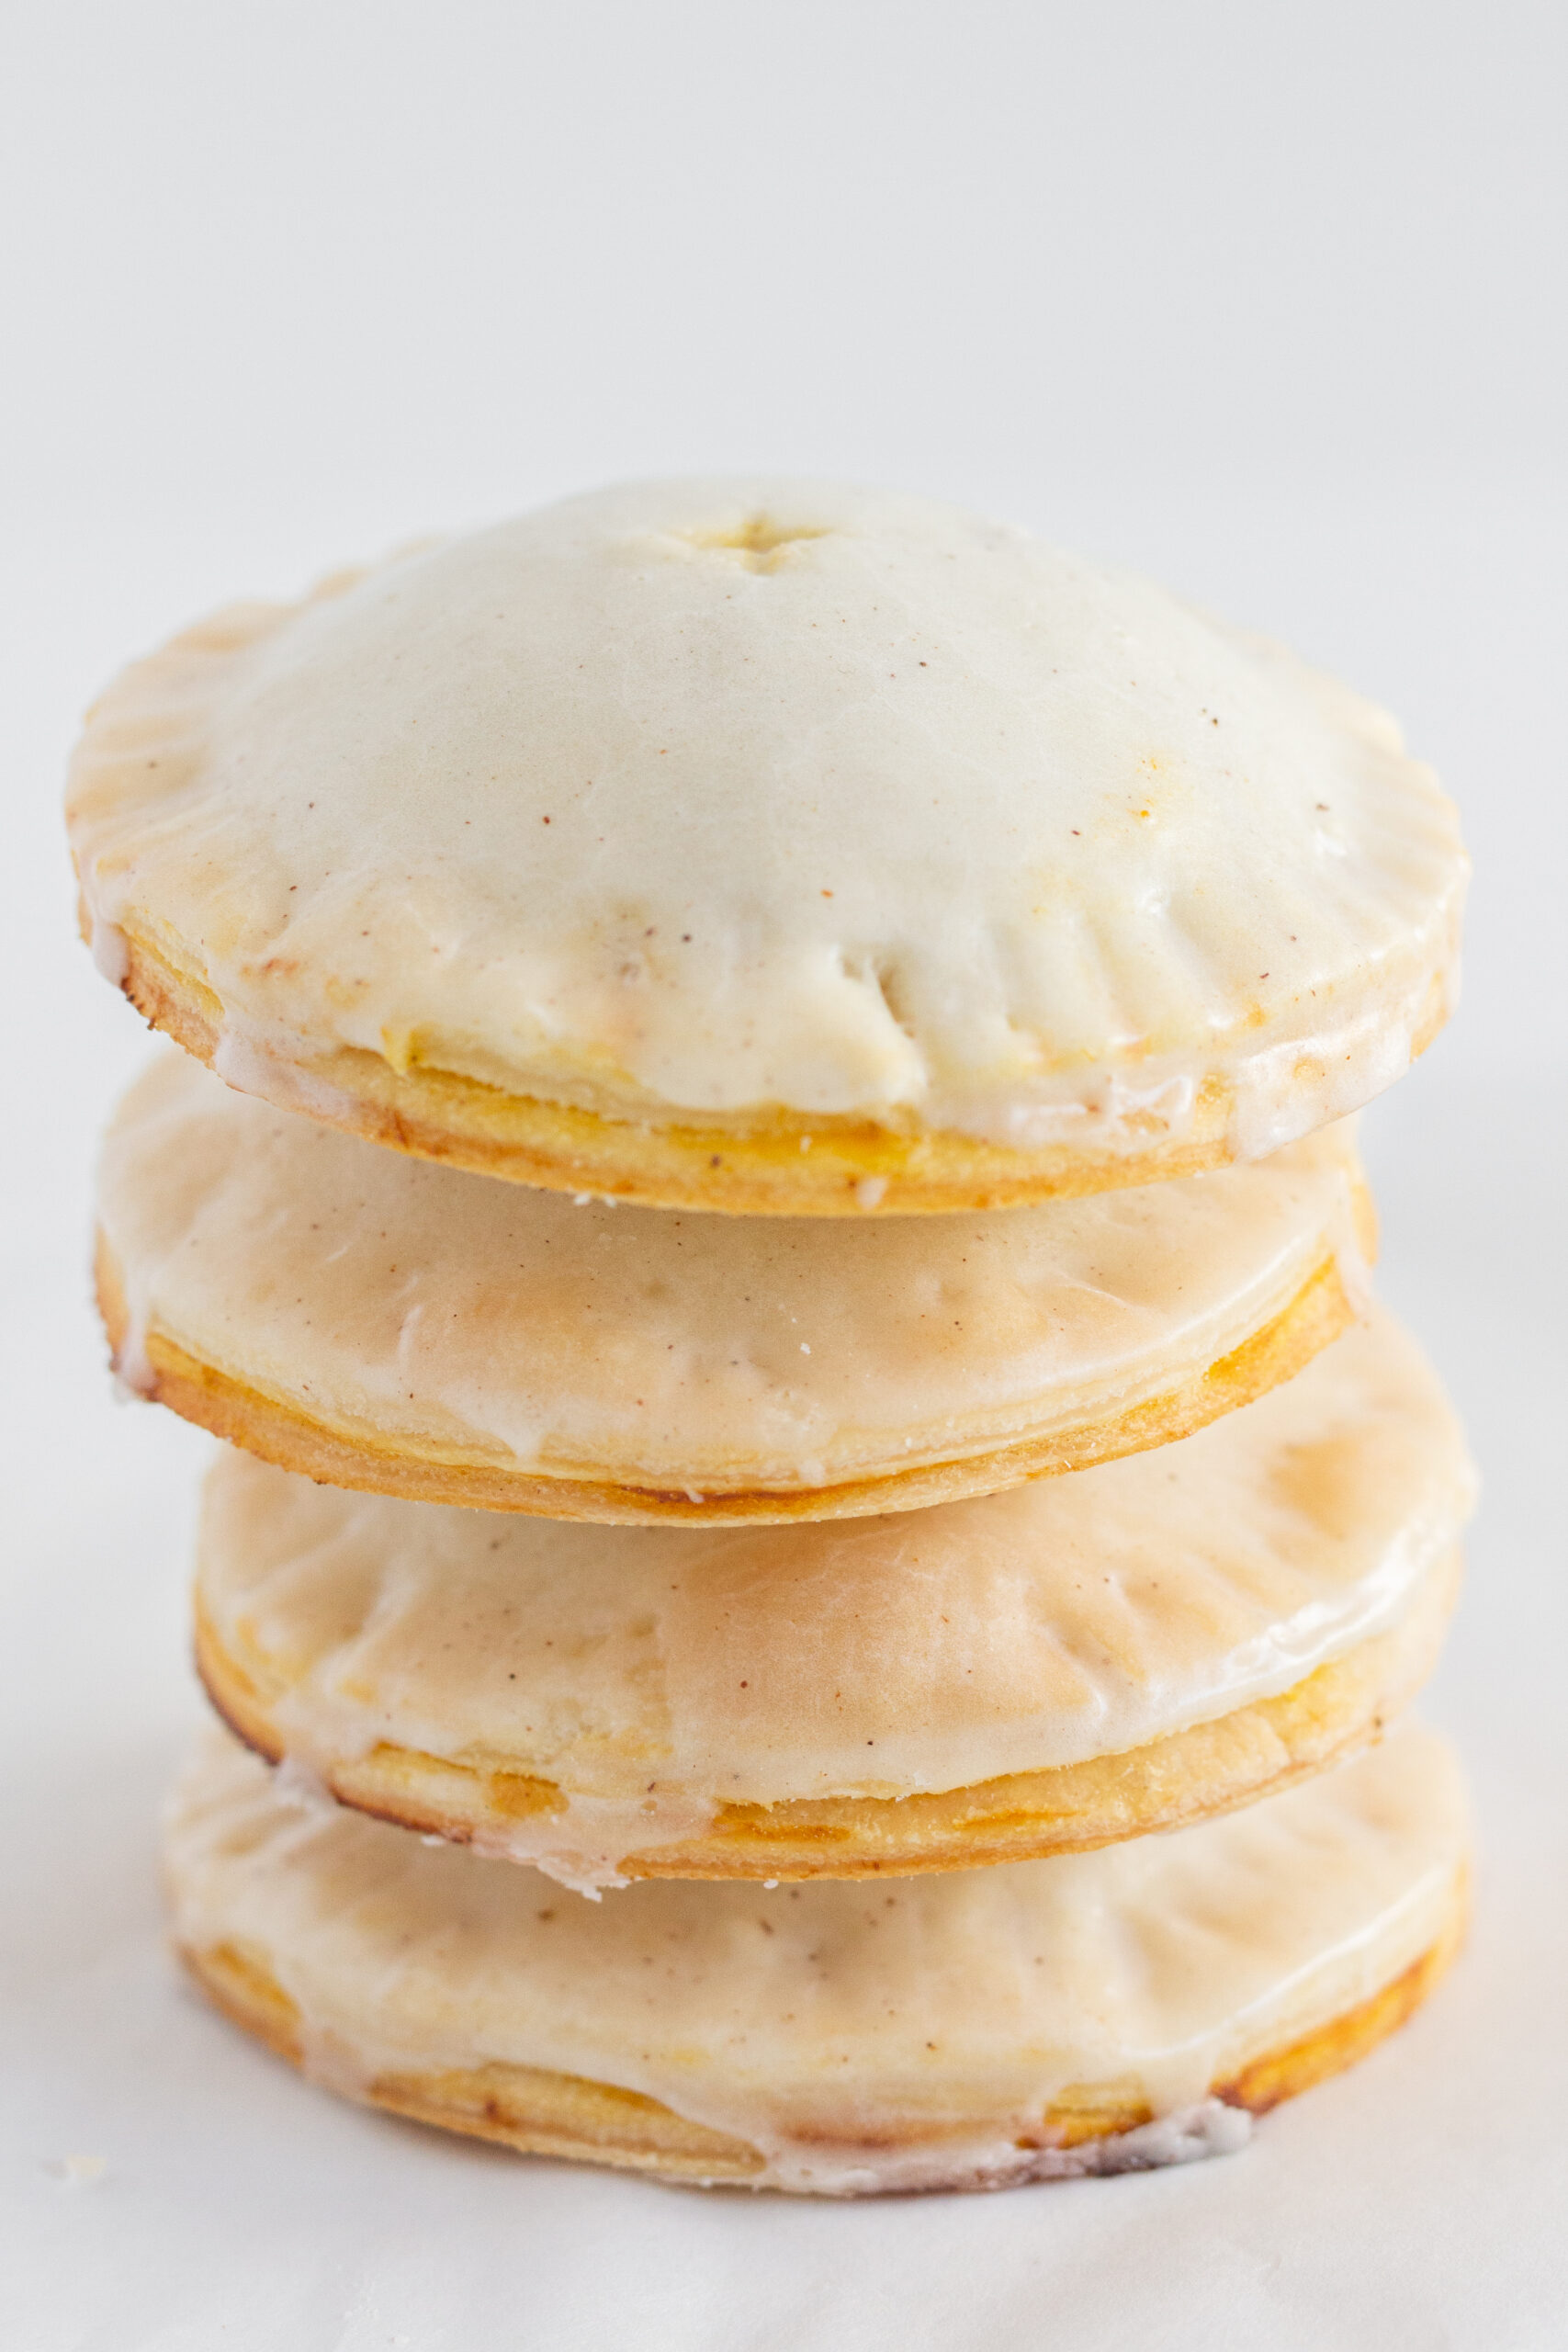
- Take the remaining 12 circles and use your fingers to slightly make them bigger. Add them to the top of the pie filling. Use the tines of a fork to crimp the edges of both pie shells together around the entire edge. Then cut a small X in the middle of the hand pie.
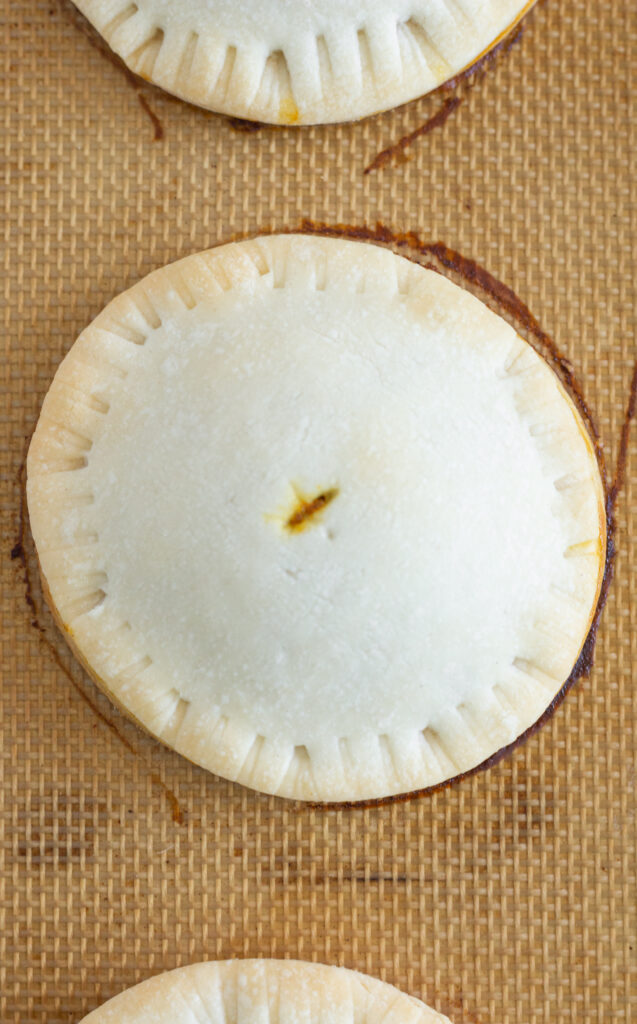
- Bake in a 375 degree oven on a silicone mat {or parchment} lined baking sheet for 15-18 minutes or until the pie crust is slightly golden and cooked through.
- Combine the glaze ingredients and whisk together. Use a pastry brush and add the glaze to the top of each pie. Allow the glaze to set up and serve.
Pro Tips
- Let the crusts come to room temperature first. Unrolling them while they’re cold causes cracking, which makes them harder to use and cut.
- No round cookie cutter? No problem. Use the end of a cup or any other round item you have on hand.
- Use a medium cookie scoop for the filling. This keeps the amount consistent in each pie, so they bake at the same rate and look uniform.
- Don’t skip cutting an X into the top of the pies. This allows the steam to escape while baking.
- Make sure that the glaze is a spreadable consistency. Add enough milk to get it just the way you want it. If for some reason it becomes too thin, add a bit more powdered sugar.
Storage Instructions
Store pumpkin hand pies in an airtight container, layering parchment or wax paper between them so they don’t stick together. They’ll keep in the refrigerator for up to 4 days. Eat them chilled, or warm them in the microwave for 20-25 seconds before serving.
These hand pies can also be frozen after baking for up to 3 months. Place them in a single layer on a baking sheet and freeze for a couple of hours, then transfer them to airtight containers or zipper bags. Freezing them flat first keeps them from sticking together and makes it easy to grab a few at a time.
Recipe FAQs
If you have a homemade pie crust recipe that you like to make, go for it. My #1 tip would be to be sure that you are rolling the dough thin like a refrigerated pie crust would be.
The mini pumpkin pies can be made ahead of time and baked later as long as it isn’t too far ahead. A few hours or overnight is as long as I would go before baking them.
No, pumpkin pie filling isn’t a substitute for pumpkin puree in this recipe. Pumpkin puree is just cooked and pureed pumpkin, while pumpkin pie filling already has spices like cinnamon, cloves, and nutmeg mixed in, along with sugar. This recipe uses pumpkin puree so the spices and sugar can be controlled in the filling itself.
Do you love pumpkin? Try these amazing recipes…
- No Bake Pumpkin Cheesecake Bars
- Easy Pumpkin Cheesecake Cookies with a Cake Mix
- Easy Pumpkin Bread with a Cake Mix
- Pumpkin Chocolate Chip Cookies Recipe with a Cake Mix
- Pumpkin Sheet Pan Pancakes from Mix

Easy Pumpkin Hand Pies
Ingredients
- 3 refrigerated pie crusts
Pumpkin Pie Filling
- 1 cup pumpkin puree
- 1 egg
- ¼ cup brown sugar, {packed}
- 1 ¼ teaspoons pumpkin pie spice
Cinnamon Glaze
- ¼ cup powdered sugar
- 1 Tablespoon milk, {or heavy cream}
- ⅛ teaspoon cinnamon
Instructions
- Preheat oven to 375 degrees. Remove refrigerate pie crusts from refrigerator and allow to come to come to room temperature while you are preparing the filling.
Pumpkin Pie Filling
- Combine the pumpkin puree, egg, brown sugar and pumpkin pie spice in a medium bowl and whisk until smooth.
Assembling Hand Pies
- Unroll the refrigerated crusts and use a glass or round cookie cutter to cut 24 circles from the dough. Add about 1 ½ tablespoons {or use a medium cookie scoop} of pumpkin pie filling to the middle of 12 {or half} of the pie crust circles.
- Take the remaining pie crust circles and use your hands to slightly enlarge them, so that they will fit over the top of the pie filling. Place a pie crust circle over each of pumpkin pie topped crusts. Use the tines of a fork to press down and crimp the edge of the pies together. Then use a sharp paring knife to cut a small X into the top of each hand pie {this allows steam to release as they bake}. Place them onto a silicone mat {or parchment} lined baking sheet.
- Bake for 15-18 minutes or until the tops are slightly golden and baked through. Remove from the oven and allow the pies to cool for 5 minutes.
Cinnamon Glaze
- While the pies are cooling, combine the glaze ingredients and whisk until smooth. Add additional milk if needed to get a good consistency. After 5 minutes, use a pastry brush to brush the top of each pie liberally with the cinnamon glaze. Allow the glaze to set and serve. Store remaining pies in an airtight container in the refrigerator for up to 4 days.
Nutrition
Nutrition information is automatically calculated, so should only be used as an approximation.