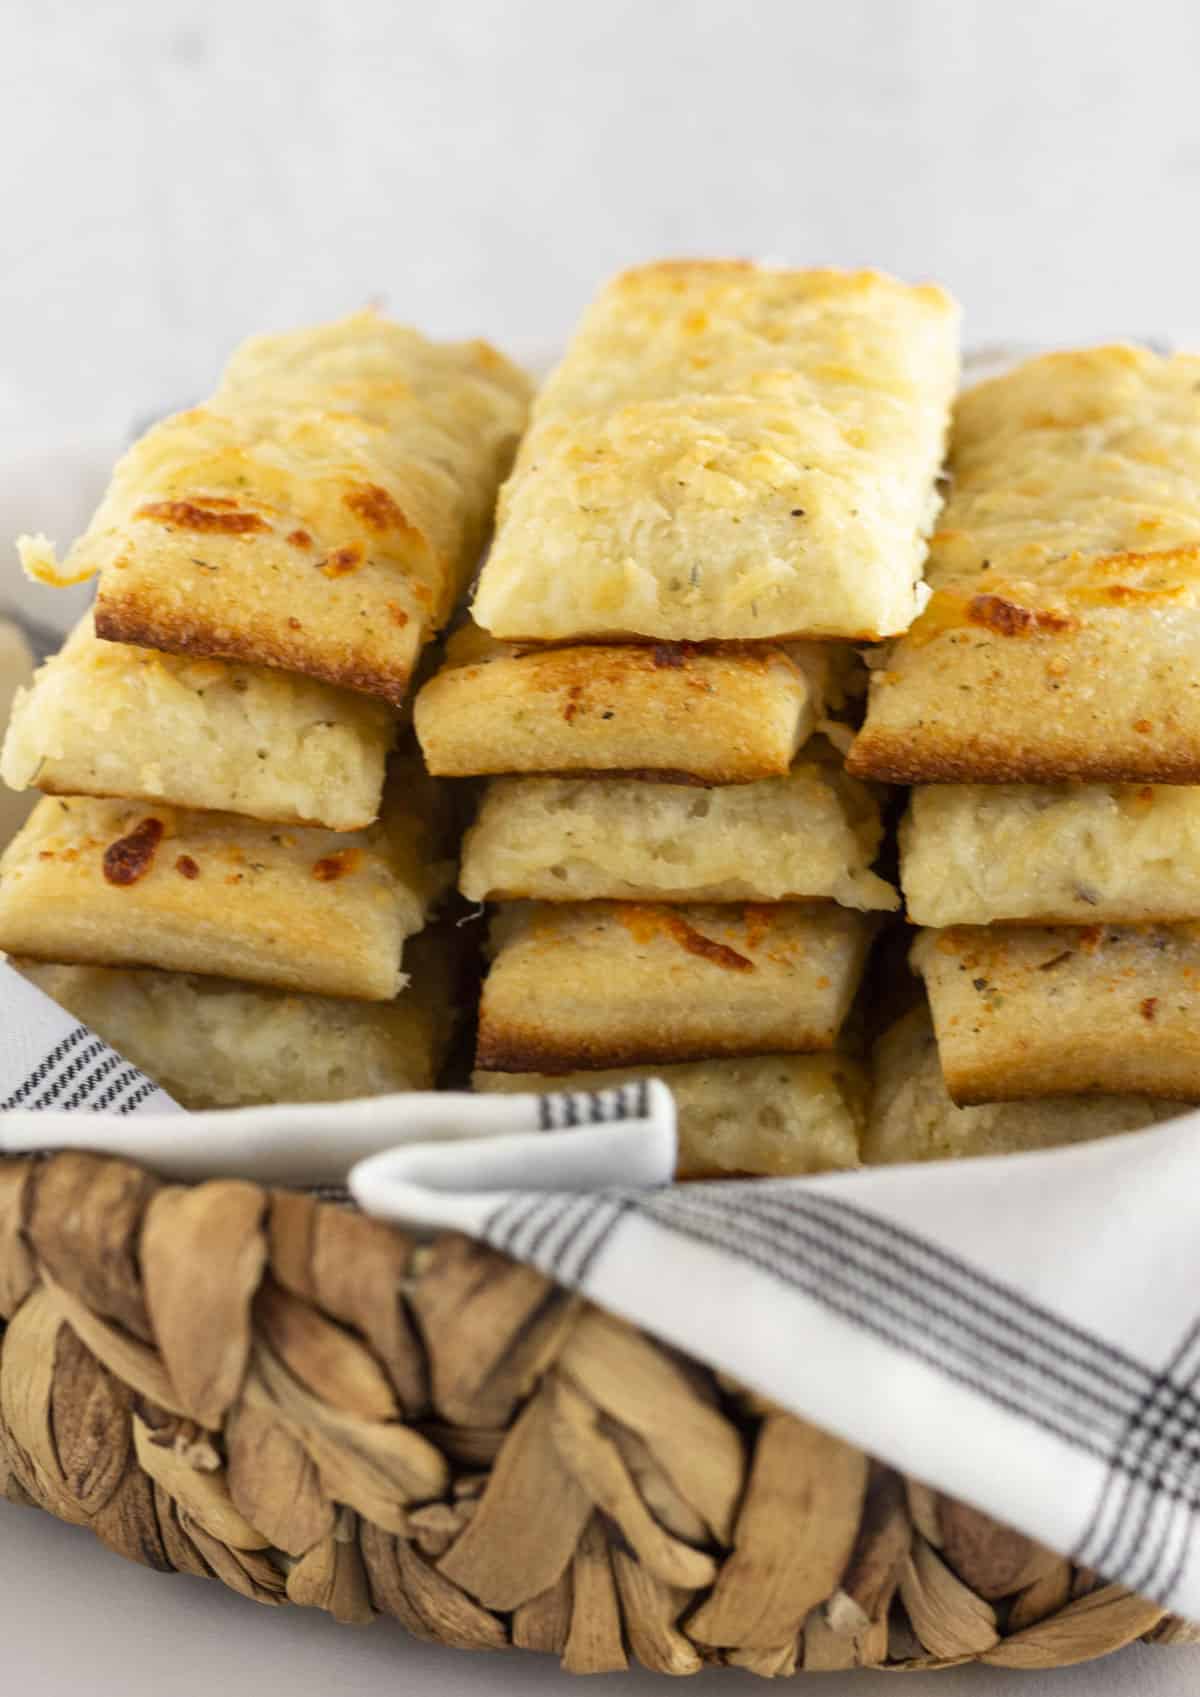
Quick and Easy Cheesy Breadsticks Recipe
Craving a savory, cheesy snack but don’t want to spend hours in the kitchen? These quick and easy Cheesy Breadsticks are the perfect solution! Made with store-bought pizza dough and a handful of simple ingredients, they come together in just 20 minutes for a delicious appetizer or side dish that tastes just like it came from your favorite pizza place.

Table of Contents
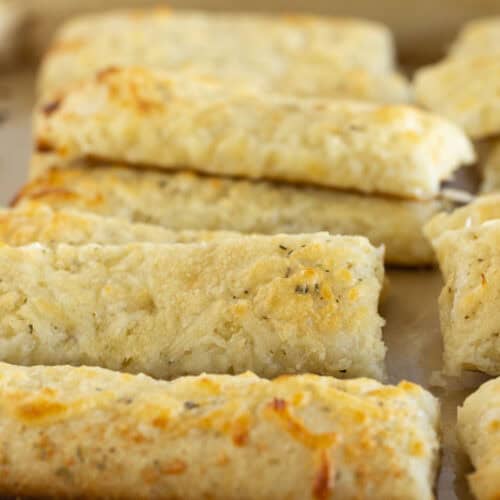
The secret to these irresistible cheesy breadsticks is the garlic butter on top! Melted butter is infused with garlic powder and Italian seasoning, then brushed over the dough before being topped with a blend of mozzarella and Parmesan cheese. As they bake, the cheesy goodness melts and bubbles while the edges of the dough turn golden brown and crispy.
What I love most about this cheesy breadstick recipe is how versatile it is and, of course, how fast it comes together! You can easily customize the seasonings or cheese to suit your tastes, or even add some extras like pepperoni, olives, or jalapeños for a fun twist.
These buttery garlic bread sticks are perfect for dipping into marinara sauce, ranch dressing, or enjoying all on their own. Plus, this great recipe can be doubled or tripled to feed a crowd on pizza night- just be warned that they disappear fast!
Whether you’re looking for a perfect snack, a party appetizer, or a quick side dish to pair with your favorite pasta {like this Cajun Pasta Bake}or soup {like this Crock Pot Tortellini Soup}, these easy cheesy breadsticks require only a handful of ingredients and are a guaranteed hit.
Free Email Series
Tips & tricks to achieve the most delicious cookies of your life!
What goes into this Recipe
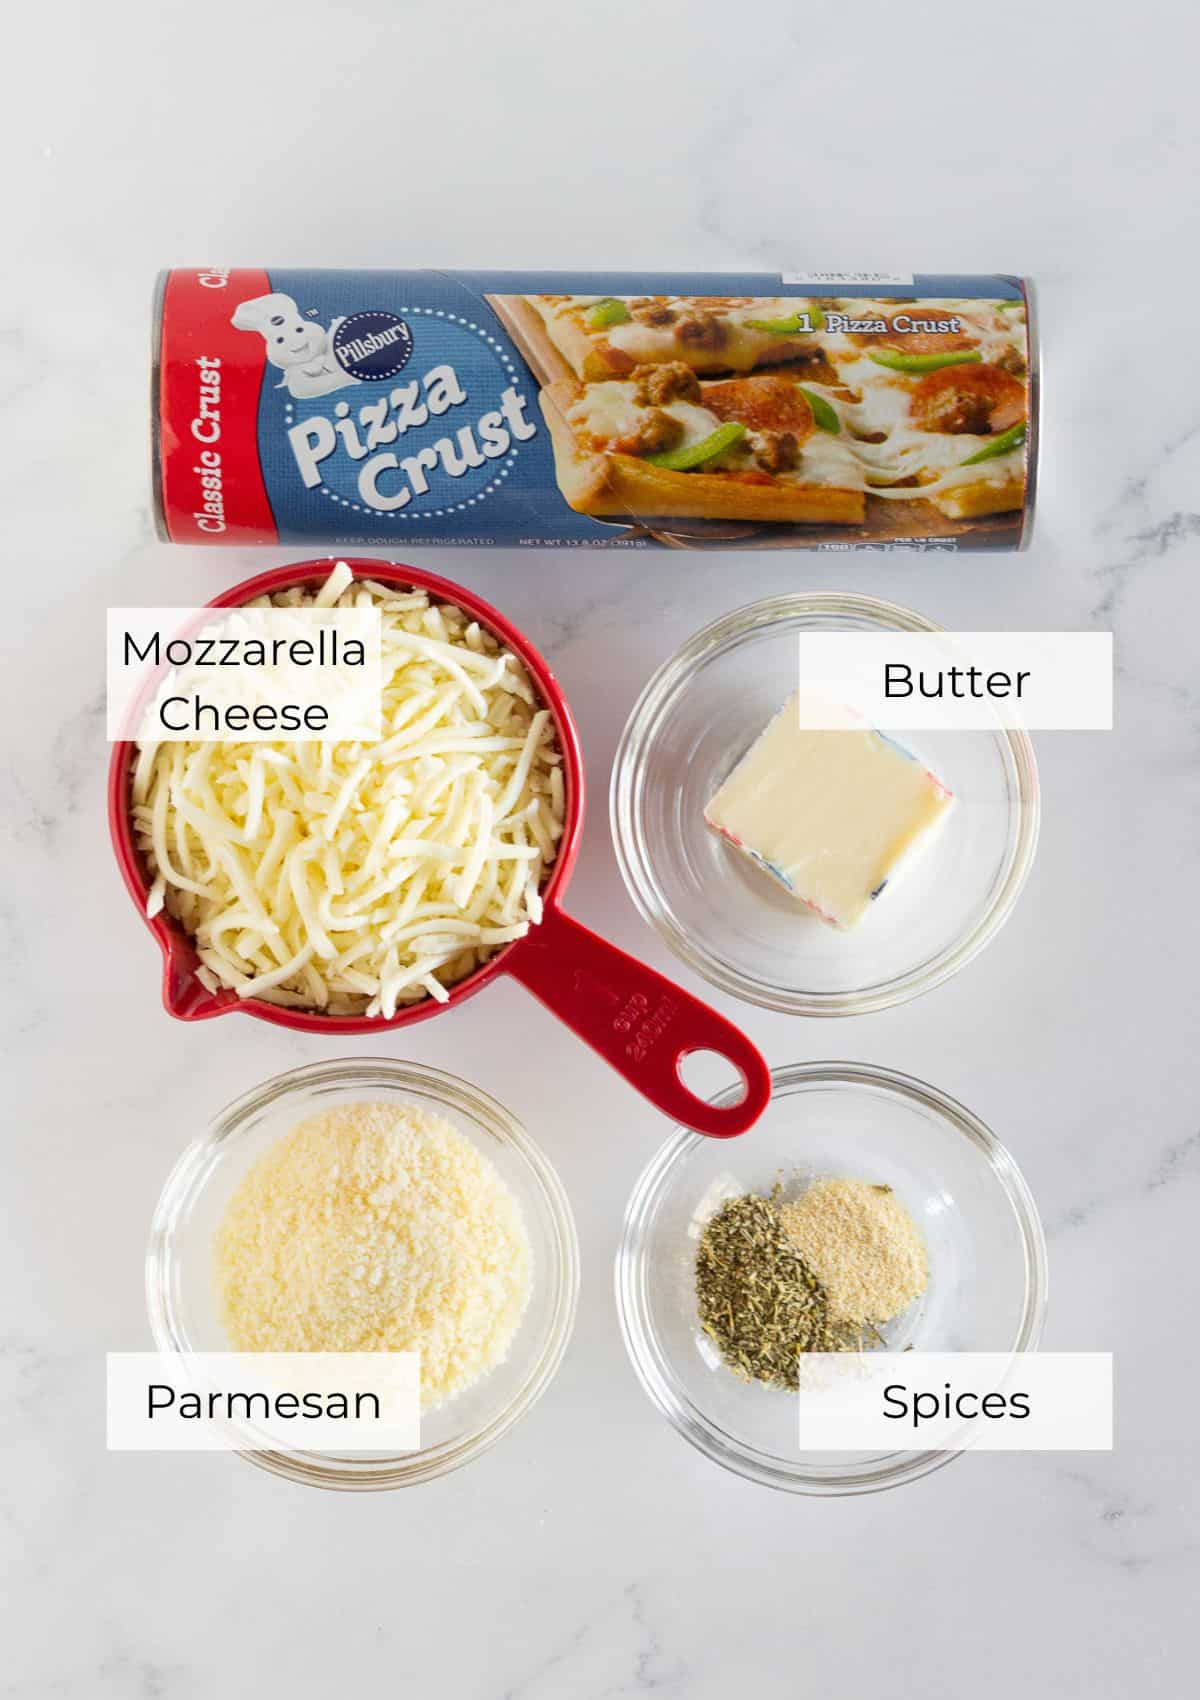
- Refrigerated Pizza Dough: Using prepared pizza crust makes this recipe super quick and convenient. Feel free to use homemade dough if you prefer. It is also used in this Pigs in a Blanket Wreath.
- Butter: Melted and mixed with seasonings to create a flavorful topping.
- Garlic Powder: Adds a savory punch of flavor to the garlic breadsticks.
- Italian Seasoning: This blend of herbs that complements the cheesy topping perfectly.
- Mozzarella Cheese: Provides that classic stretchy, melty texture.
- Parmesan Cheese: Adds a bit of a salty bite that goes perfectly with the melted mozzarella.
See recipe card for full information on ingredients and quantities.
Variations
Spice lovers can add a pinch of red pepper flakes to the butter mixture for some heat.
Swap the Italian seasoning for ranch seasoning mix for a zesty twist.
Use a blend of your favorite cheeses like cheddar cheese, Asiago, or provolone to customize your cheese sticks.
You can also brush the baked breadsticks with olive oil and sprinkle with fresh herbs like basil or parsley and fresh garlic for a stronger flavor.
Make your breadsticks into cheesy garlic knots by cutting the dough into strips, tying into loose knots, then brushing with the butter and topping with cheese.
How to make Cheesy Breadsticks
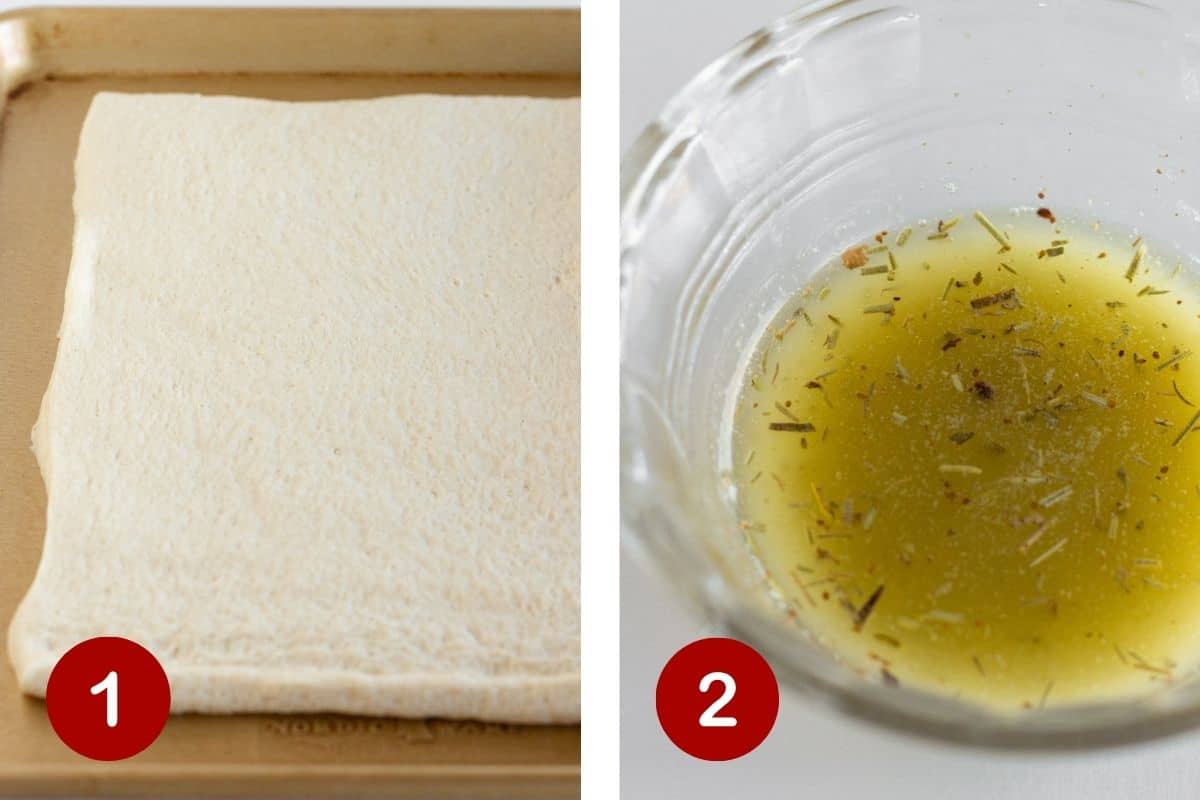
- Start by unrolling the pizza dough out onto a prepared baking sheet that has been sprayed with non-stick cooking spray.
- Melt butter in a small bowl in the microwave, then add garlic powder and Italian seasoning.
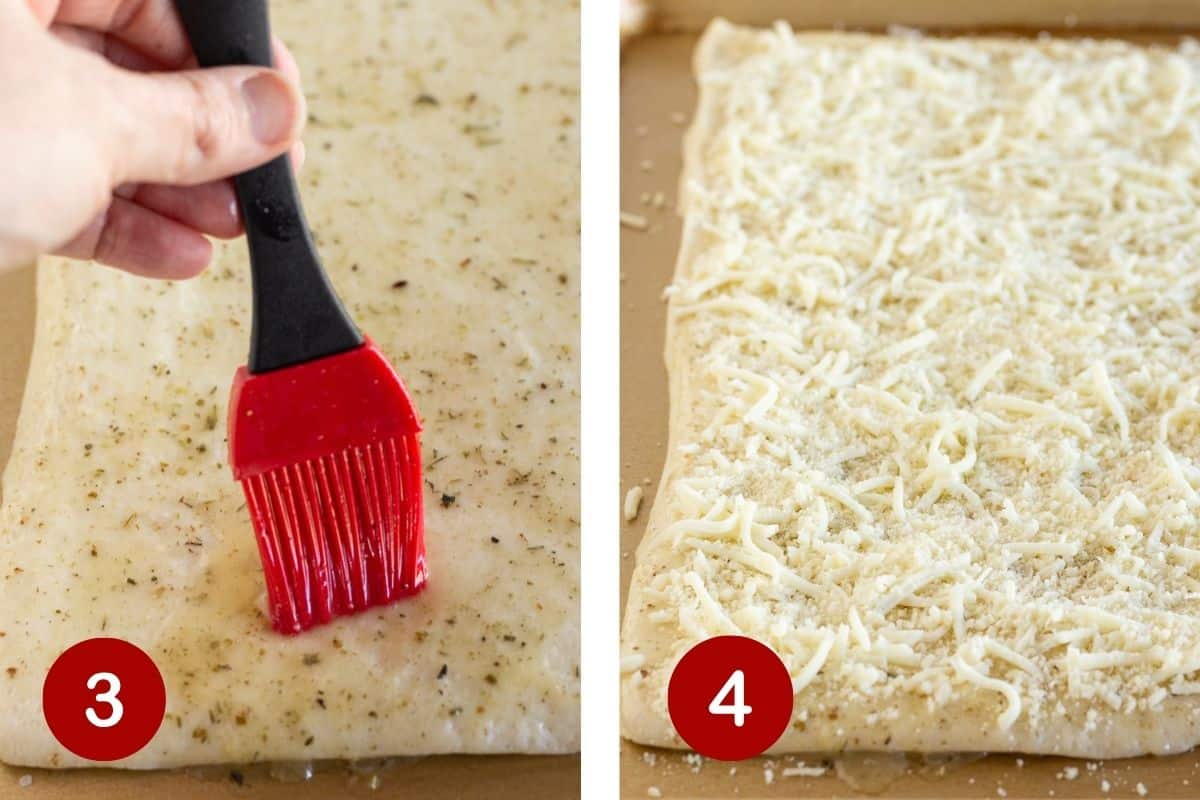
- Spread butter mixture over the top of the breadstick dough. I used a basting brush but you could use the back of a spoon.
- Add the shredded mozzarella cheese evenly over the top of the breadsticks, followed by the Parmesan cheese.
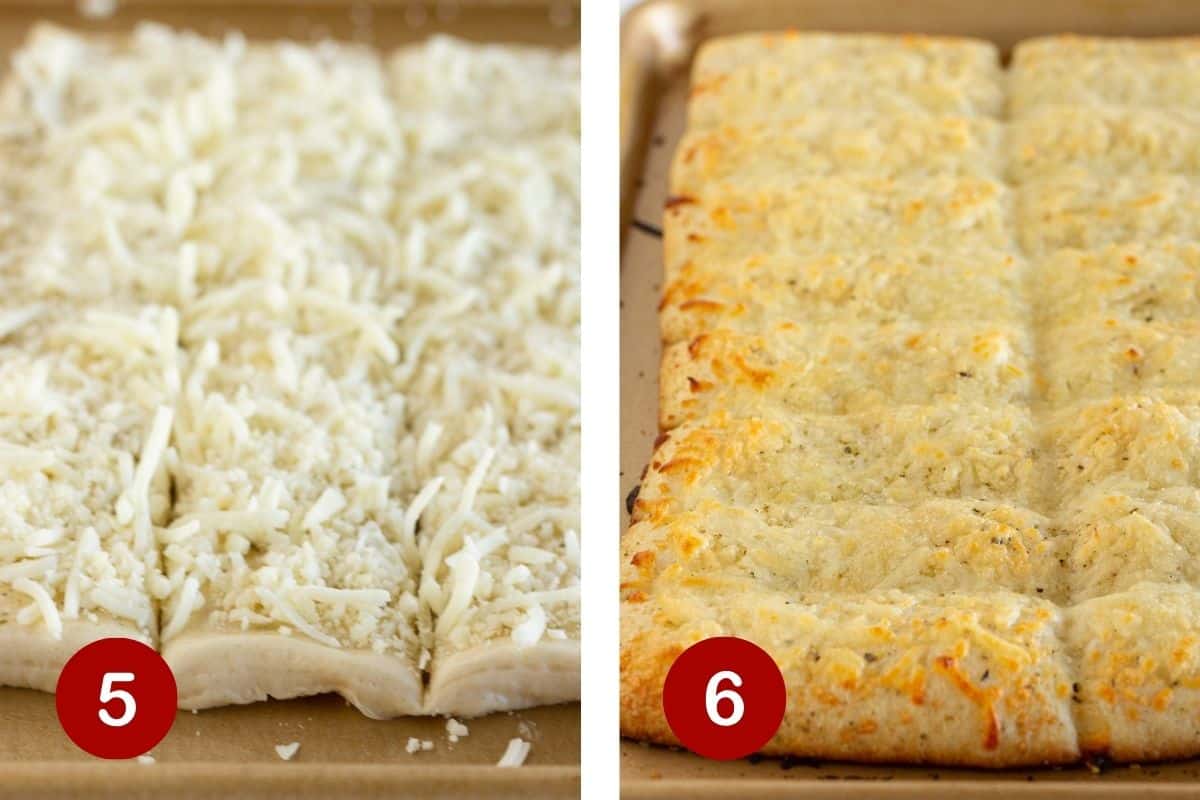
- Slice the pizza dough into about 12 breadsticks.
- Bake for 15 minutes at 400 degrees and you not only get a great golden crust, but the cheese is perfectly melted.
Expert Tips
- Use a pizza cutter to cut the easy cheesy garlic breadsticks. It makes this step so much easier.
- Line the baking pan with parchment paper. This helps with clean up.
- It is important to cut the breadsticks before you bake them. That will help you with getting equal sized breadsticks.
- If you cut down the middle, then you can cut the other way to make your twelve sticks. I actually made a lot more than that on this batch of breadsticks, but I prefer the larger sticks.
- You may need to go back over the cuts after you have baked the cheesy breadsticks. It will ensure that they pull apart nicely.
Storage and Freezing
Store: Store leftover cheese breadsticks in an airtight container at room temperature for up to 2 days. To reheat leftover cheesy breadsticks, place the breadsticks on a baking sheet and reheat in a 350°F oven for 5-10 minutes, until warmed through and crispy.
Freeze: To freeze, place the baked and cooled breadsticks in a freezer-safe bag or container and freeze for up to 1 month. Thaw at room temperature, then reheat in the oven until warmed through and crispy.
Recipe FAQs
Absolutely! Homemade dough will work great in this recipe. You’ll need about 1 pound of dough.
Yes, you can assemble the breadsticks up to 8 hours ahead of time, cover with plastic wrap, and refrigerate until ready to bake. Add a few extra minutes to the baking time.
They’re delicious on their own or served alongside marinara sauce, warm pizza sauce, Alfredo sauce, ranch dressing, or garlic butter for dipping. They also pair well with Pepperoni Pizza Chicken Skillet and Potato Soup.
Do you need side dish ideas? Try these recipes…

Did you try this recipe?
Leave a ⭐️ review below and tag @practicallyhomemade on Pinterest!
Quick and Easy Cheesy Breadsticks
Ingredients
- 13.8 ounces pizza dough
- 2-3 Tablespoons butter {melted}
- ¼ teaspoon garlic powder
- ½ Tablespoon Italian seasoning
- 1 cup shredded mozzarella cheese
- 3 Tablespoons Parmesan cheese
Instructions
- Preheat the oven to 400 degrees.
- Unroll pizza dough onto a greased cookie sheet. Combine melted butter, garlic powder and Italian seasoning in a small bowl.
- Cover top of dough with butter mixture. A brush works well but if you don't have one, the back of a spoon works too. Top butter with shredded mozzarella cheese, followed by Parmesan cheese. Before baking, cut into 12 sticks.
- Bake for 15-17 minutes or until the edges are golden brown and the cheese is completely melted. You may have to go over the cut lines one more time to break the melted cheese. Serve warm. Store at room temperature in an airtight container.
Notes
- Customize the cheese with whatever you have on hand and add a pinch of red pepper flakes to the butter mixture to add a hint of spice.
- You may need to go over the cuts you made before you baked the breadsticks one more time, to ensure they pull apart nicely.
- To reheat leftover cheesy breadsticks, place the breadsticks on a baking sheet and reheat in a 350°F oven for 5-10 minutes, until warmed through and crispy.